How do I configure a billwerk account?
This article should help you take the first steps with billwerk and lighten the workload at the beginning.
1. Company/ User Accounts/ Administration
As a first step, we suggest entering your company information in billwerk. Click on your e-mail address at the top right and then choose "Account > Company". Here you can add your value added tax identification number (VAT ID) and the creditor ID as well as some other stuff related to your company.
The creditor identification number is required to participate in the SEPA direct debit procedure. More information regarding creditor ID can be found in the following article: What is the creditor ID for SEPA direct debit?
You can find more information about the company data here.
In case you want to share the access to your billwerk account with other employees, you can create other users and assign them different roles: How can I manage user administration and set roles and rights?
2. Settings
2.1. Payment provider
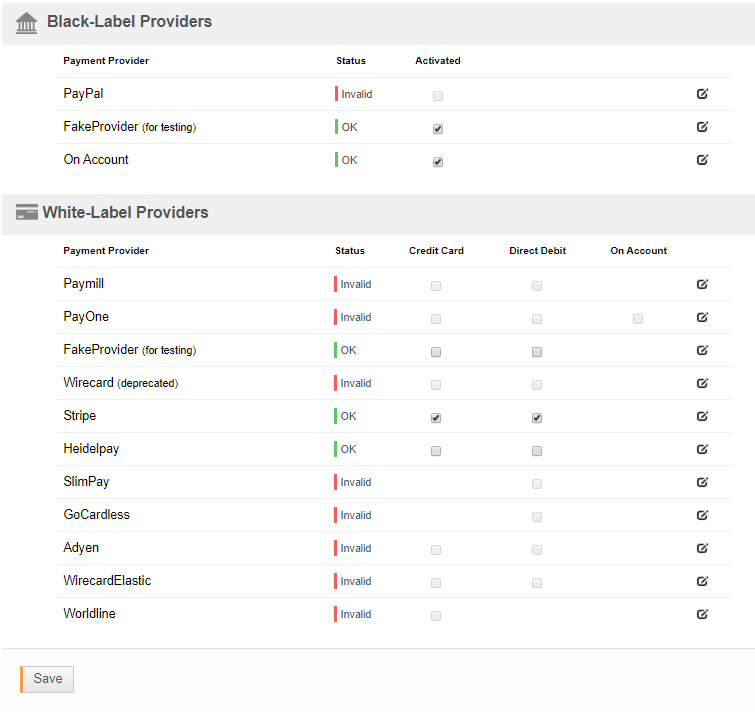
billwerk currently supports many payment providers from different countries. To configure payment providers, go to "Payment > Payment Provider" in the settings. If you want to use several payment providers, you must configure them individually. All configuration instructions for the individual payment providers can be found here.
If you want to use ''payment on account'' as a payment method, you can define the time for payment: How can I configure the time for payment for payments on account?
Hint: billwerk offers the possibility to combine different payment providers. You can activate any number of black-label providers at the same time. In the case of white label providers, only one PSP can be active for each payment method (credit card, ELV, on account).
2.2. Tax Policies
As a next step, we suggest configuring the tax policy for your products. You can do it if you go to "Payment > Tax Policy" in the settings. There you can, for example, define a tax policy with reduced VAT and another one with regular VAT: How can I define different tax policies?
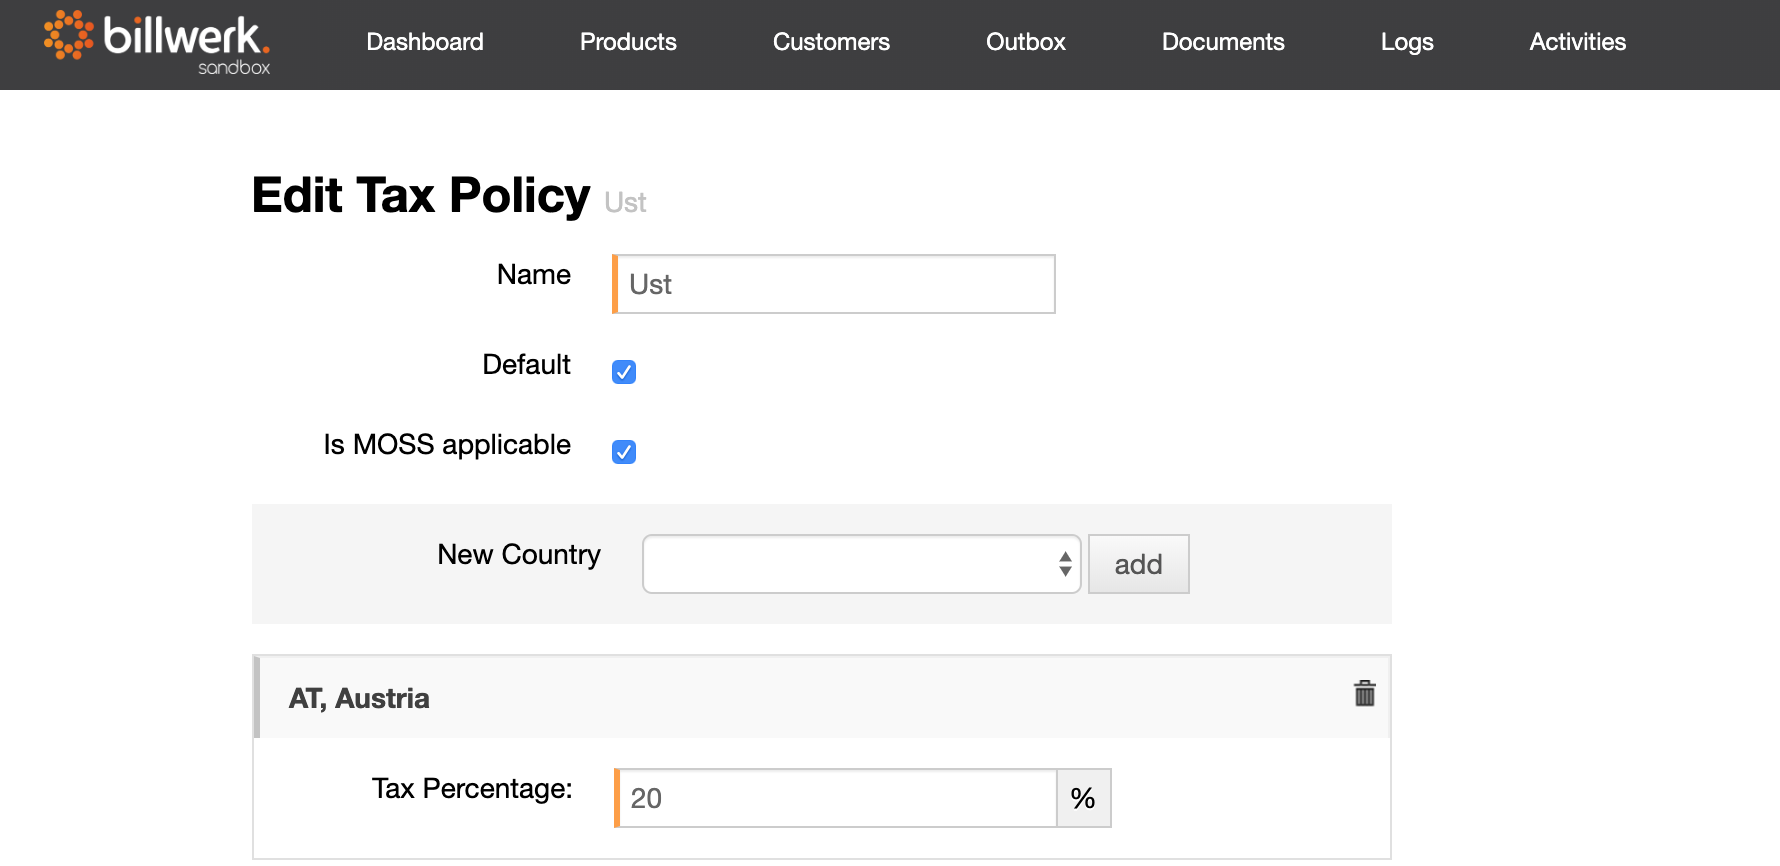
Hint: billwerk automatically uses the stored tax rate if the country is specified for a customer. If the customer's country is not defined as an individual tax rate, billwerk checks which tax rate is applicable for the customer in descending order.
2.3. Documents
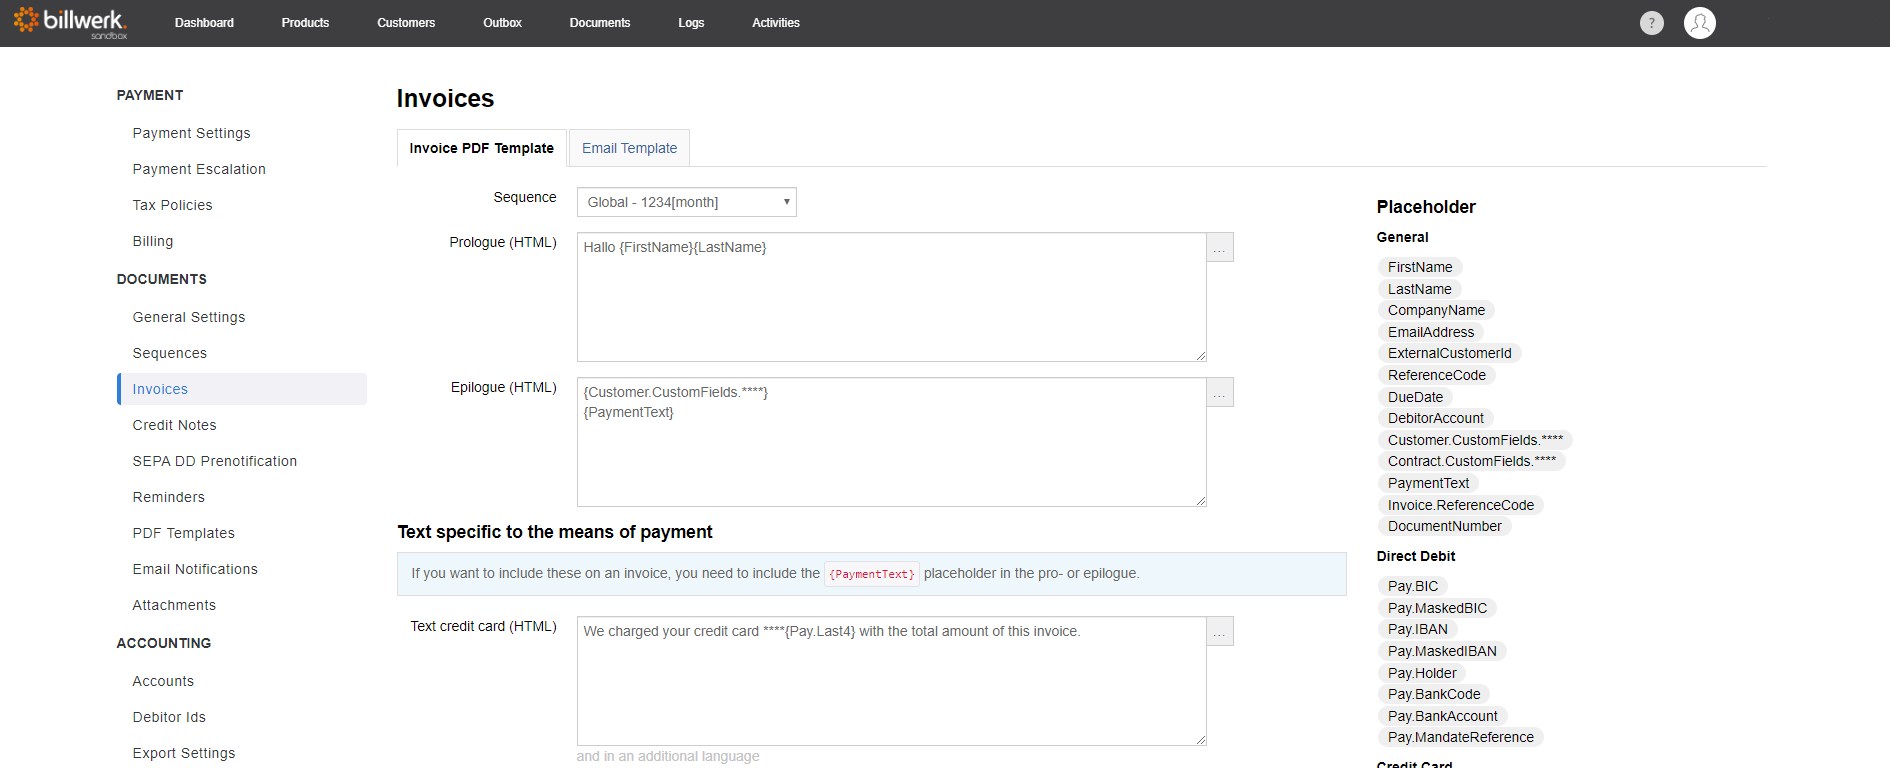
billwerk offers you the possibility to set up document templates. The templates for invoices, reminders, credit notes and SEPA DD prenotifications can be configured under "Settings". Placeholders, HTML code, and translations are also available: How can I individualize texts in documents?
Under "Settings > Documents > Sequences" you can configure your own individual number sequence for each document type (invoice, credit memo, dunning): How can I use sequences?
You will find a selection of different fonts to individualize your documents if you go to "Settings > Documents > PDF Templates > Fonts": Which fonts can be used in the documents?
You can use PDF templates to provide documents with your own letterhead or layout: How can I use my own letterhead?
Hint: If you navigate to "Settings > Documents > SEPA DD Prenotification" you will find the settings for notifying the payment in advance by e-mail, so that the customer can ensure he has sufficient funds in his account: How does the SEPA DD prenotification work?
2.4. Payment escalation
You can use billwerk to configure an automated payment escalation process. To do this, navigate to "Payment > Payment escalation" in the settings. Here you can define the number of days on which an action is to be carried out after the payment is overdue and select the actions to be executed (Trigger Webhook / Create reminder / End contract): How can I configure the payment escalation?
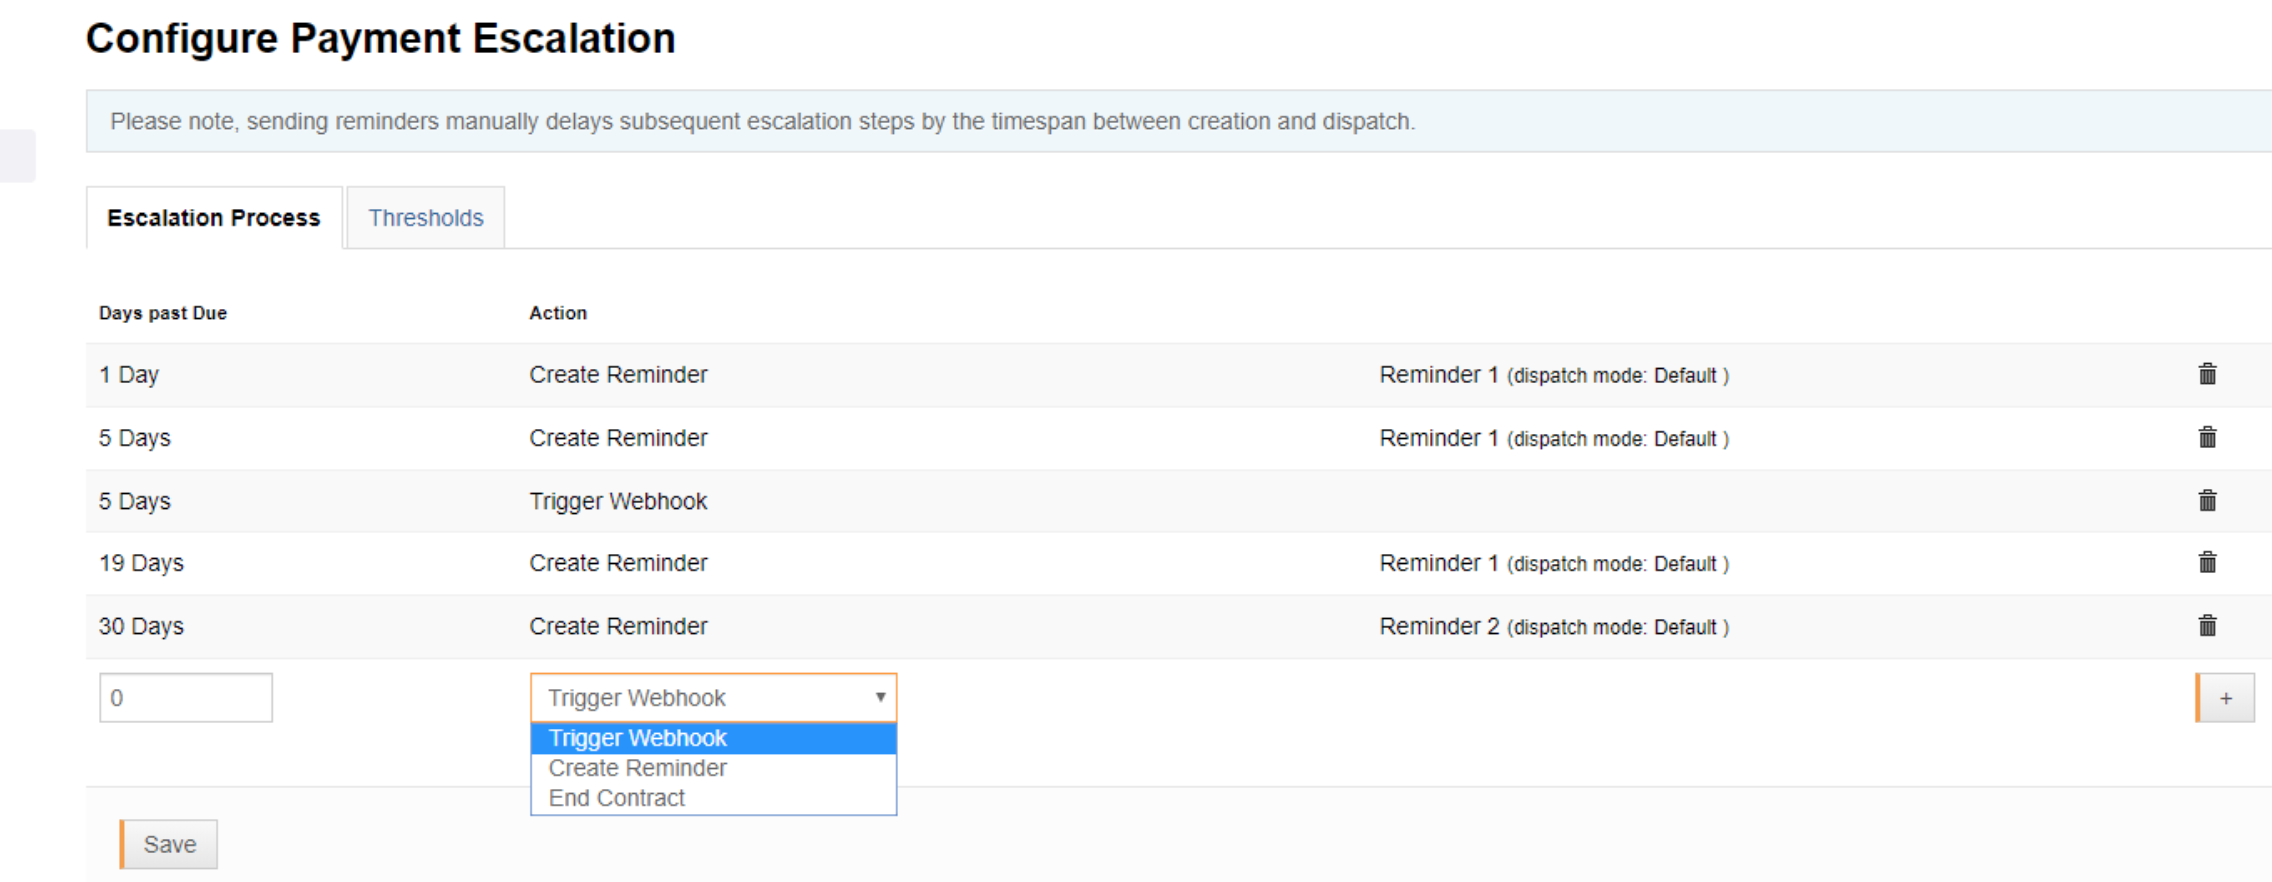
Hint: You can also set a threshold value from which the payment escalation should be started for each used currency.
2.5. Self-service
The hosted order page and the hosted customer portal offer an easy way to integrate ready-made self-service forms into your own website . If you go to "Settings -Self-Serviсe" you can configure how your signup page and the customer portal would look like. You can also change the color design and integrate your company logo: How can i use the hosted signup page and the hosted customer portal?
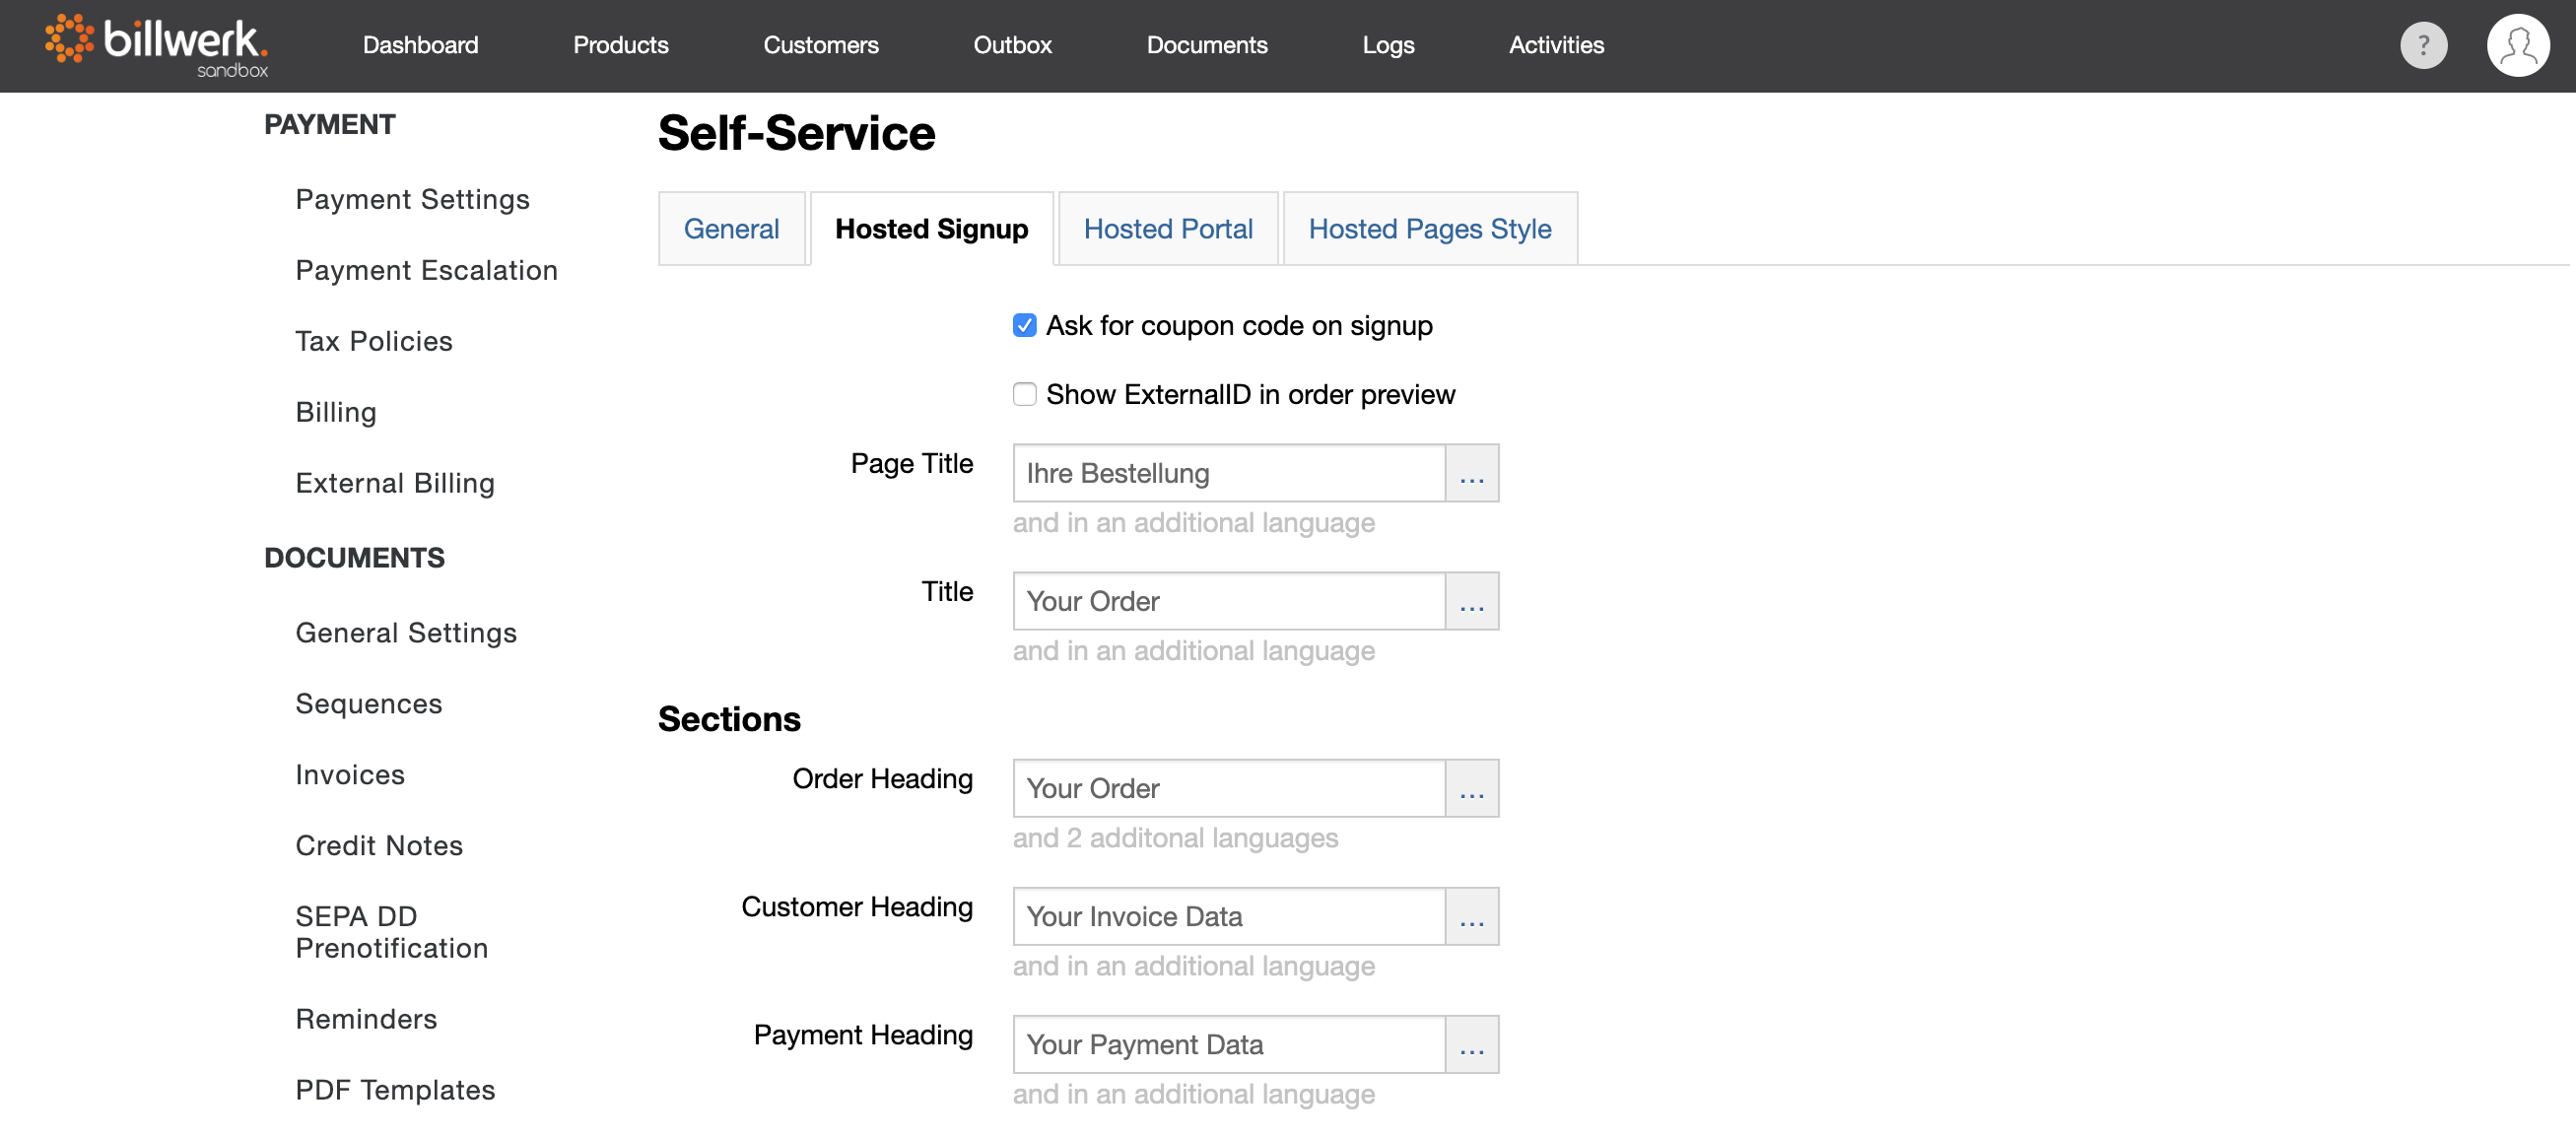
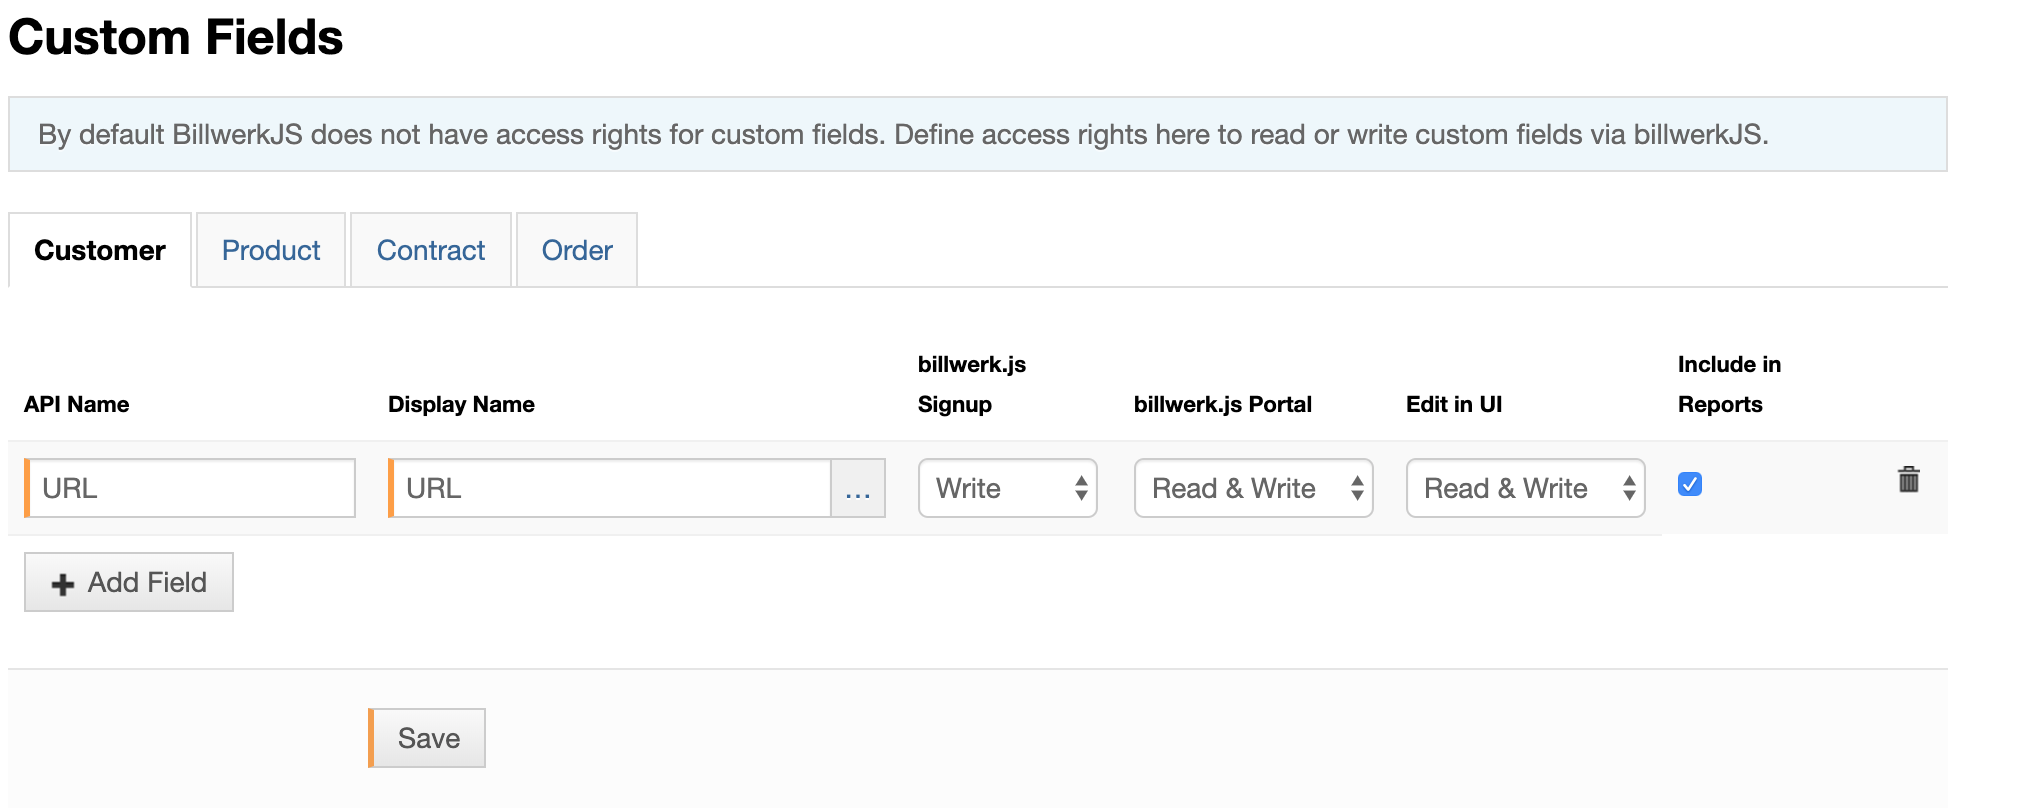
Hint: If you want to add any additional information about customers, products or contracts, you can configure custom fields. To do so, navigate to "Settings-Customization-Custom Fields" and select the desired tab (Customer, Contract or Product): How can i configure custom fields?
3. Produсts
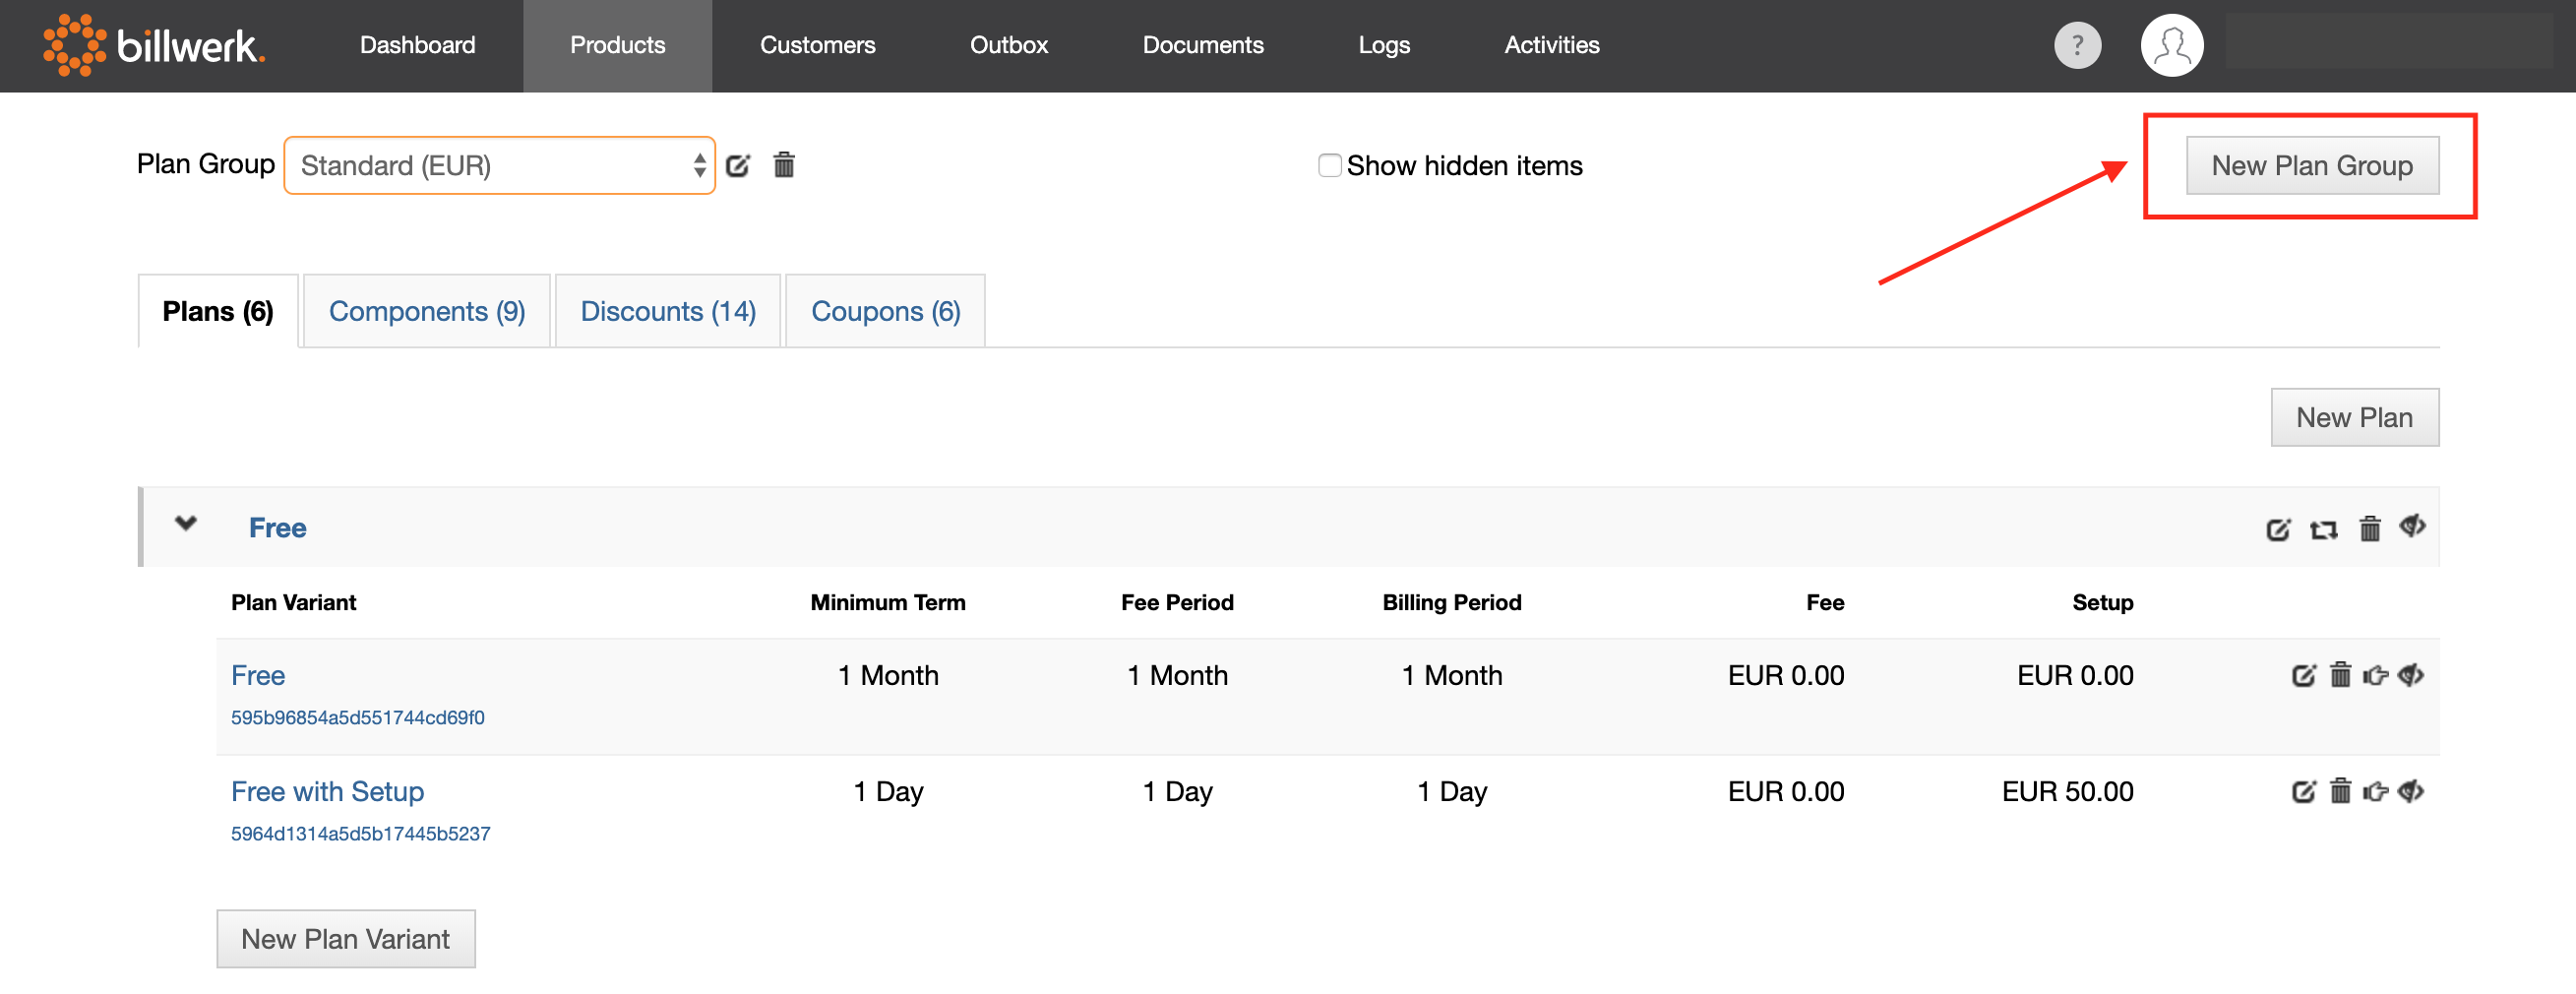
3.1. Plan Groups
In order to manage your product catalog optimally in billwerk, it is important to understand the relationships between the plan groups, plans, plan variants and components . You can find the appropriate description here.
First, you create a plan group that ensures that products are segregated by the currency or, for example, the tax policy. Plan groups represent the highest level of product structuring in billwerk. To create a new plan group, go to the "Products" tab and click on "New Plan Group": How can I set up a plan group?
Hint: The currency applies to all products within the plan group. The tax policy is applied to all plans and plan variants. You can use any number of plan group to separate your products between specific markets or according to your own criteria.
3.2 Plans
The next step is setting up the plans. Plans are always assigned to exactly one plan group and reflect the specific products, offered by you. You can open the window for creating a new plan by clicking the "Add Plan" button.

Hint: If you want to offer the plan in different languages, first enter the general (default) language. This language will be always set by default if there is no specific language configuration for the customer or if there is no translation for it.
You can add the translation by clicking the button on the right side of the corresponding input fields. This applies equally to all other products.
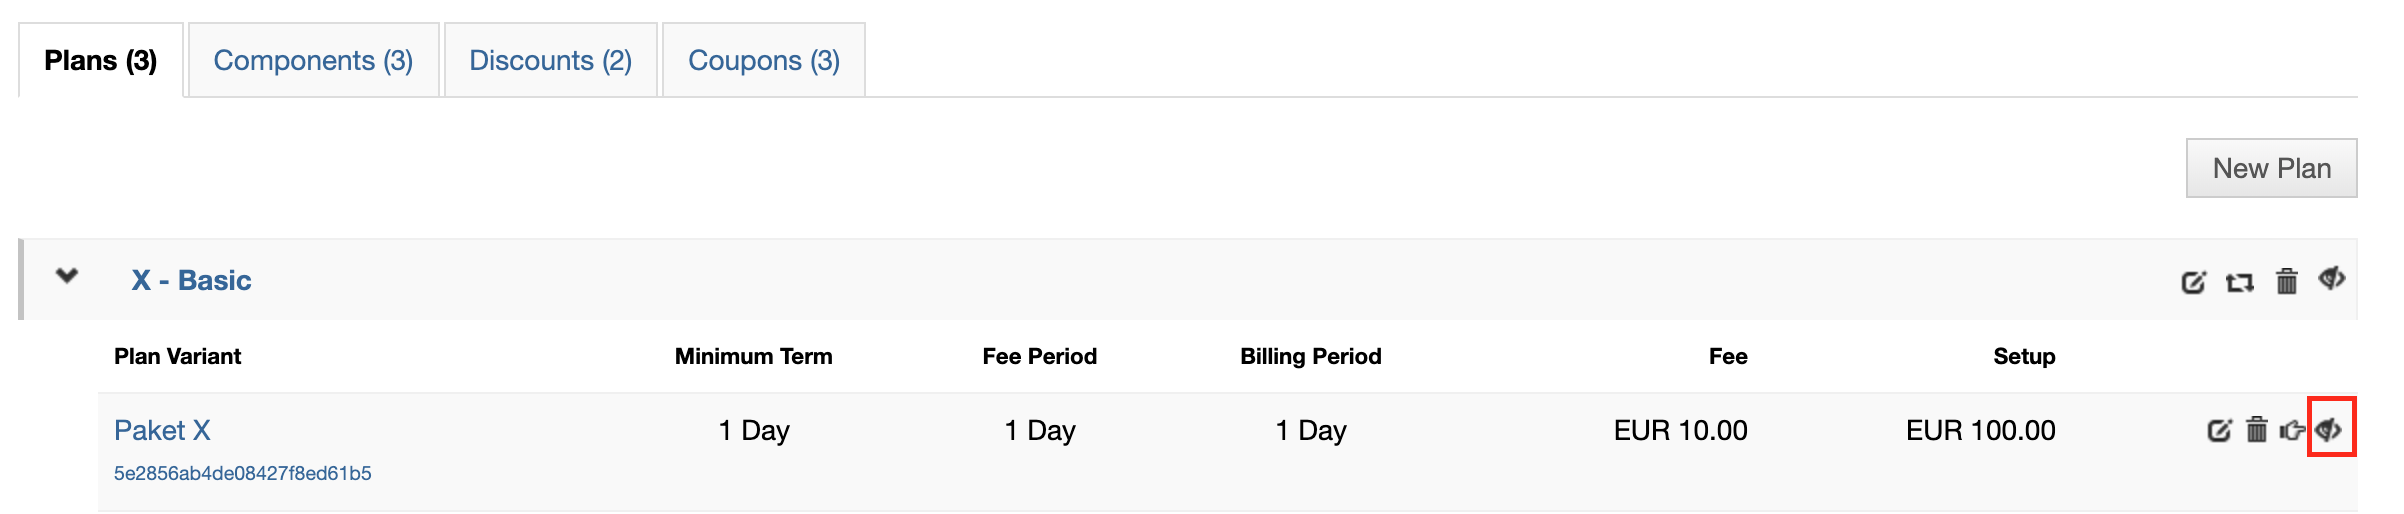
3.3. Plan variants
As a final step, you should add the plan variants. Plan variants are always assigned to exactly one plan. They refer to the same product but allow you to differentiate between contract terms, fees applied, and other factors. You can create a new plan variant by opening an existing plan and clicking the "New Plan Variant" button : How can I create plans and plan variants?
Hint: Plan variants are the actual contract for the subscription. They define the сontract term, notice period, and billing interval. Only one plan variant can be active in each contract at any point in time.
Once a plan variant has been booked in a contract, you can no longer delete it for technical reasons. This applies not only to active contracts but also to those, that were cancelled or terminated. However, you can hide this plan variant in the UI.
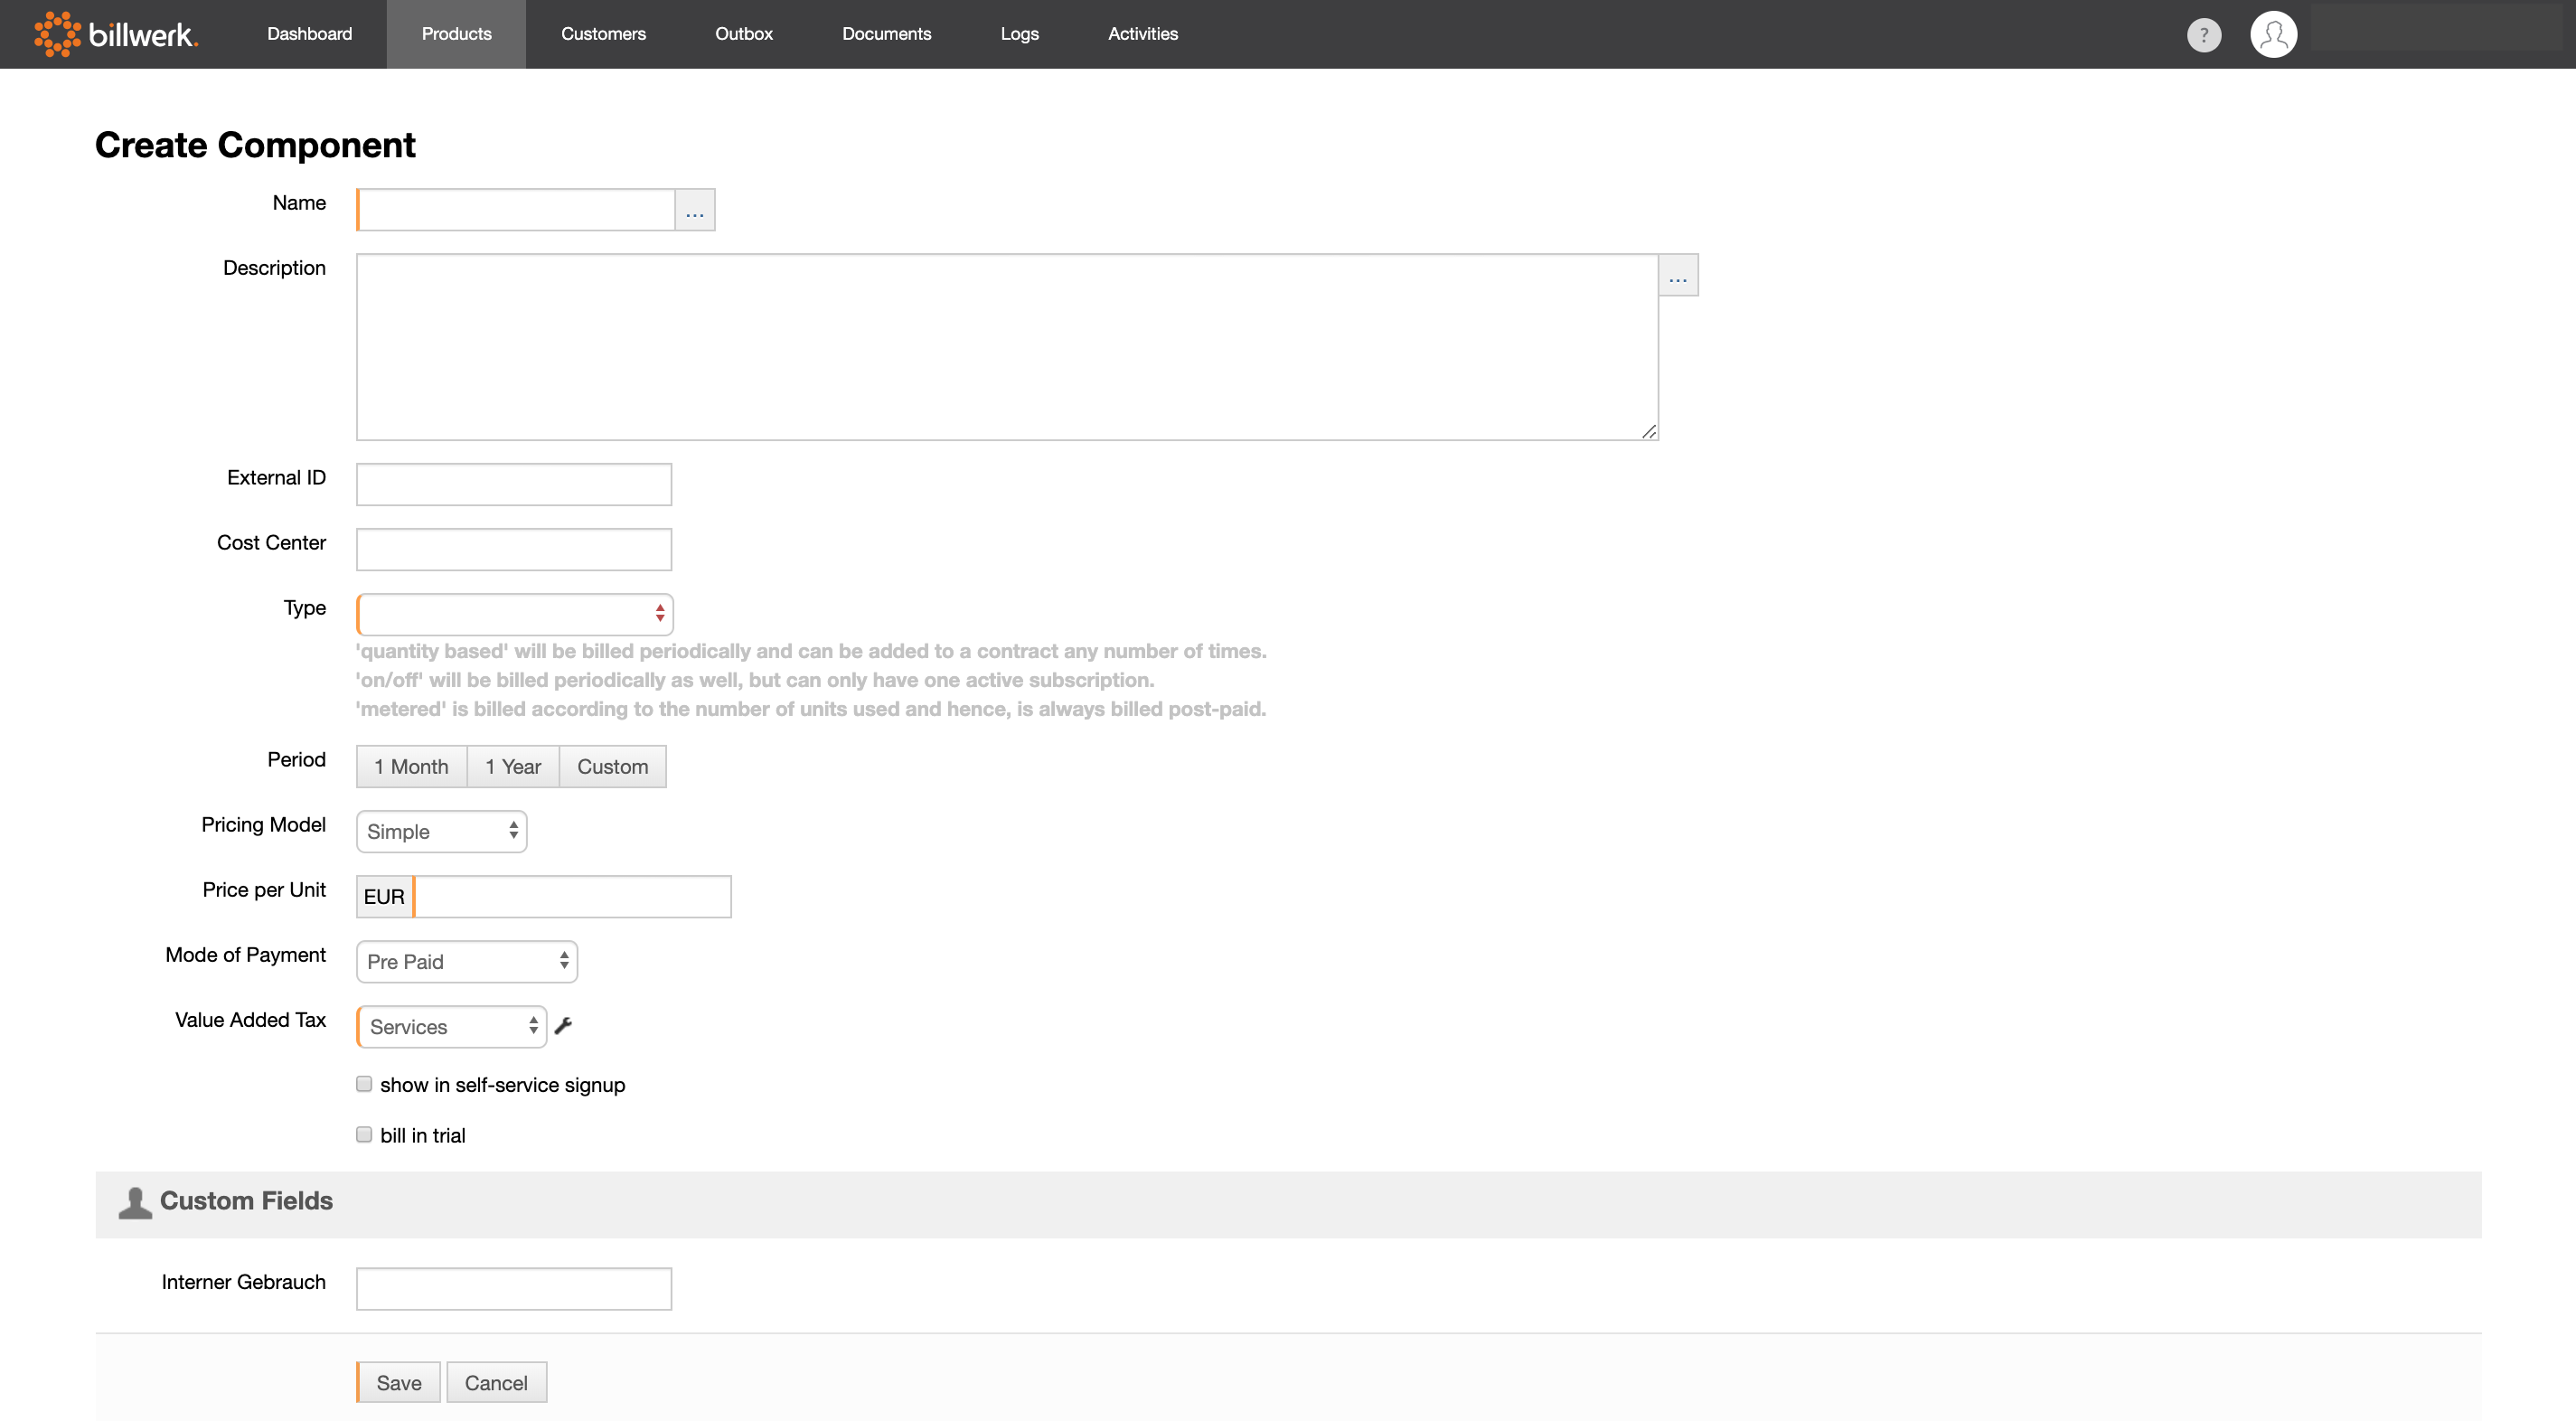
3.4. Components
Components are an important and integral part of billwerk product catalog and are designed to implement your business model. You can add additional products, services or features with the help of components. These enhancements can be set both periodically and metered (according to consumption). To create a component, switch to the "Components" tab in the "Products" section and click "Add Component": How can I create a component?
Hint: In many subscription models, the prices of components are standardized for customers. In practice, however, there are special use cases, in which the prices, names, and descriptions of the components differ for individual end customers. billwerk offers this functionality: How can I customize the prices and descriptions of components?
You can also easily create different discounts with billwerk and freely configure their characteristics: for example, time-limited and unlimited validity are possible. Furthermore, you can determine the products for which the percentual discounts are applicable and whether separate invoice items should be created for the discount position.
You create a new discount under "Products" > "Discounts" with "Add discount".

This way, you get an influential marketing tool for your product.
Hint: Discounts are not stackable. When two discounts are reducing the price of the same product, only the strongest discount will be applied.
3.5. Coupons
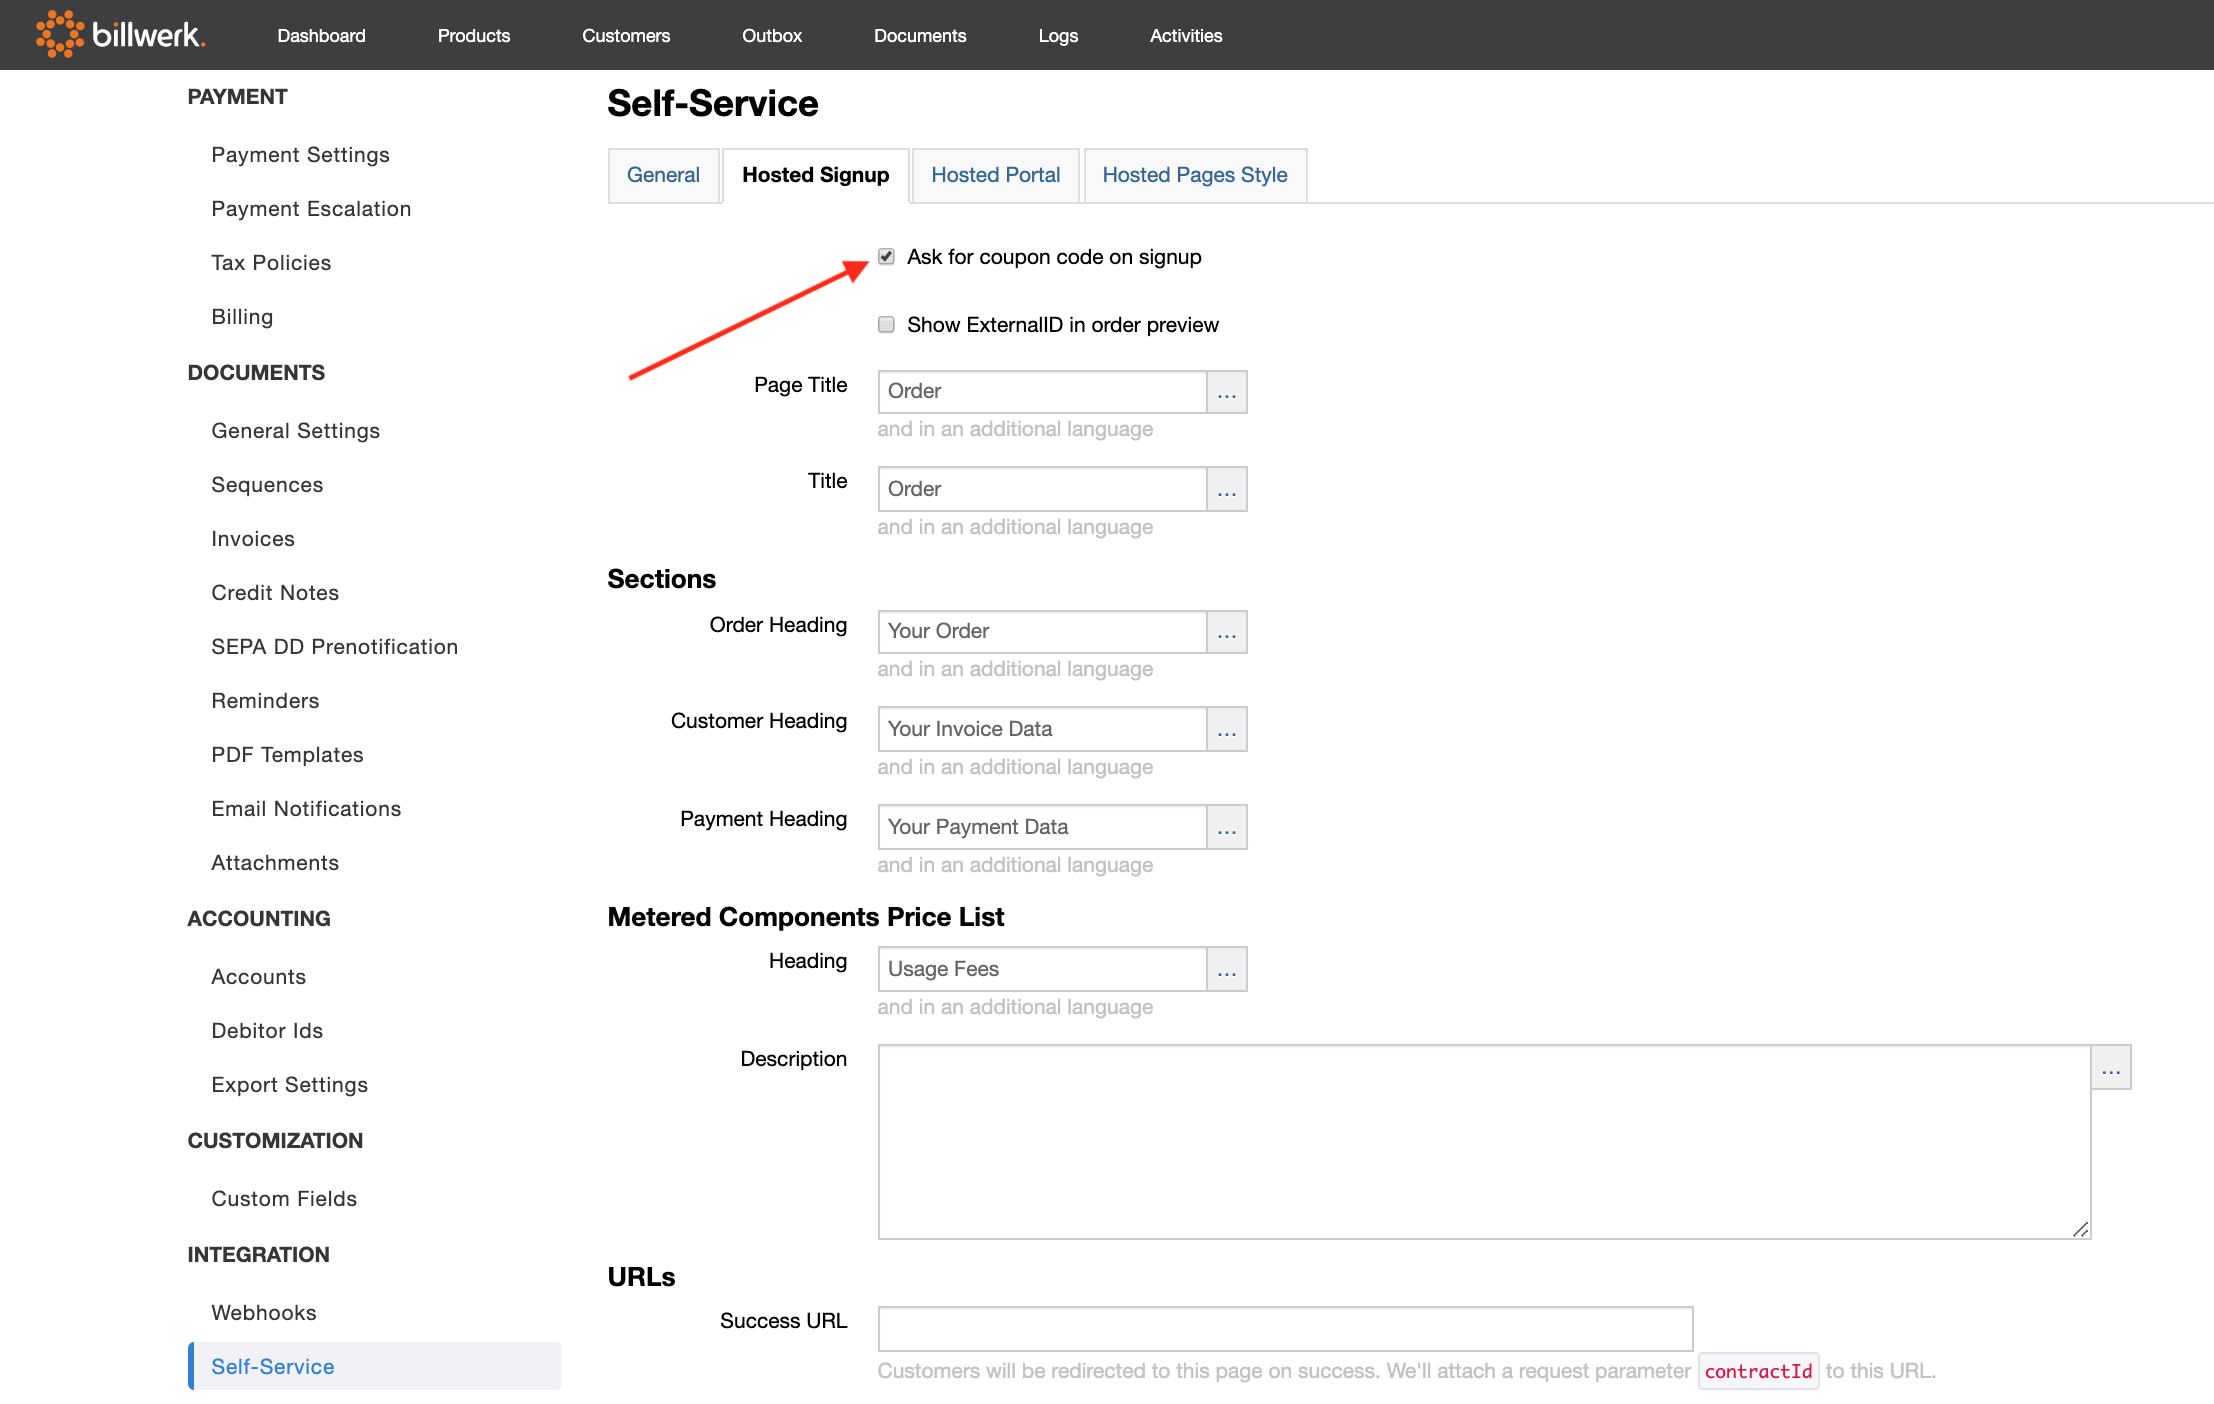
Coupons refer to discounts and contain any number of coupon codes/vouchers that you can provide to your customers to activate discounts for their subscriptions in self-service. To create a coupon, go to "Products" > "Coupons" and click on "Add Coupon".
Once you have generated the coupon codes, don't forget to unlock the coupon field on the signup page. To do this, go to "Settings > Integration > Self-Service > Hosted Signup" and check the box "Ask for Coupon Code on signup" to activate the field. This is also necessary if you are using SubscriptionJS.
Further information about discounts and coupons can be found in the following article: How can I create discounts and coupons?
4. Accounting Export
After you have processed the first invoices via billwerk, it is advisable to configure the financial accounting export. Go to "Settings > Accounting > Accounts" and enter all accounts used. The accounts for payments and turnovers can only be configured after something has been booked to them. You can also select whether you want to use debtor accounts, whether billwerk should automatically create passive deferred income items and whether the postings should be created per each invoice item.
How can I configure the accounting export?
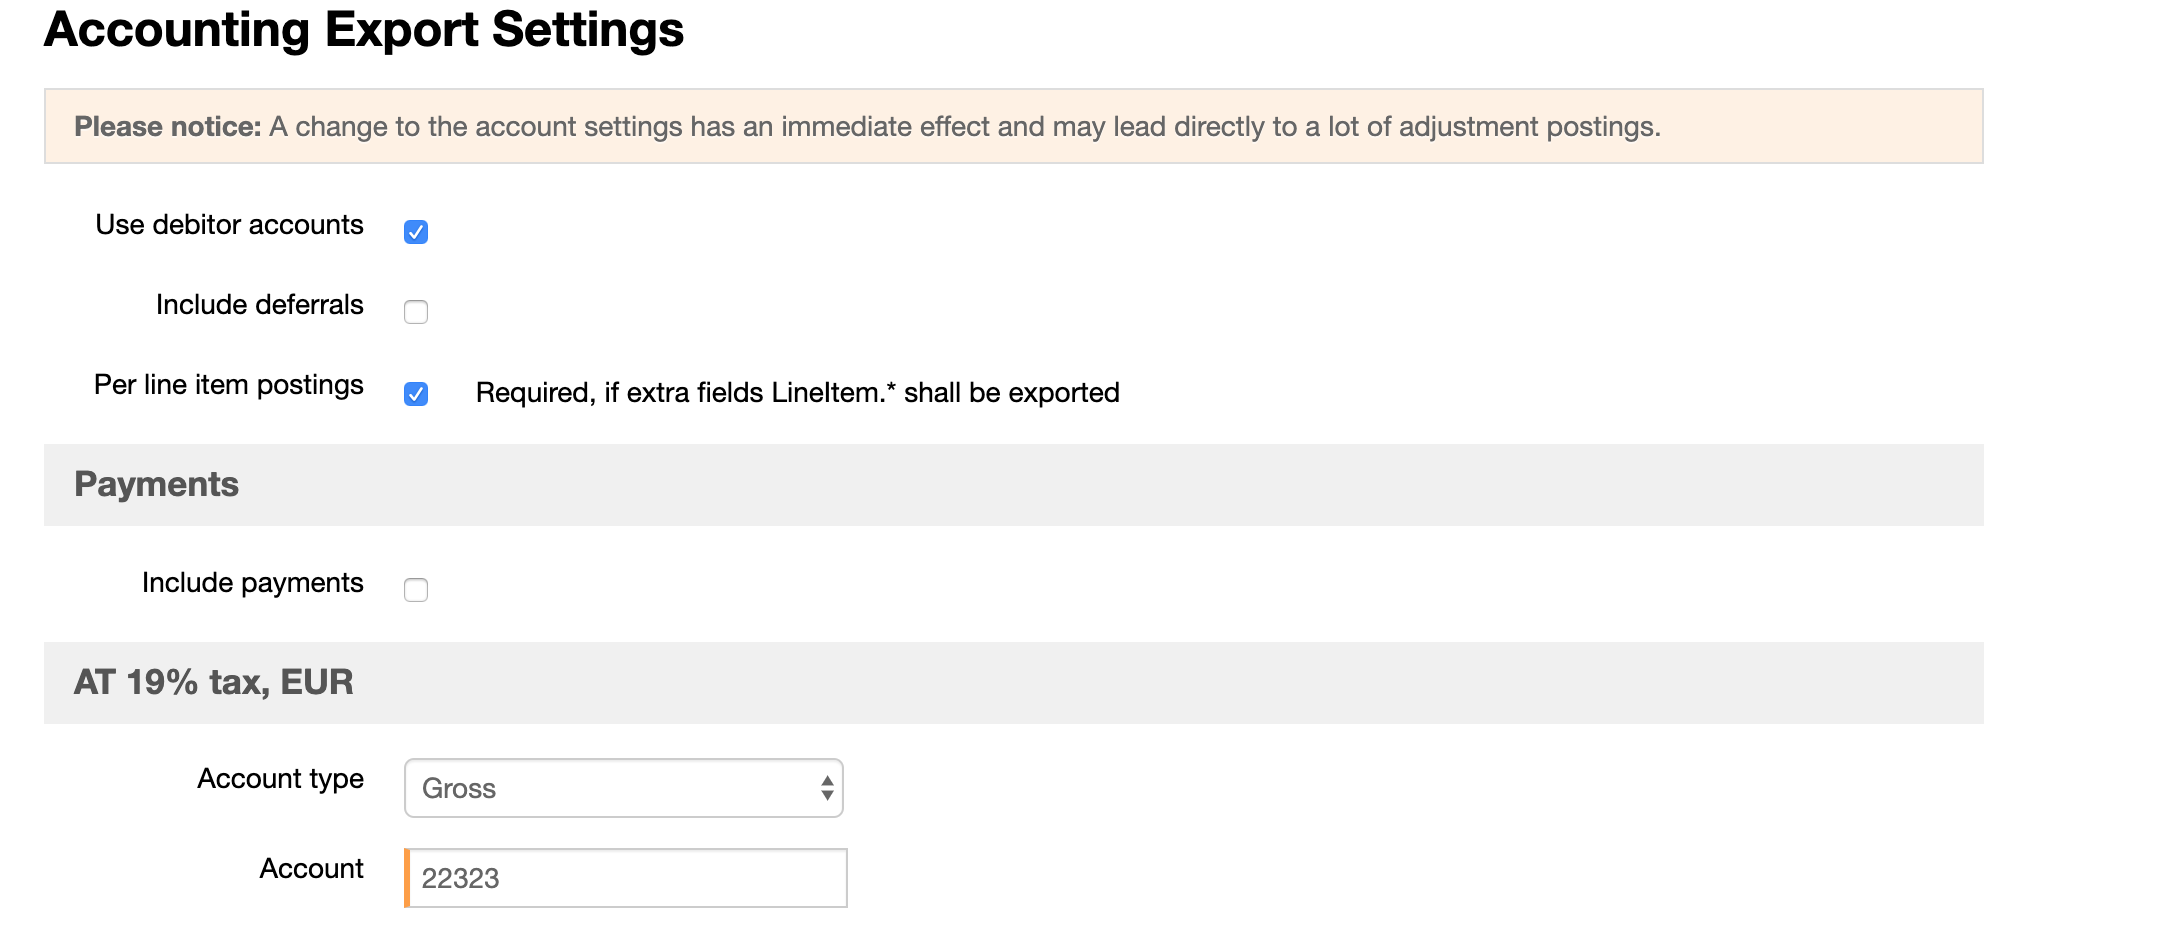
Hint: Please note that if you want to use debtor accounts, all customers should possess a debtor ID. billwerk can automatically generate a debtor ID when creating a new customer. You can find this option under "Settings > Accounting > Debitor Ids": What possibilities does billwerks accounting export offer me?
We hope that this article helped to make your first steps with billwerk. If you still have questions, please feel free to contact our support team at support@billwerk.com.