Tenant hierarchy
Tenant hierarchy overview
This feature must be enabled. Please contact support@billwerk.com.
Tenant hierarchy in billwerk lets you easily view and manage multiple billwerk entities. For example, you could have different entities depending on geography, division or department. Each entity is independent of one another - neither products, settings nor reporting are shared between entities.
The tenant hierarchy is headed by a main entity (parent entity) with sub-entities (child entities) beneath.
This article contains the following sections:
Tenant hierarchy search and switching entities
Entity configuration
Creating new sub-entities
Entity user access and roles
Granting user access to selected entities
Tenant hierarchy search and switching entities
You can search for an entity or switch entities by following the steps below:
To access the Search Entity feature:
If you are not logged into the billwerk platform, the Switch Entity screen will appear after login.
If you are already logged into the billwerk platform, click on the Switch Entity link in the top-right corner. On the Switch Entity page, a tree view of your entities will be displayed. You can use the search box by typing in the name of entity or entity ID and clicking on the magnifying glass icon to display the results.
Click on the name of the entity to switch to that entity.
Press the Select button.
Entity configuration
To access the configuration page for entities:
Click on the Profile icon in the top-right corner.
Select the Account option.
From the Account menu on the left-hand side, choose Tenant Hierarchy.
On the Tenant Hierarchy page, a tree view of your entities will be displayed. You can use the search box by typing the name of entity or entity ID and clicking on the magnifying glass icon to display the results.
Click on the name of the entity to switch to the entity.
Press the Select button.
Creating new entities and sub-entities
To create a new entity or sub-entity:
Click on the Profile icon in the top-right corner.
Select the Account option.
From the Account menu on the left-hand side, choose Tenant Hierarchy.
Depending on which hierarchy level you want to add the entity:
Press the New Entity button.
Press the New sub-entity button in the line of the account name to create a sub-entity within the entity.
On the next page, fill out the details about the new entity or sub-entity.
Click on the Save button to save your changes.
Entity user access and roles
To view which users have access to the entities and what is their role:
Go to the main entity.
Click on the Profile icon in the top-right corner.
Select the Account option.
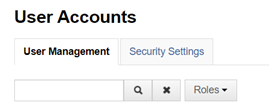
From the Account menu on the left-hand side, choose User Accounts.
The table will display all users which are at the current level in the hierarchy or in sub-entities with information about their role for each of the entities they have access to in the Role column.
You can use the search box above the table to search for users by typing in their first name, last name or email address and clicking on the magnifying glass icon.
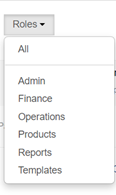
To filter by user role, click on the Rules button to expand the menu and select the role.
Granting user access to selected entities
You can grant access to users to selected sub-entities and manage their roles and rights. You can learn more about user roles and rights under this link.
To grant access to selected entities and manage the users’ roles and rights:
For users without access to billwerk:
Go to the main entity.
Click on the Profile icon in the top-right corner.
Select the Account option.
From the Account menu on the left-hand side, choose User Accounts.
Click on the Invite User button.
In the User section, add the user details.
In the Roles section, you can grant the user access to a new entity by clicking on the Add Entity button and selecting the user role. The user will be granted access to the that entity and all sub-entities belonging to this entity.
Press the Save button.
For existing users of billwerk:
Go to the main entity.
Click on the Profile icon in the top-right corner.
Select the Account option.
From the Account menu on the left-hand side, choose User Accounts.
Click on the Edit icon in the line with the name of the user.
In the Roles section, you can grant the user access to a new entity by clicking on the Add Entity button and selecting the user role.
Press the Save button.