How can I change the design of the signup page and the customer portal?
Table of contents
Layout
Input fields customer data
Displaying credit card logos
Redirecting after an order
Headlines and descriptions for hosted signup pages and portal
Showing and hiding the sections in the hosted portal
Layout
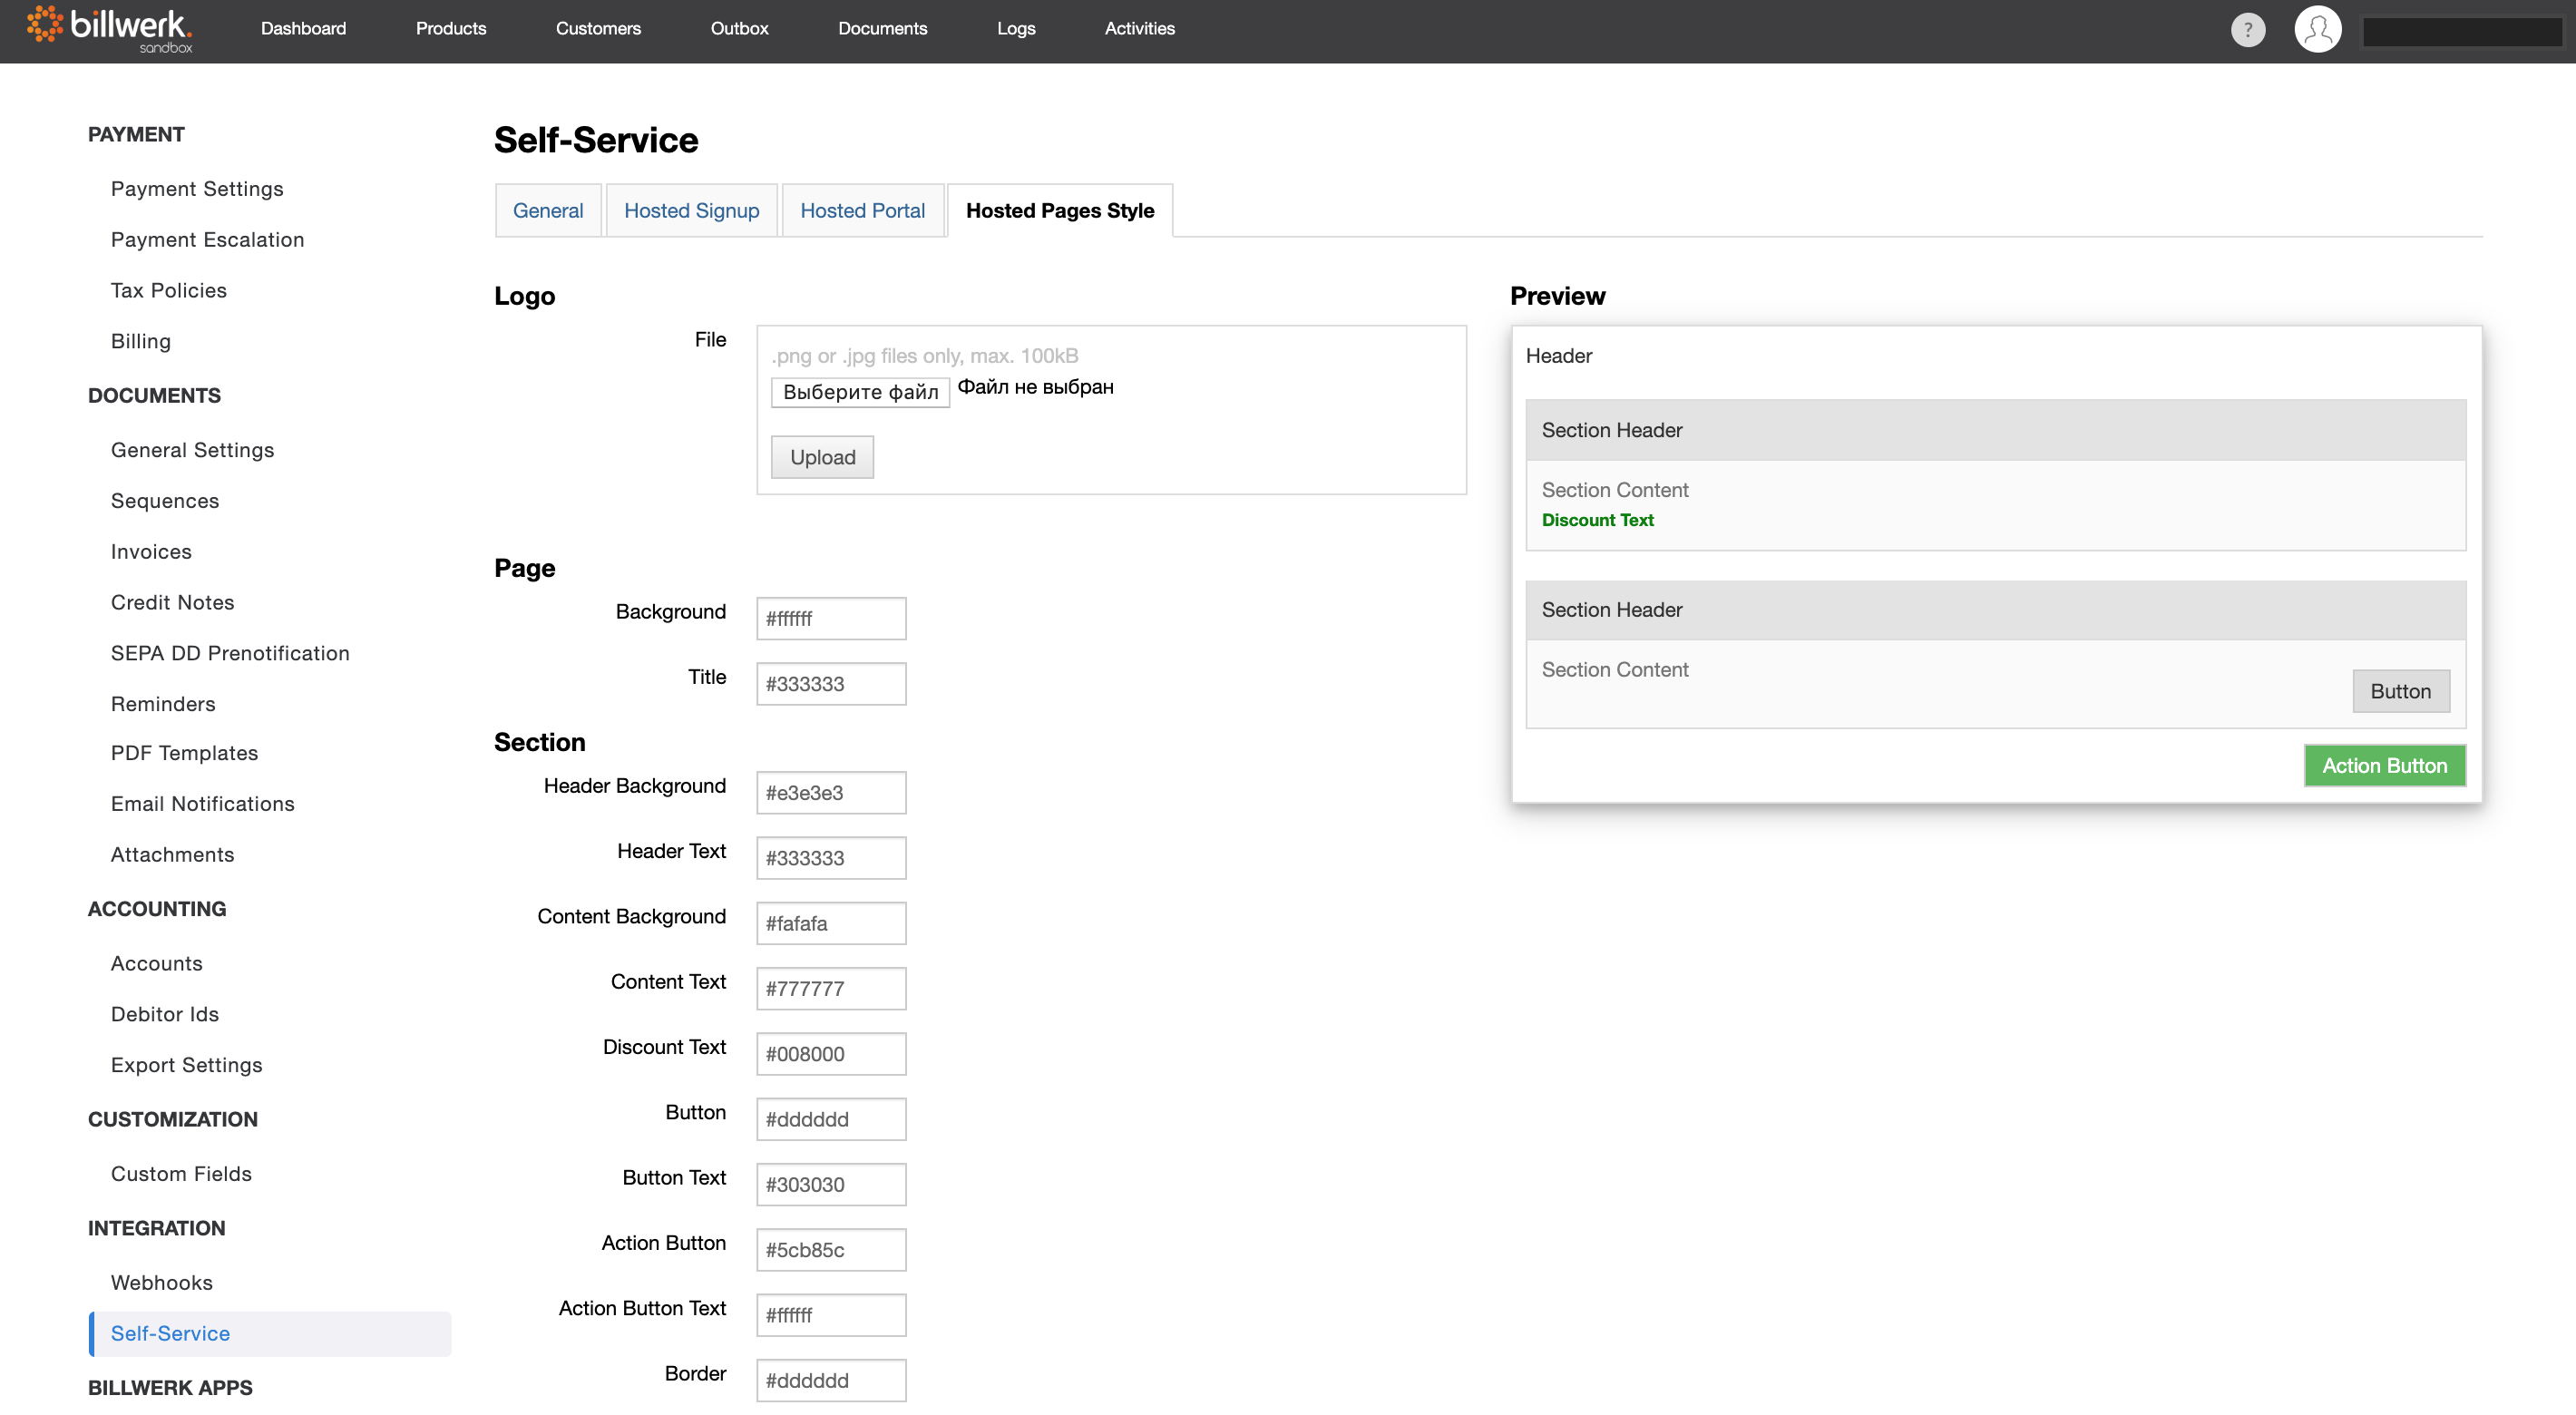
You can customize the hosted order pages and the customer portal to suit your corporate design. For this purpose billwerk offers you the possibility to insert your company logo, change the colors and design the width and curvature of the edges. To do this, go to "Settings > Integration > Self-Service > Hosted Pages Style".
Here you can use "Choose file" to select your company logo and then upload it. Now you can change the width and height of the logo.
Under "Page" and "Section" you can define the colors of the buttons and fields with an HTML color code. The width of the borders can be 0 pixels or increased as desired and the rounding of the boxes can be rounded off by square (0) with higher inputs.
Input fields customer data
In addition, you can define which customer data are mandatory or optional fields that must or can be filled by the customer, and which fields you do not need. You can find instructions here.
Displaying credit card logos
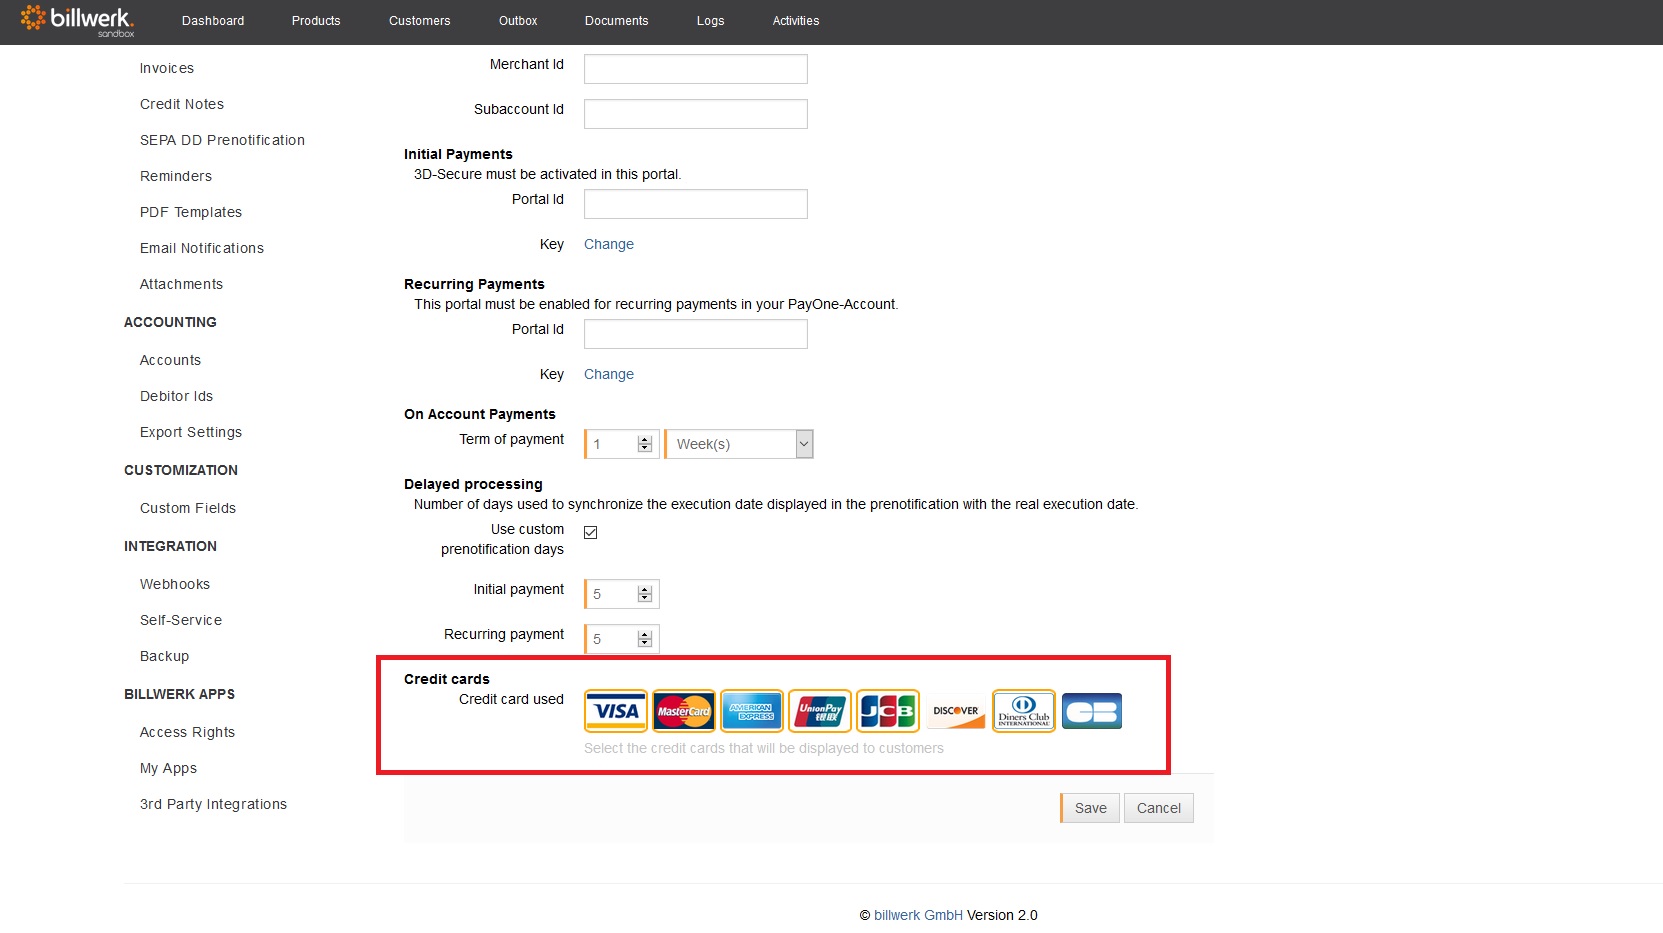
For the order page and the customer portal you can define which credit card logos of the different credit card providers are displayed for the customer. Depending on the payment provider, you can accept different credit card types such as Visa, Mastercard, American Express, etc. To display only the logos of the providers you support, go to the payment settings of the payment provider you use via "Settings > Payment > Payment settings > Edit" and click on all credit card logos you want to display for the customer and save your selection. The selected logos now appear automatically, after selecting the payment method credit card in the order page and the customer portal. If you also offer the 3D-Secure procedure for credit card payments, you can optionally display the logos for "Verified by Visa" and "Mastercard SecureCode". To do so, activate the desired selection and save it at the end.
Redirecting after an order
In the Hosted Signup tab, you can enter a success and an error URL in the URLs section. Your customers will be redirected to these URLs after the order.

Headlines and descriptions for hosted signup pages and portal
In the Self-Service settings, you can also edit the headings of the sections of the signup pages and the portal. If you are adding translations, your customers will see the respective translation if you provide the customers with the link to the page in the respective language. The pages in the individual languages are defined by the use of language query parameters in the URL, such as ?language=en. If no parameter is set, the Default (German) heading is used. The hosted order success page will be in the same language, later.
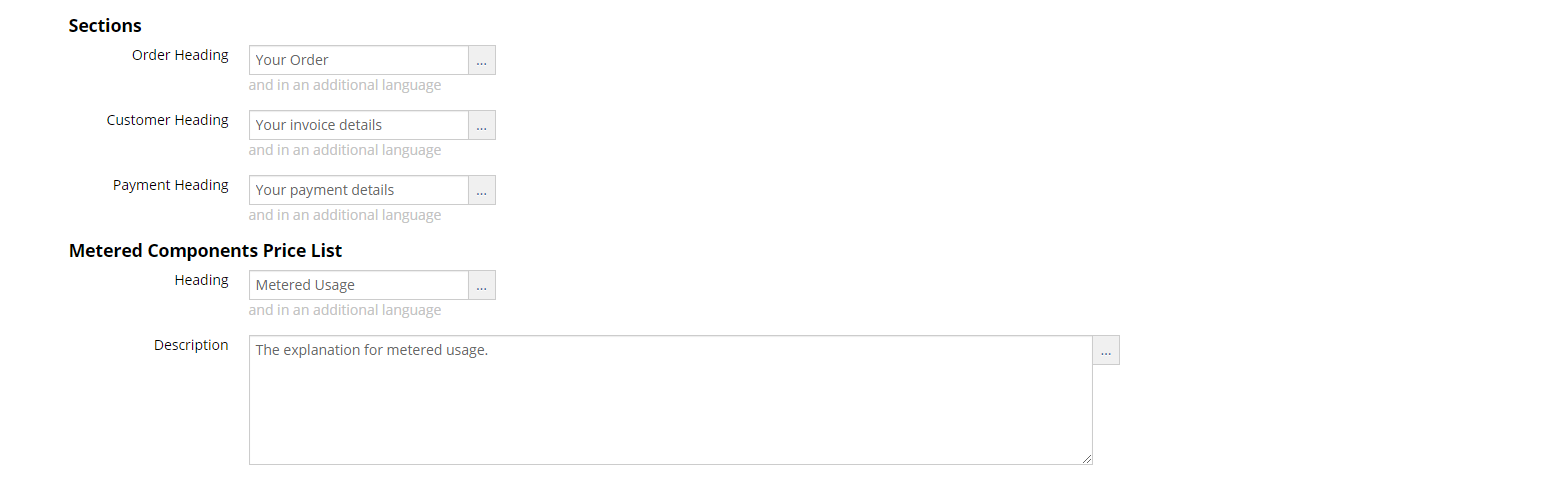
It is also possible to enter a general description of the metered components.
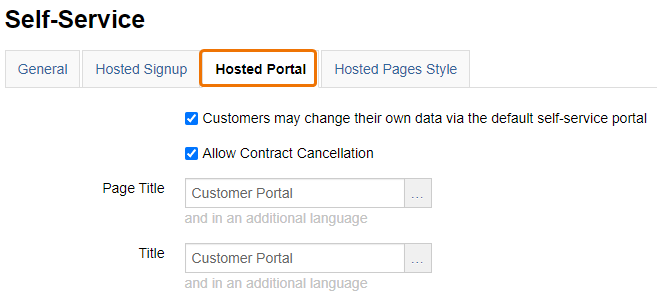
Showing and hiding the sections in the hosted portal
In the Hosted Portal tab, you can show and hide the sections of the hosted customer portal. In general, you can set here whether your customers can edit their data themselves and whether contract cancellations are allowed via the customer portal. To do this, activate or deactivate the corresponding checkboxes.
 |
You can show and hide the following sections:
Customer: The customer data is displayed in the portal
Payment: The current payment data is displayed in the portal
Contract: The products currently active in the contract are displayed in the portal
Ledger: The account balance is displayed
Documents: The invoices and credit notes of the contract are displayed and can be downloaded
Additional data: The content of custom fields of the contract is displayed