Single sign-on (SSO)
Table of contents
Introduction
Inviting external user
Introduction
Note
This feature needs to be unlocked for your account. If you are interested, please contact support@billwerk.com.
Single sign-on (SSO) is an authentication method that allows you to authorize once and use multiple applications without having to authorize again.
To use the single sign-on method in billwerk, you have to connect an identity provider, e.g., an active directory, with billwerk. billwerk supports the OpenID Connect protocol and Azure Active Directory.
billwerk distinguish between internal users and external users. Internal users are created and managed in billwerk. External users are provided and managed by the connected identity provider.
As soon as an external user logs into billwerk the first time, the user is created in billwerk. When the user data in the identity provider are updated, billwerk will update the user data of the external user. You can also invite external users. The user will then be pre-created.
Note
External Id and email address cannot be edited in billwerk.
Users of the identity provider cannot be edited in billwerk.
When the roles and users are provided by Azure Active Directory , the external user is read only.
When the roles of the users provided by Azure Active Directory are managed in billwerk, only the roles are editable.
When the roles are provided by Open ID Connect, the roles are not visible.
When the roles of the users provided by Open ID Connect are managed in billwerk, only the roles are editable.
Single sign-off out of billwerk is not possible.
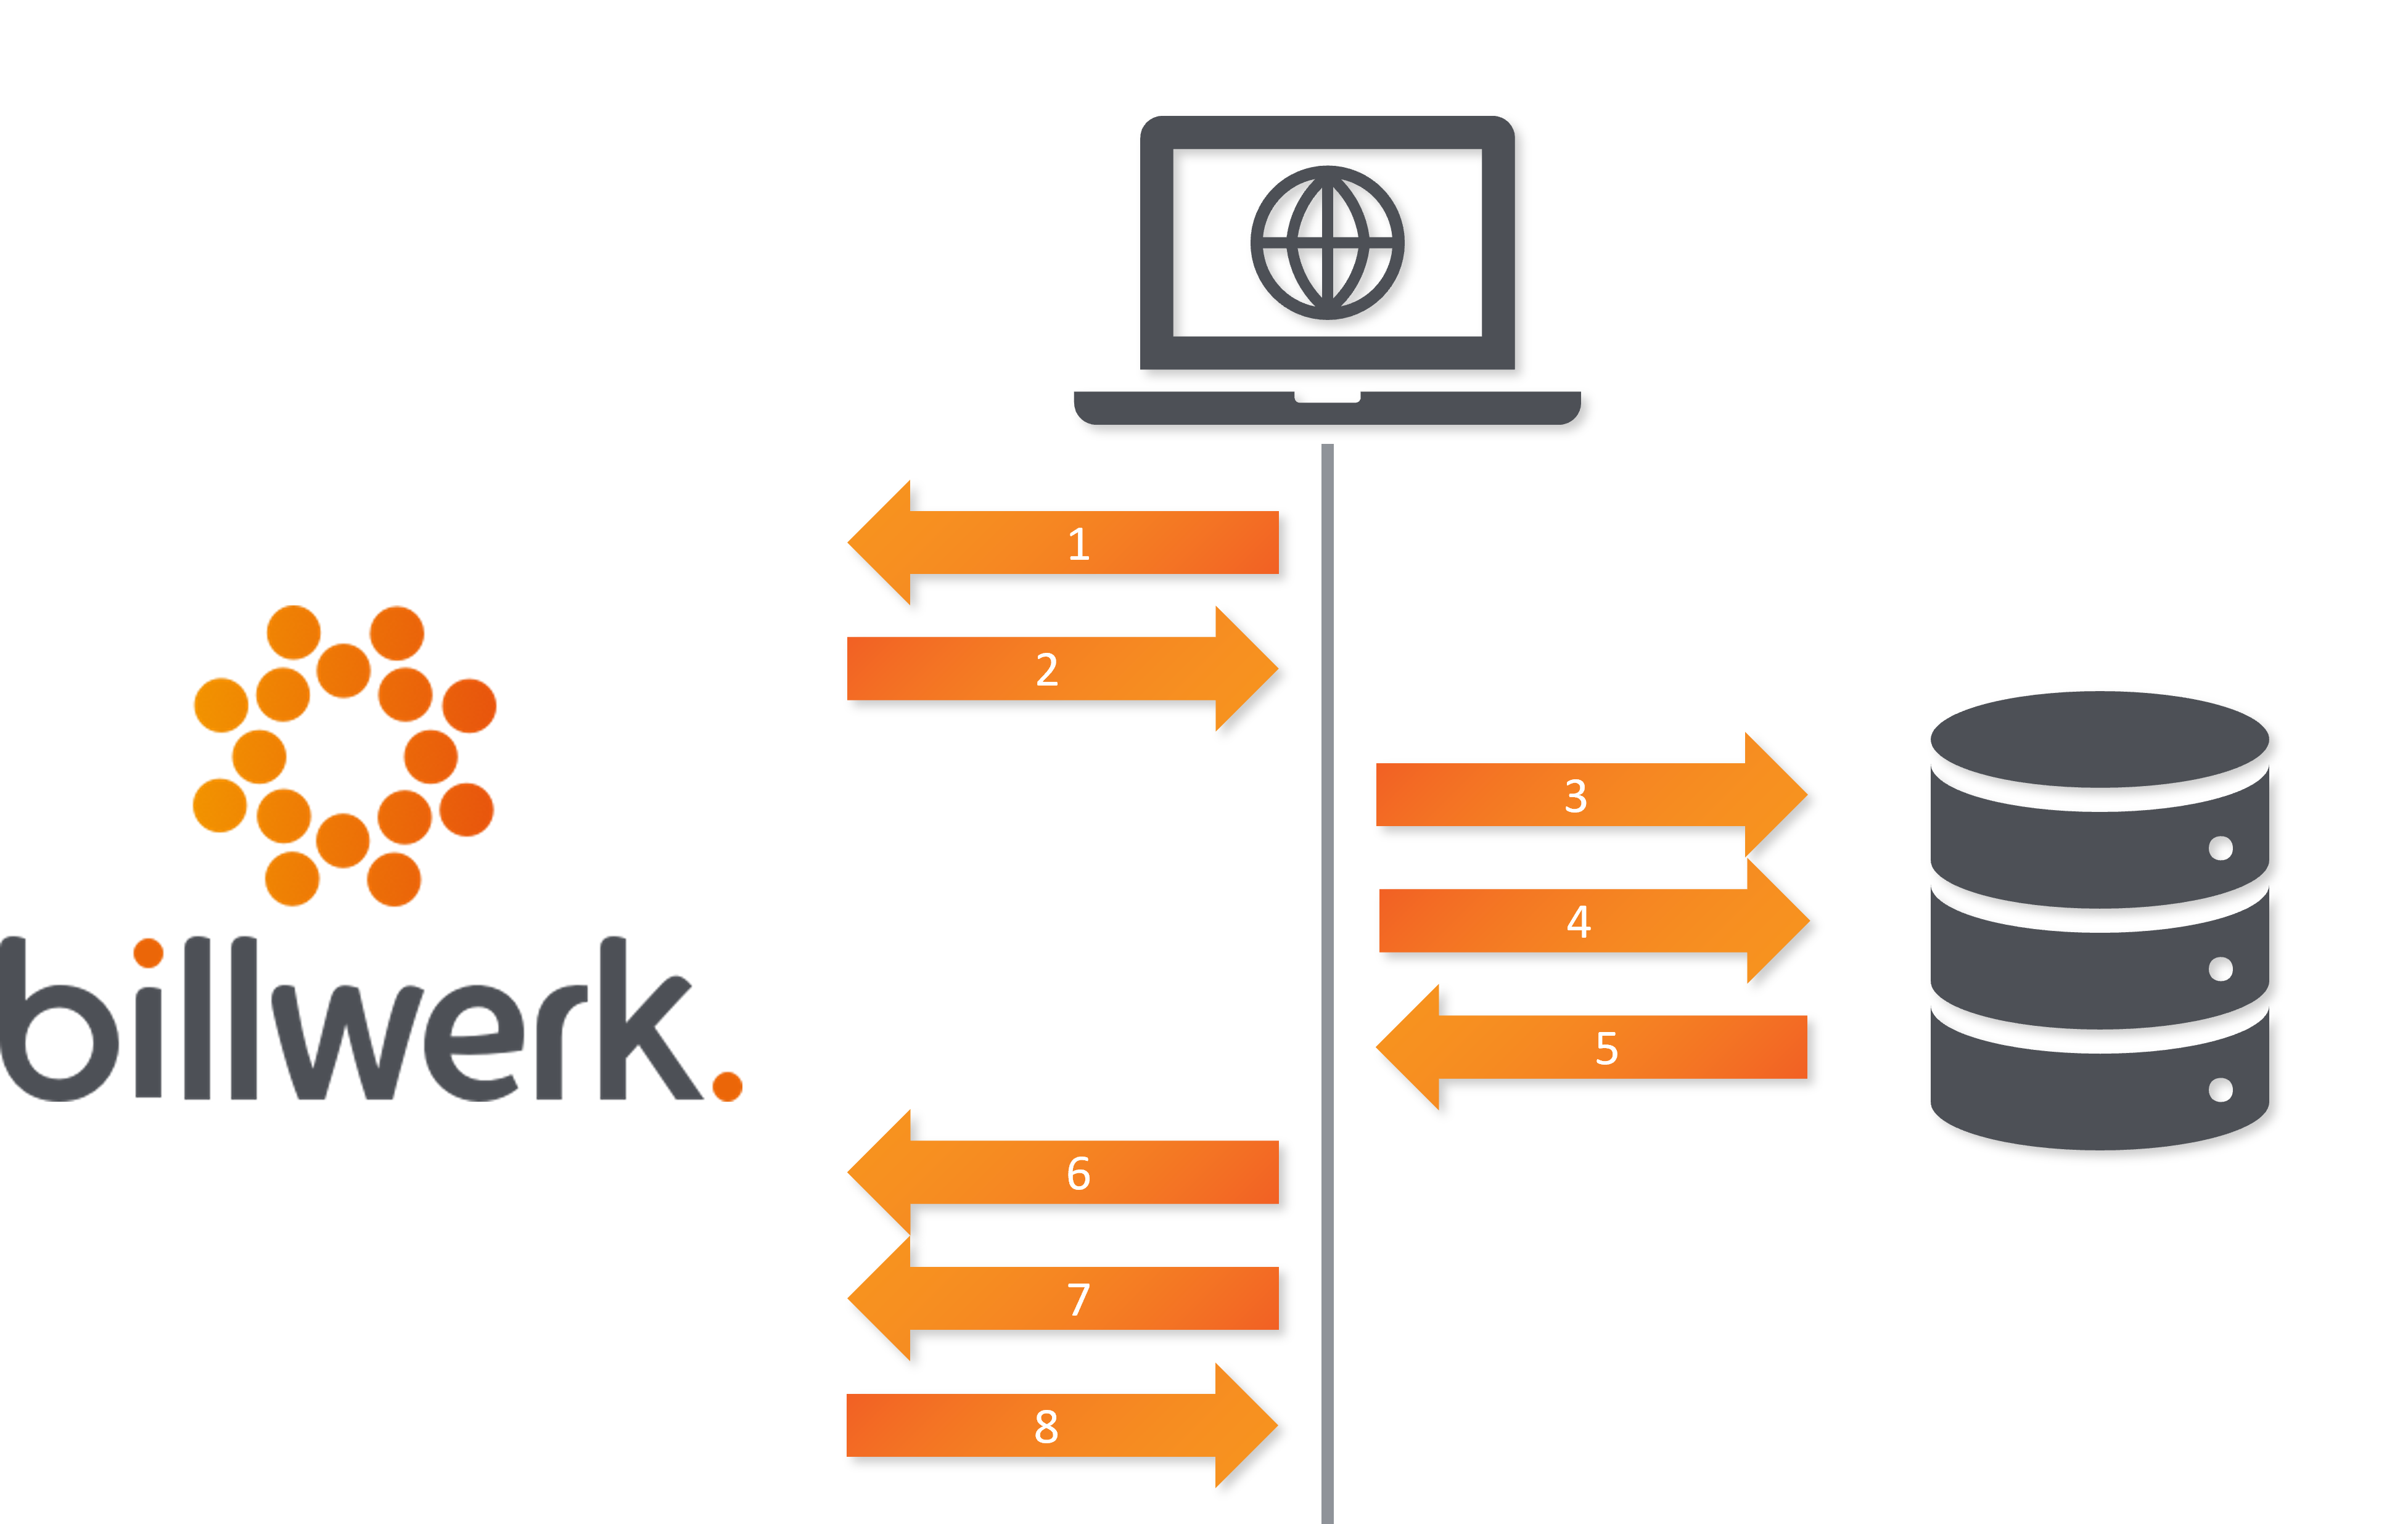 |
1 | User calls billwerk |
2 | Request is sent to user's browser |
3 | Access is requested from the identity provider |
4 | User logs in if necessary |
5 | Token is sent to user's browser |
6 | Token with the user's identity is sent to billwerks endpoint |
7 | Request is received by billwerk and user is validated |
8 | Access is granted |
Inviting external user
To get to the User Accounts, click on your email address > Account in the top right corner.
In the ACCOUNT section, click User Accounts.
Click the Invite User button.
Select External User in the User Type dropdown-list.
Fill in the required fields.
Select the roles.
Note
If the External Role Assignments Strategy in the settings is set to RolePerLegalEntity or OneRoleForAllLegalEntities it is not possible to select roles. Roles provided by Identity Provider are assigned.Click Save.