How can I use the hosted signup page and the hosted customer portal?
Content
The hosted order page and the hosted customer portal offer an easy and fast way to integrate pre-fabricated self-service forms into your own website.
The hosted order page is a registration form for new customers that can be used to place orders.
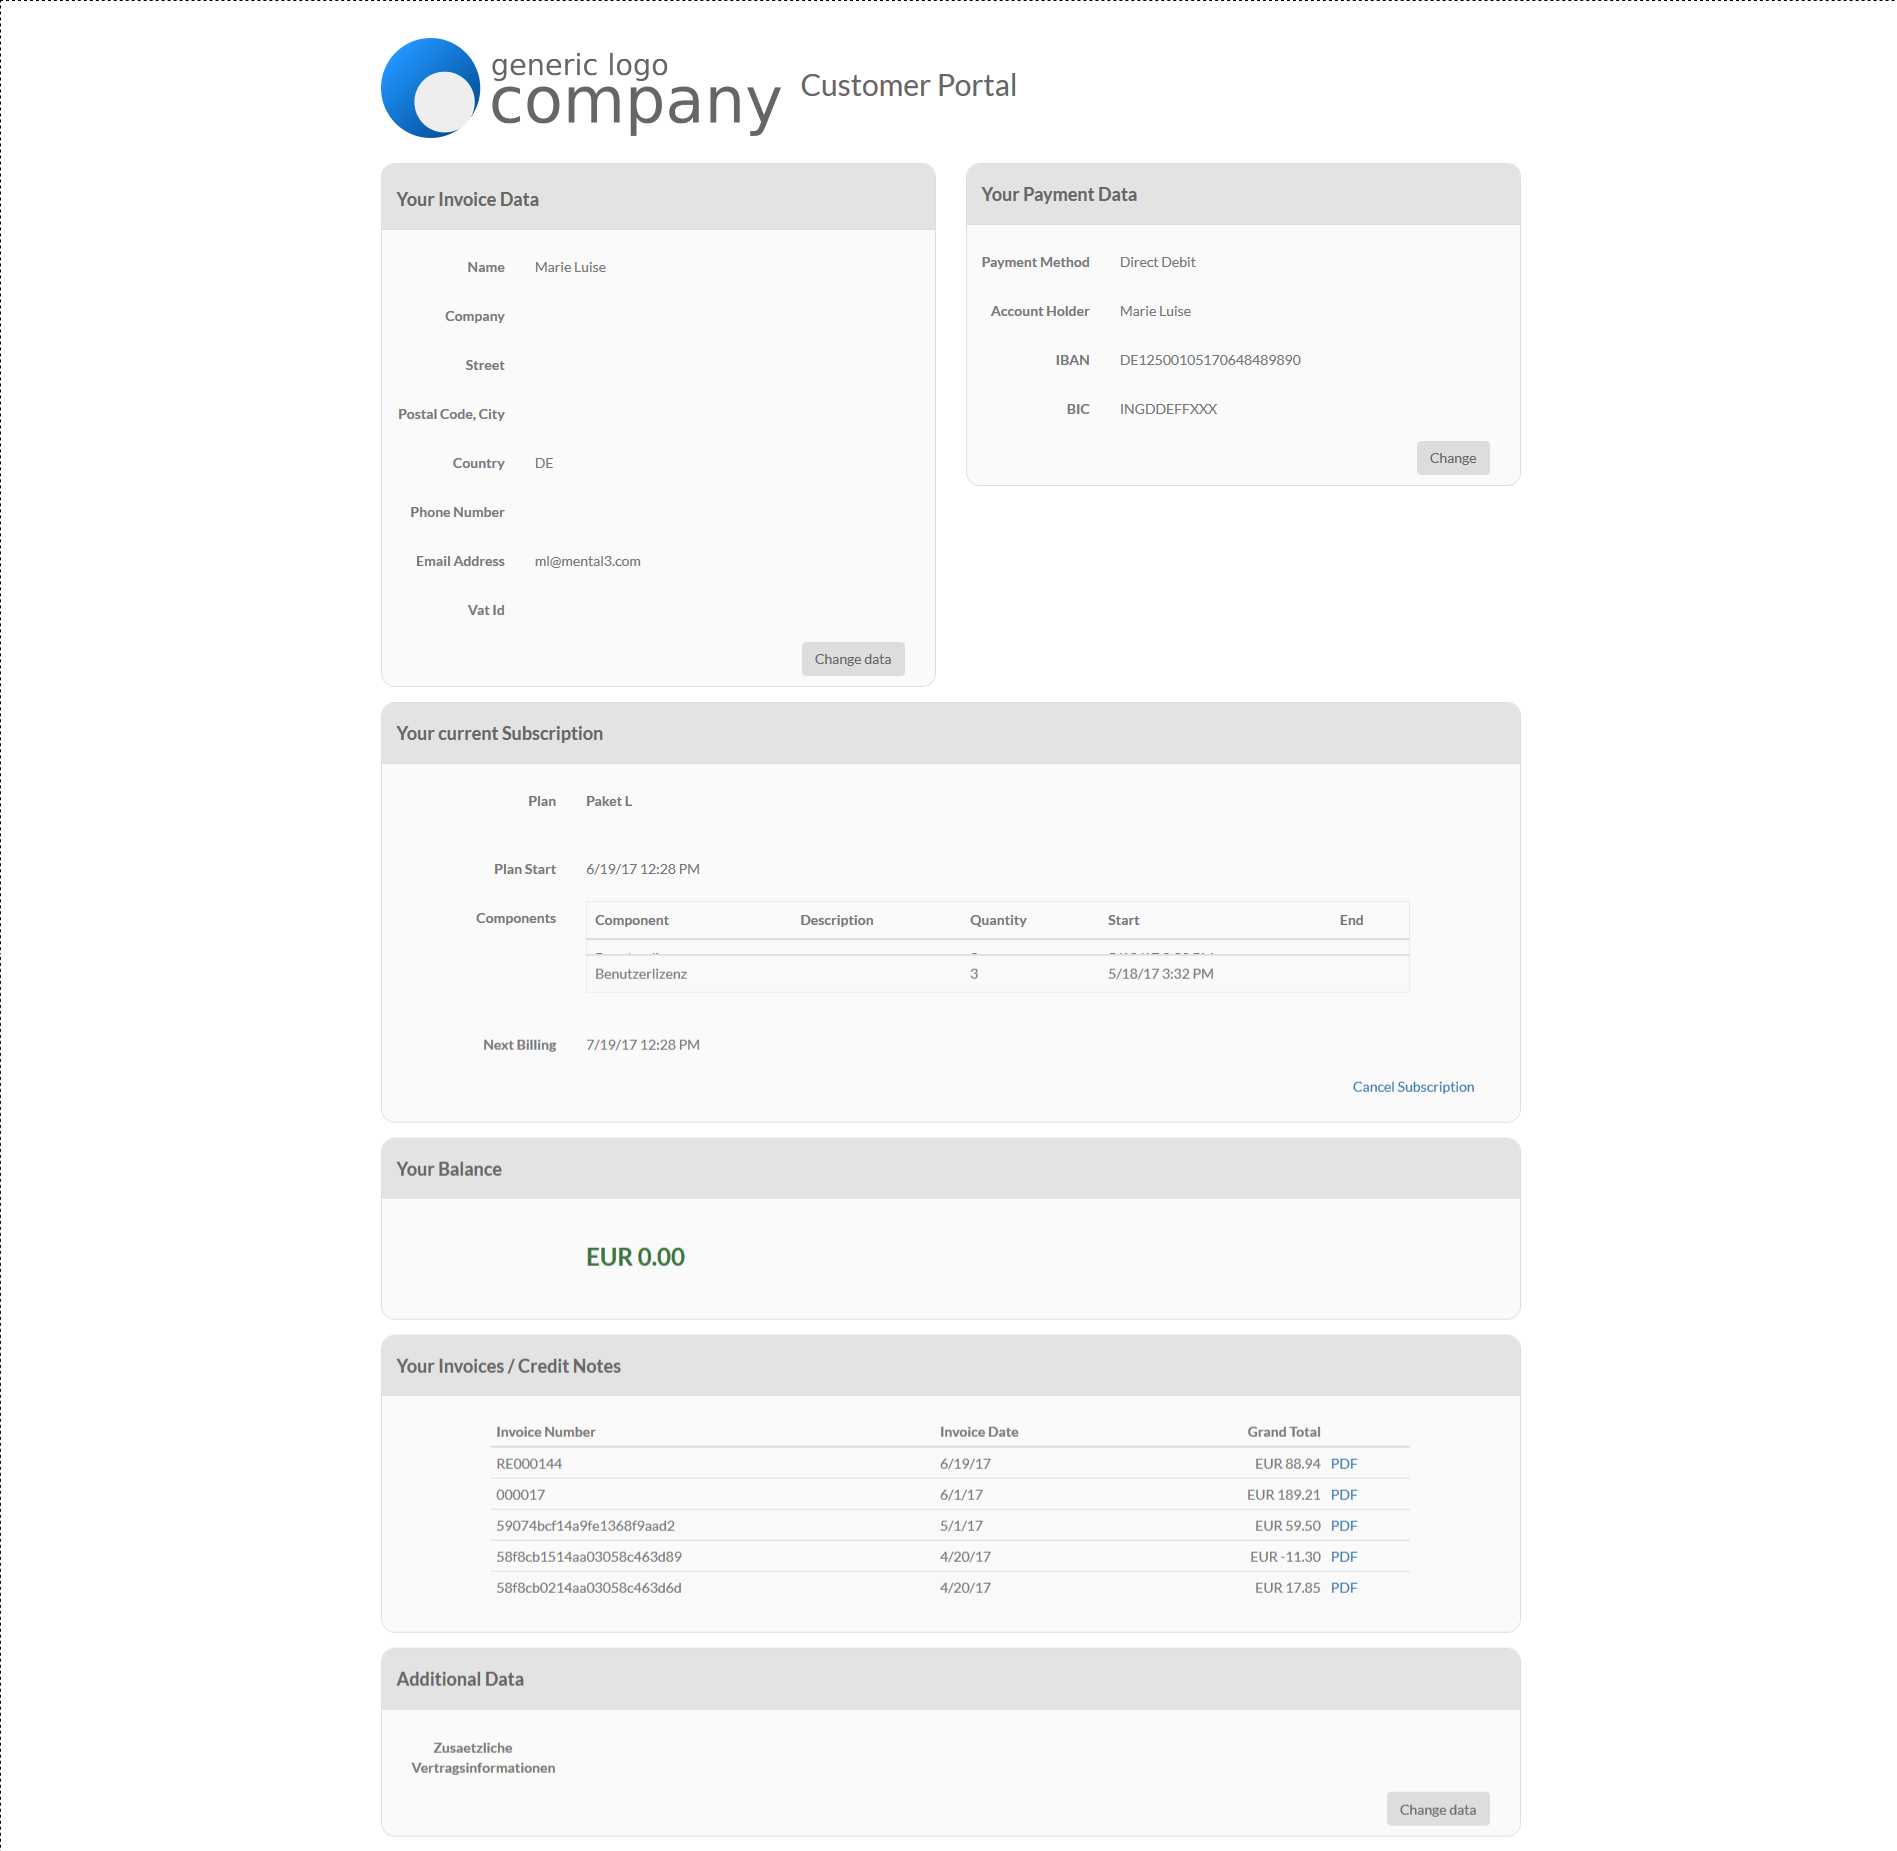
The hosted customer portal is a self-service page for existing customers to view the services they have booked, independently change invoice or payment data, cancel the contract in due time or, for example, download invoices and credit notes already received.
Both the order page (Hosted Signup, registration form) and the customer portal (Hosted Customer Self-Service Portal) can either be reached via a link and passed on to your customers, or the pages can be integrated into a separate website via iFrame.
Self-Service Settings
All settings for the self-service pages can be found under Settings > Integration > Self-Service Settings.
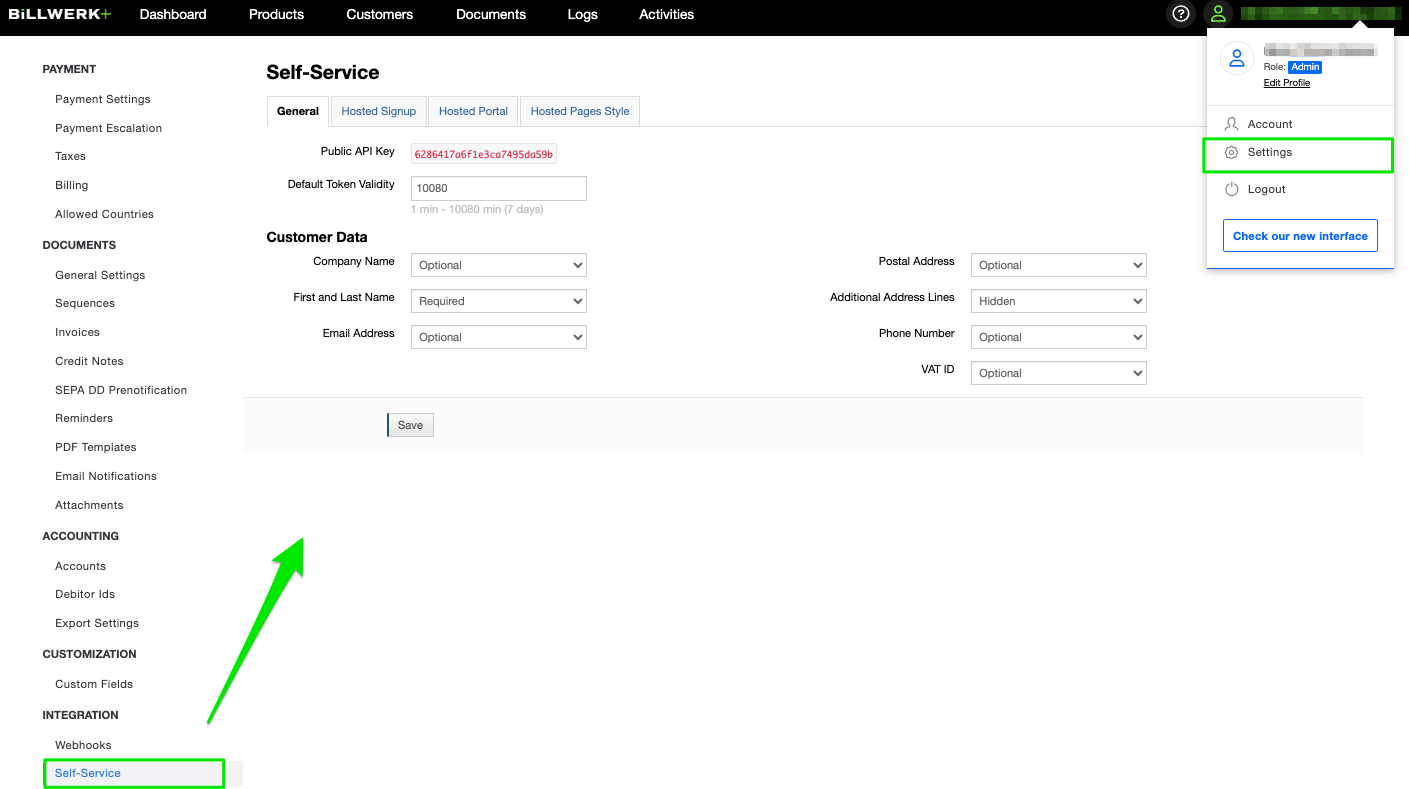
General
In the first tab you can:
check the Public API Key
set the Default Token Validity: Between 1 min - 10080 min (7 days)
configure which Customer data field is optional, required or hidden in the self service
Company name
First and last name
Email address
Postal address
Additional address lines
Phone number
VAT ID
Save your settings.
Hosted Signup
You have the following options at your disposition:
Decide, if you would like to
Ask for coupon code on signup
Show ExternalID in order preview
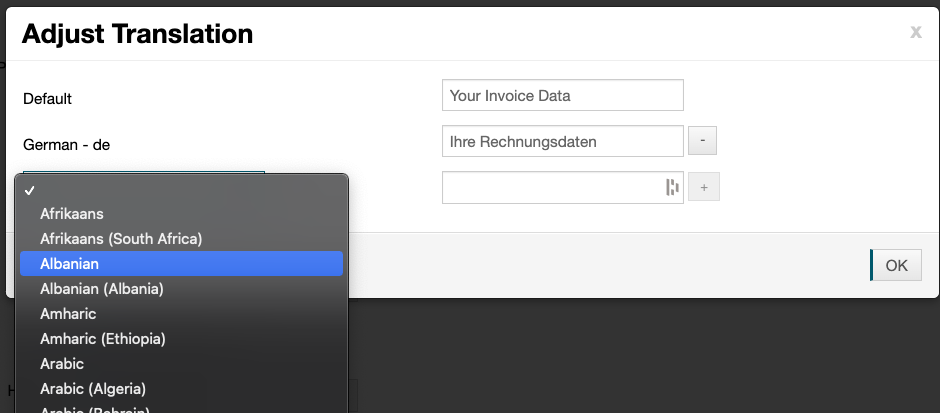
For each of the following information you can open the Adjust Translation window, where you can set a name for the different languages you need:
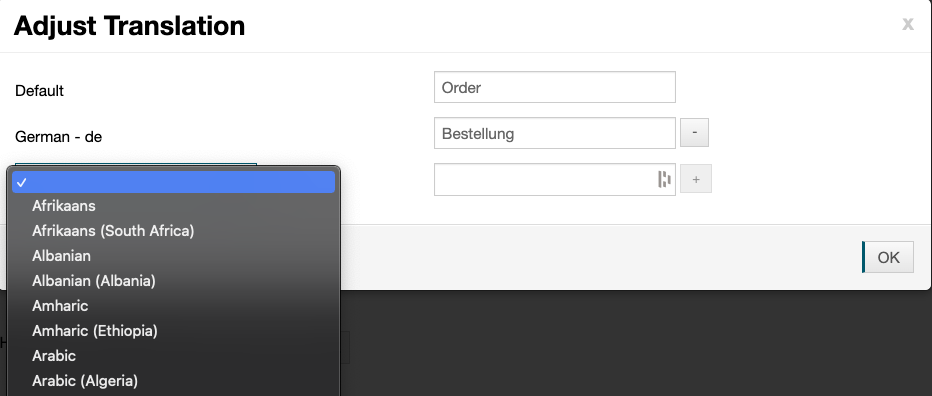
Page Title
Title
Order Heading
Customer Heading
Payment Heading
Metered Components Price list heading
Metered Components Price list description
Set the different URLs
Success URL: Customers will be redirected to this page on success. We'll attach a request parameter
contractIdto this URL.Error URL: Customers will be redirected to this page on error.
TAC URL: Insert the URL of your Terms and Conditions here. If set, it can be displayed by using the placeholder
{tac}in the Terms of contract settings below.DPP URL: Insert the URL of your Data Protection Policy here. If set, it can be displayed by using the placeholder
{dpp}in the Terms of contract settings below.Withdrawal Instructions URL: Insert the URL of your Withdrawal Instructions here. If set, it can be displayed by using the placeholder
{withdrawal}in the Terms of contract settings below.
Define your Terms of contract: Click on the

button to add the terms of contract; line per line. You can use
{tac},{dpp}or{withdrawal}as a placeholder for the respective URLs that have been defined above.Click on

to adjust translation and insert the different translations per language. The drop down list Mandatory confirmation can be set to required, if you would like to display a checkbox to let your clients confirm the different rows of your terms of contract.
Note
Note:(1) The output of the contract terms is displayed above the order button. The specification of each line is optional.
(2) The placeholders are only displayed properly if a URL is defined.
(3) The combination of several placeholders is possible. Maximal 5 rows can be specified.
Further information about the configuration options for contract terms and conditions can be found here .
Click on Save to finish the configuration.
To check your configuration, please follow this procedure.
Hosted Portal
You have the following settings at your disposition:
Decide, if you would like
that customers may change their own data via the default self-service portal
to allow contract cancellation via the hosted portal.
For each of the following sections you can decide
to display them or not
define a heading and adjust translations by clicking on
Customer
Payment
Contract
Ledger
Documents
Additional data
Click on Save to finalize your configuration.
Hosted Page Style
On this tab you can set the look & feel of your hosted page.
You can:
Upload a logo.
Set colors (using hexadecimal color codes) according to your corporate identity for:
Page title
Page background
Section:
Header Background
Header Text
Content Background
Discount Text
Button
Button Text
Action Button
Action Button Text
Border
As well as the:
Border width
Border radius
Click on Save to finalize your styling.
For more information on customizing the design, please click here.
Would you like to see the results of your settings? Let us have a look.
Hosted order page
First of all, you have to edit the plan variant settings to enable access to the hosted order form.
Enable access
Please go to the Products tab.
In the Plans tab, in the Plan variant column, click on the name of the variant you are interested in.
On the Edit plan variant page, scroll to Signup Settings and activate the Allow self-service signup for this variant option.
Now you can access the hosted order page preview.
Hosted order page access
Back on the Products tab overview, in the Plans tab, search for the plan variant you are interested in.
In the line of this variant, click on the

icon.
You will be redirected to the Self Service order form you configured in the Settings earlier:
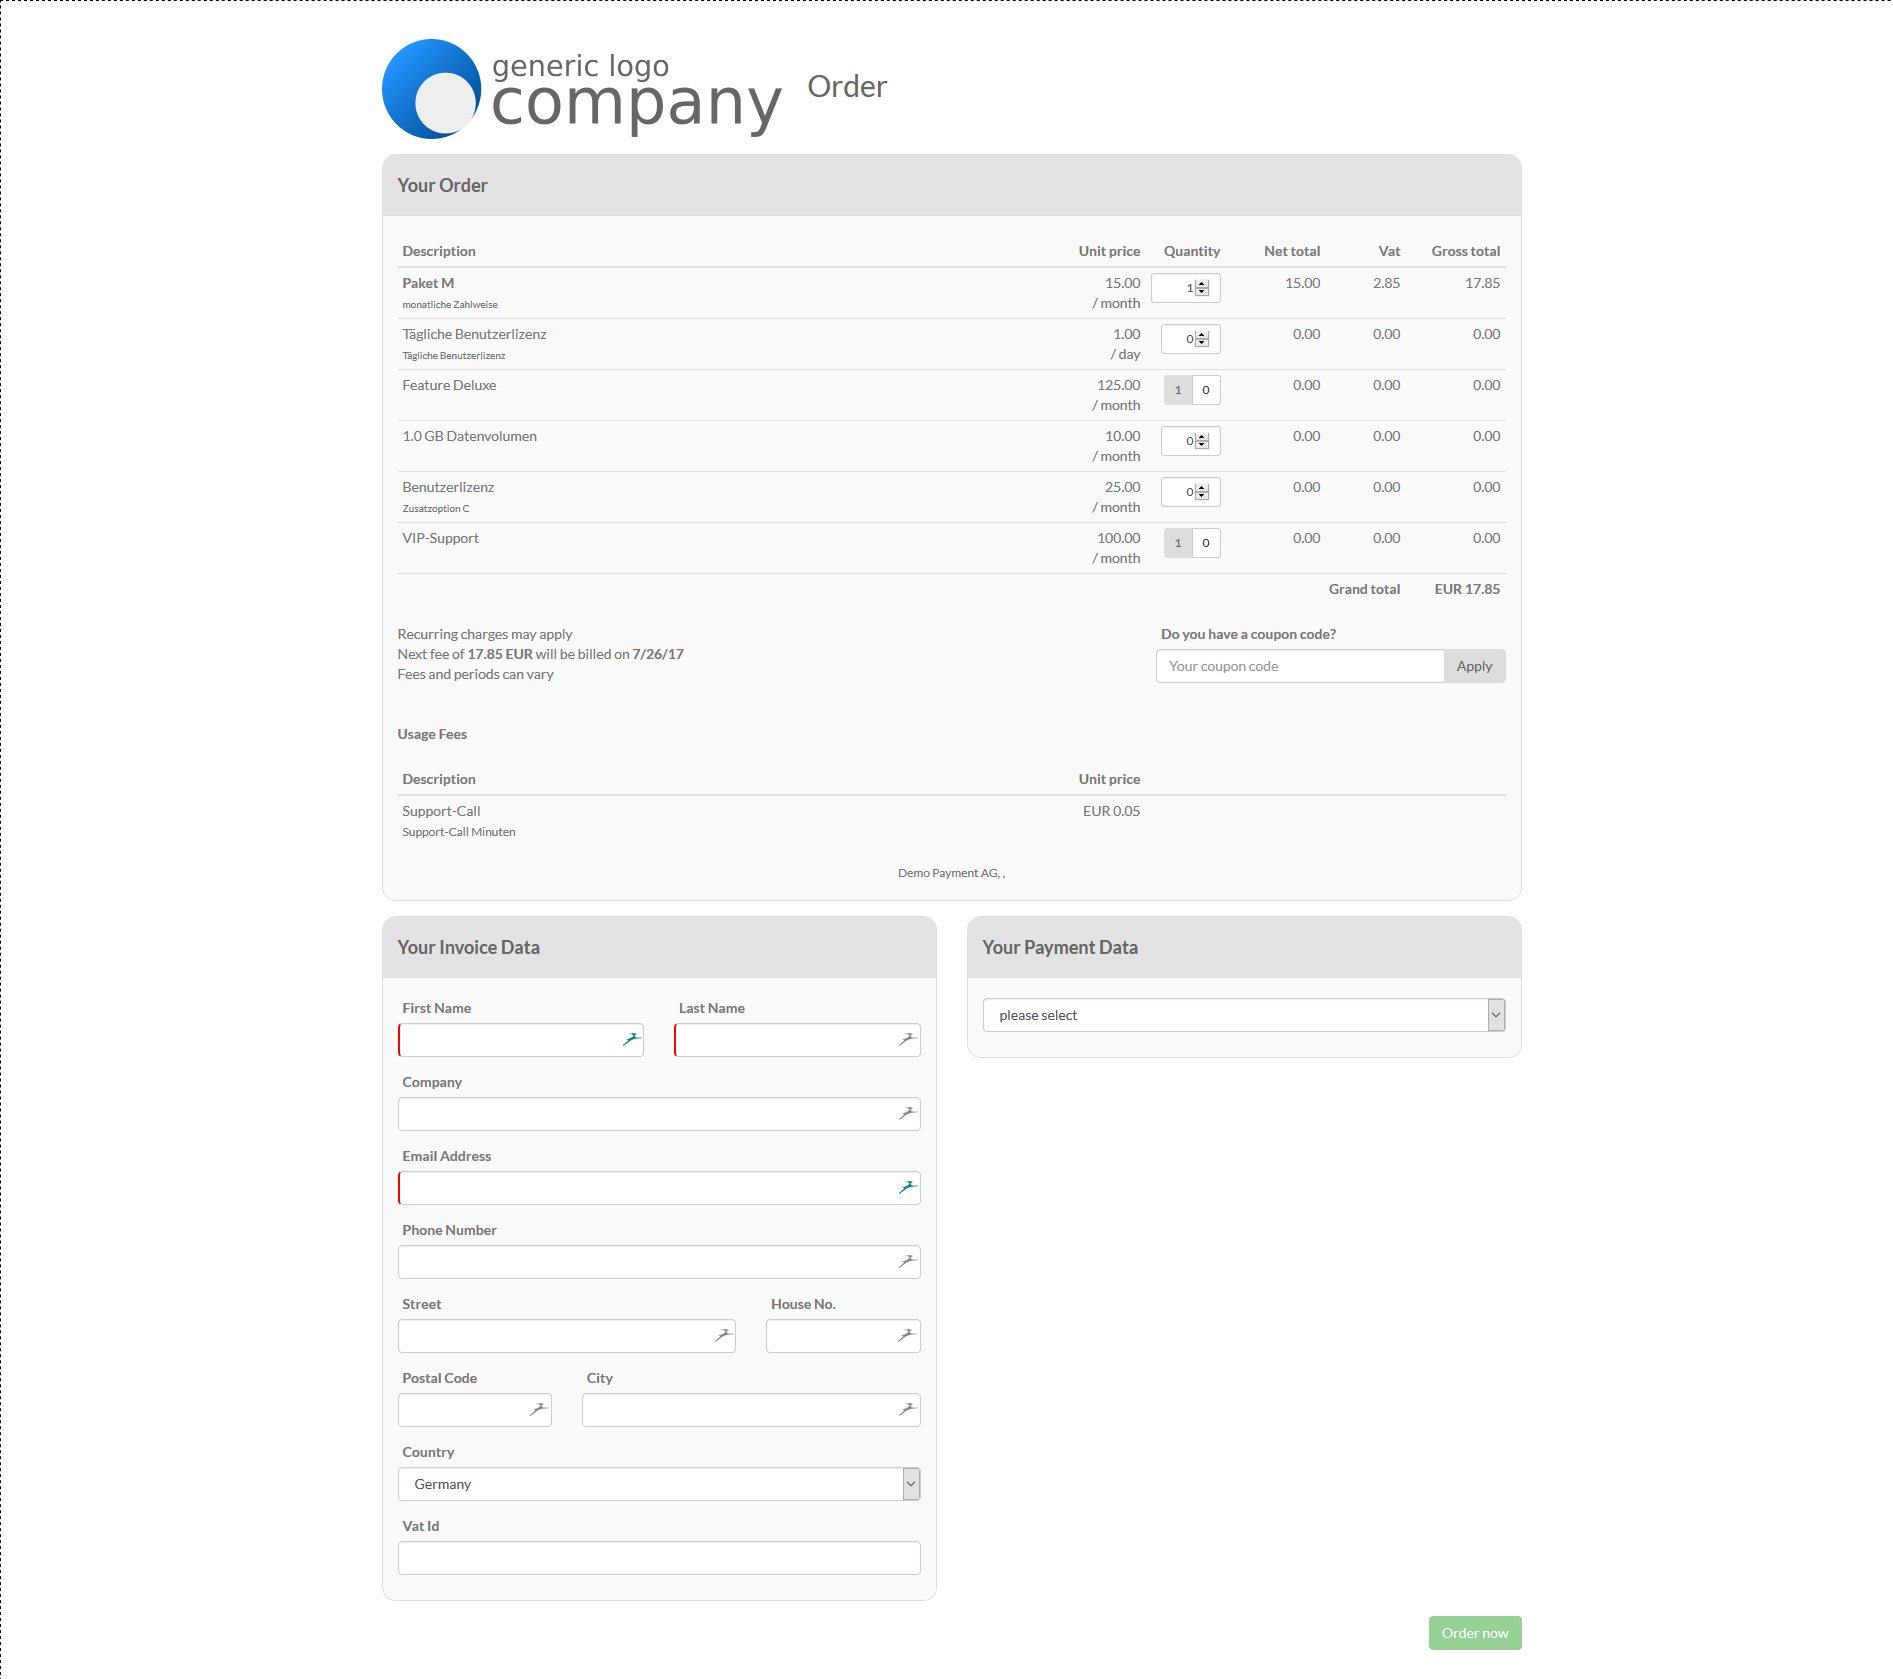 |
Displayed products
Each link on a hosted order page leads to a plan variant and all components in that product family to be displayed on the order pages.
Whether a specific component should be listed in the order pages can be defined in the respective component:
Open the Products tab.
On the Products page, open the Component tab.
Double click on the name of the component you would like to add.
Scroll to Signup Settings.
Activate the option show in self-service signup (available for quantity based and on/off components only).
If the component is activated for the order page, quantity based and on/off components can be freely added to the shopping cart by the customer.
Metered usage components can only be displayed as information in the Usage fees section using the show as pricing information in self-service option:
More about components can be found here.
Hosted customer portal
Example page of the customer portal:
 |
Access to the customer portal
Access to the customer portal is via a time-limited token. The expiry time of the self-service token can be configured under Settings > Self Service, please see above.
Access via the user interface
The link to the hosted customer portal of a contract can be accessed in the UI.
Please open the Customers tab.
Click on Reference code of a customer to open the Contract Details.
Click on Perform Action and then on Self-Service Access.
Access via own app or website
An access token for a specific contract can be requested via REST API. This allows direct access to the customer portal in your own app or website.
In the developer documentation you will find the function with which you can request the self-service token for a specific contract via REST API.
Access via link in an e-mail
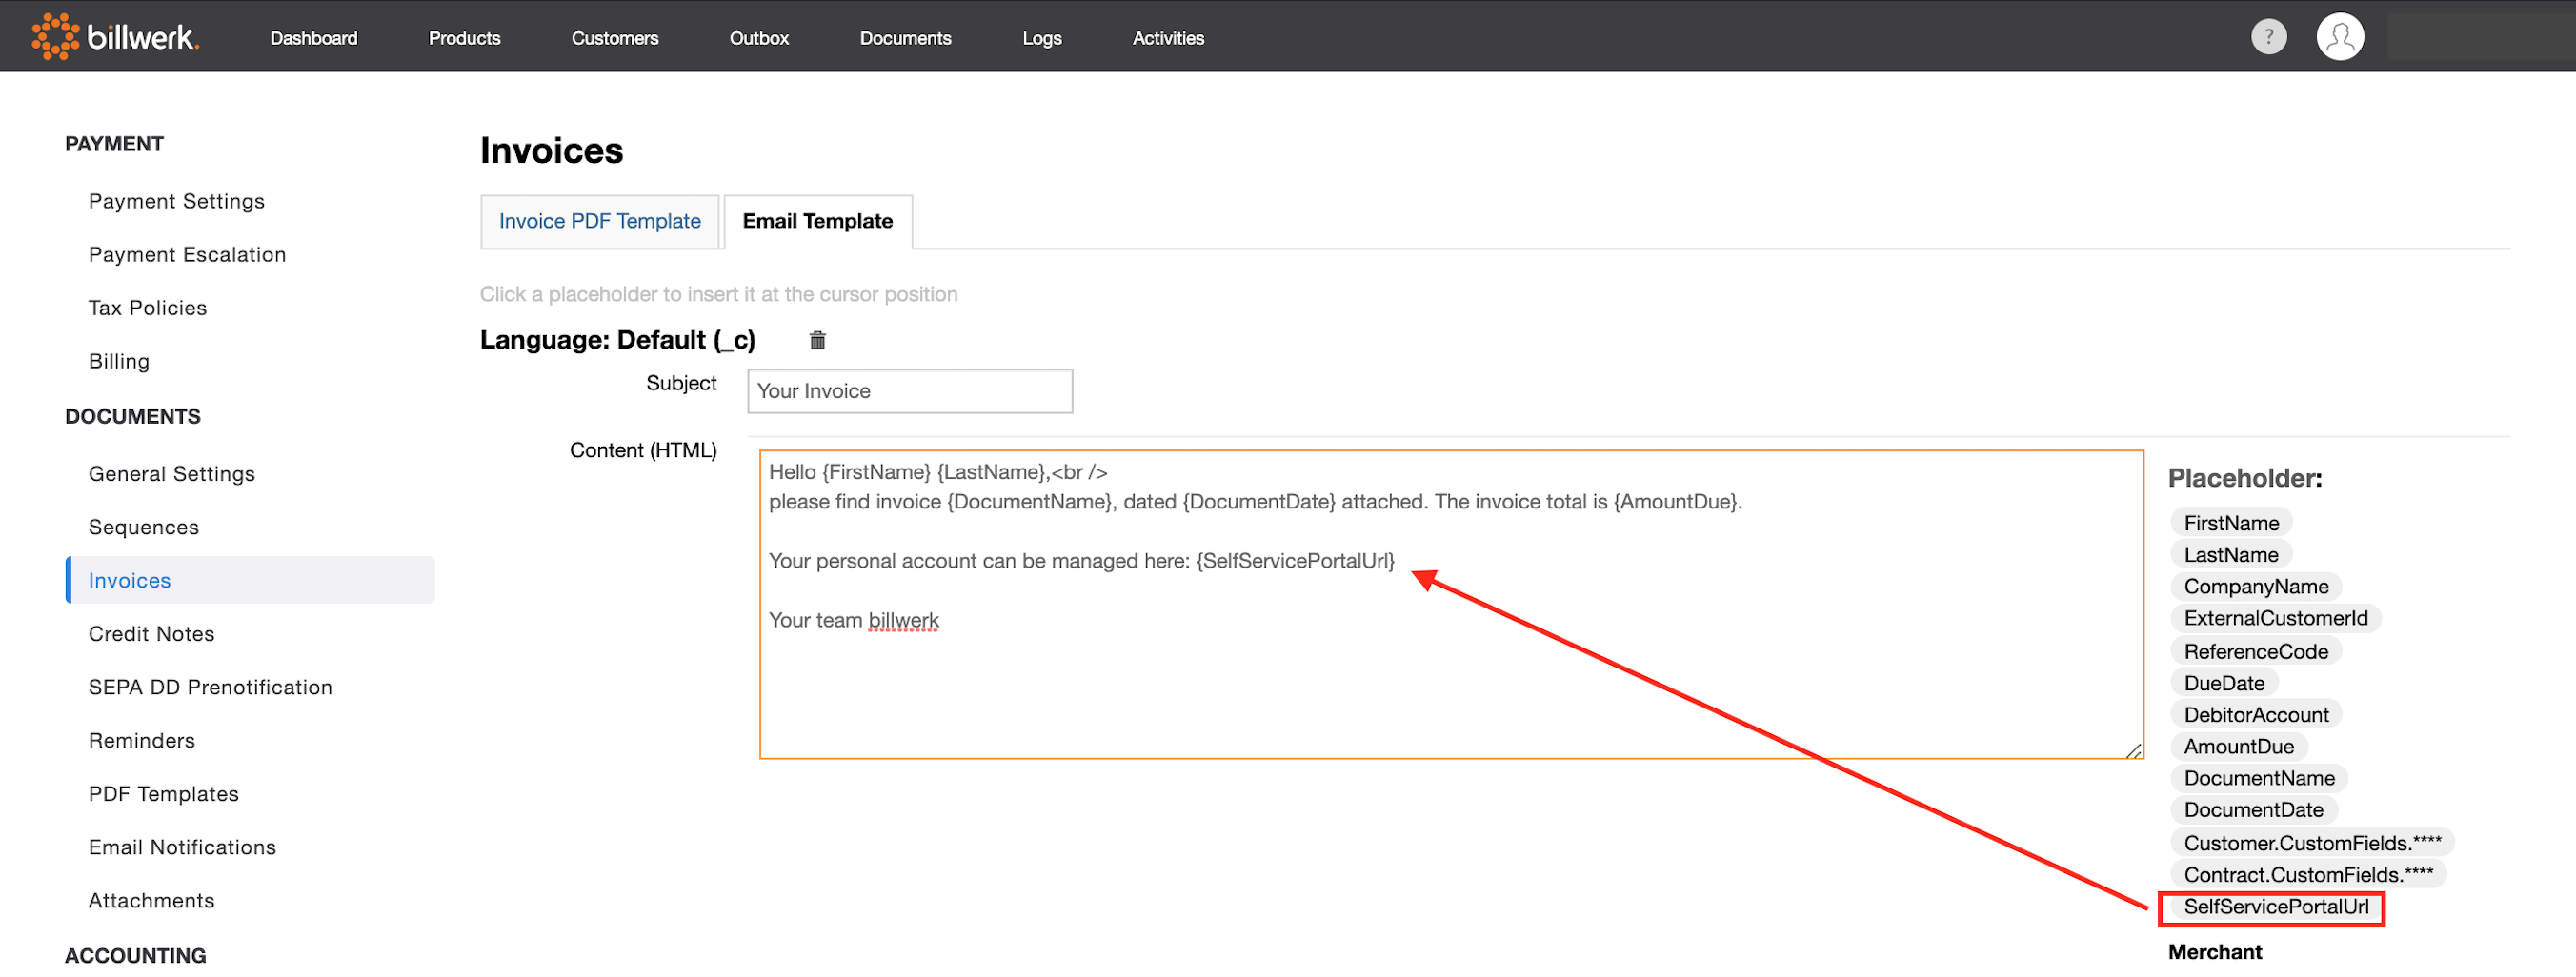
If you do not have a separate login area for your customers, you can send the link to the customer portal with each new invoice/credit note or reminder e-mail.
To place the link in the e-mail:
Go to Settings > Documents > Invoices > E-Mail Template.
Place the placeholder {SelfServicePortalUrl} anywhere, which will be replaced by the personal link that can be called up for a limited time.
Note: You can use the same placeholder in the credit note email template and the reminder email templates.
If the link to the customer portal has to be delivered in the respective customer language, the placeholder {SelfServicePortalUrl} can be supplemented by a URL suffix of the language, e.g: {SelfServicePortalUrl}?language=en.
For more information on how to deliver a specific language, click here.
 |
Displayed areas
For the customer portal, it can be set which areas the customer is allowed to view and change and which not. Detailed instructions can be found here.