Billwerk+ Subscription for WooCommerce
This guide shows you how to configure Billwerk+ Optimize for WooCommerce.
Note
Billwerk+ Pay and Billwerk+ Optimize are two parts of the former Reepay application. The application was not renamed everywhere yet, so you might still find functionalities with the old name as shown in this article.
Please watch these tutorials:
Billwerk+ Optimize: Subscription Plugin for WooCommerce (Walkthrough)
Billwerk+ Optimize: Subscription Plugin for WooCommerce: How to import customers
Setup and configuration
Please ensure first that you have Optimize Checkout for WooCommerce installed.

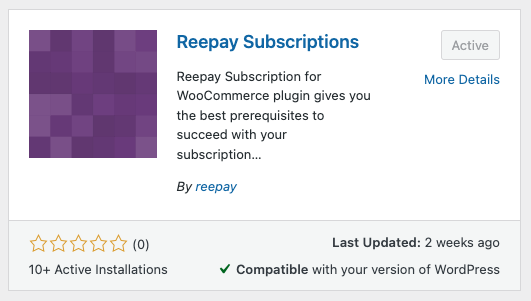
Find the Optimize Subscription for WooCommerce plugin in WordPress Plugin Directory, install it, and activate it.
Note
The logo and text might have changed.
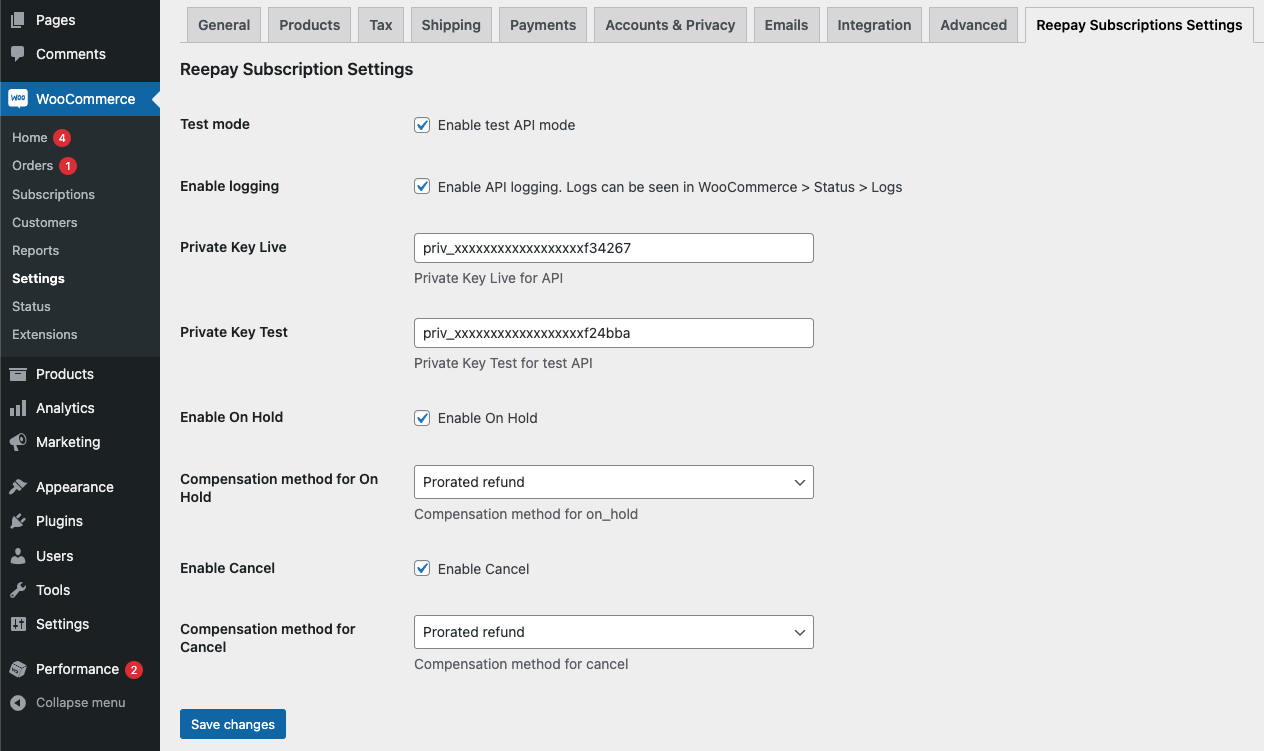
Once activated, you need to head over to WooCommerce → Settings → Optimize Subscription Settings. Here you need to paste in your private keys, which have to be the same key, as you have used for Billwerk+ Checkout. Please also enable test API mode, to use your test private key from your test Billwerk+ account.
Caution
Private keys have to be the same keys as those used for Optimize Checkout!
Create product and plan
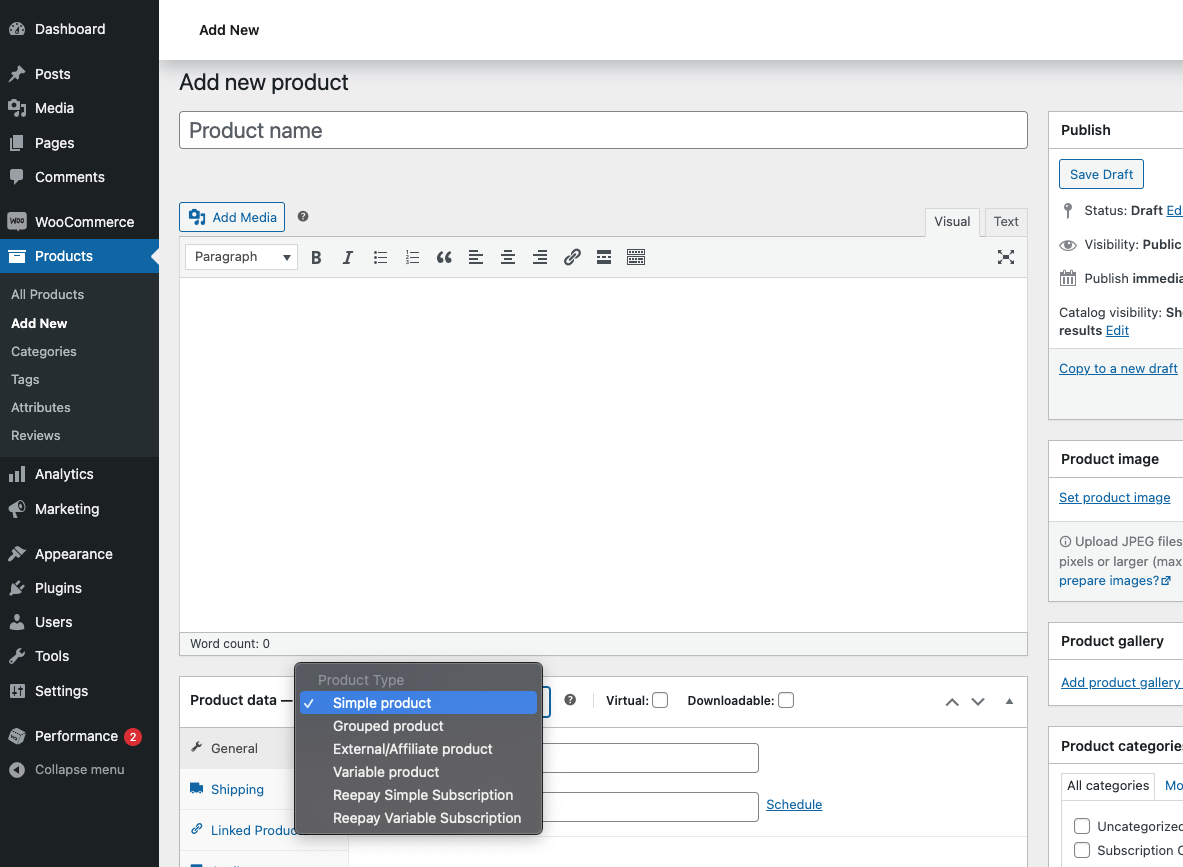
Now you can head over to Products and click on Add new product. In the Product data section, you can choose between :
Both versions are built upon the normal WooCommerce logic about Simple and Variable products.
Optimize Simple Subscription
For Optimize Simple Subscription you have these options:
Either you can create a new plan .
or you can reuse an existing plan.
Note
Plans can also be created and managed in the Billwerk+ Admin.
If you are just testing, you can use the same values as in the screenshot below. Remember to click on Create plan at the bottom.
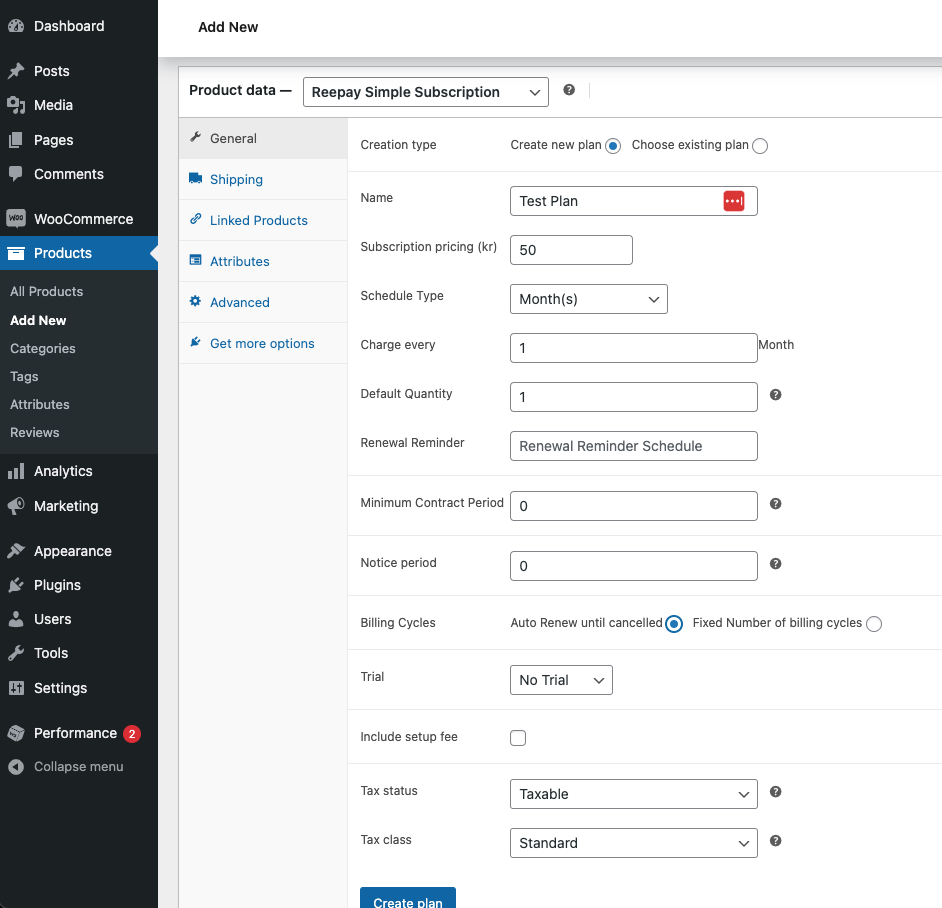
Now your plan is created and attached to your WooCommerce product. To verify this, you should be able to see the plan now as chosen under Choose existing plan. Here you have also the option to update the plan, but notice the Supersede Mode section.
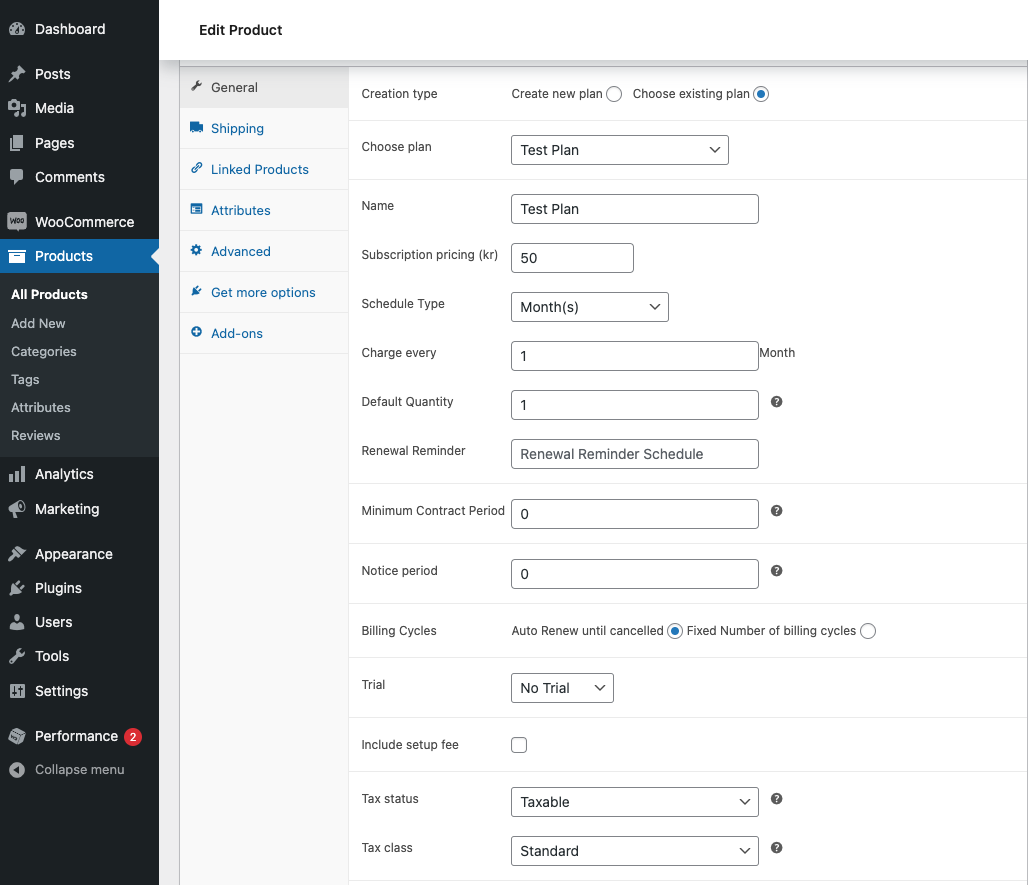
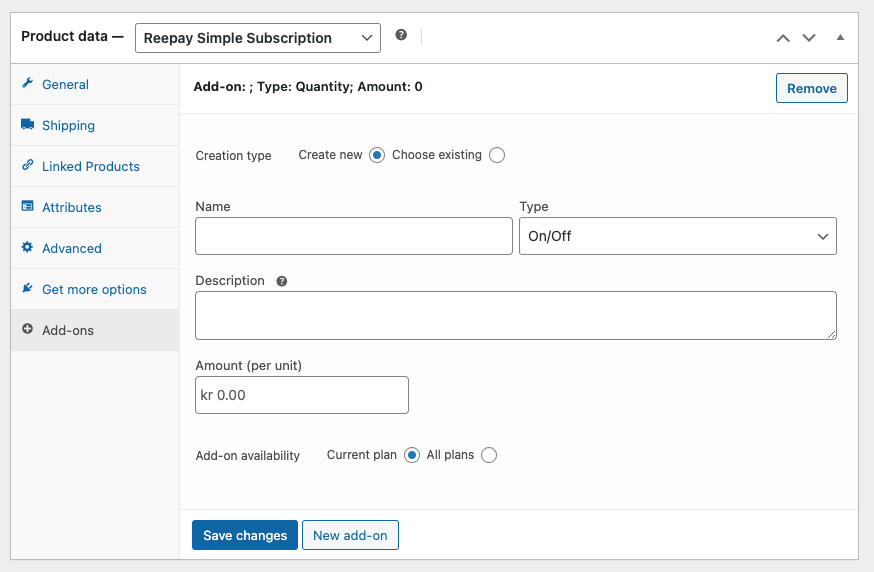
If you want to attach some Add-ons to the plan, you can click on the Add-ons section and click New add-on. Here you will see a similar view, where you can either Create new add-on or Choose existing add-on.
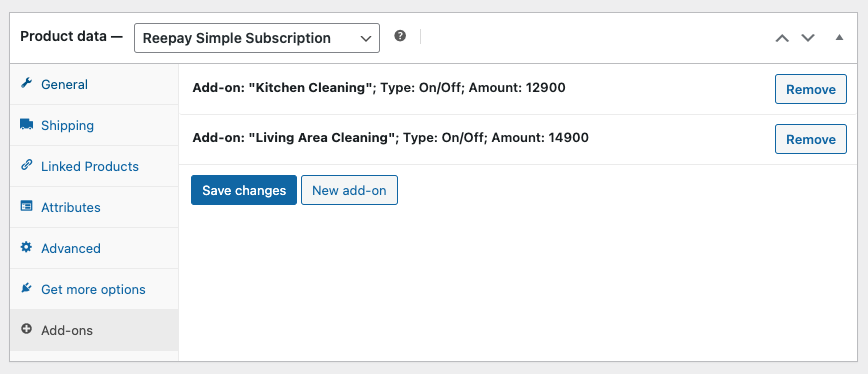
After you have created a couple of add-ons you will see something like this. Remember to save.
Optimize Variable Subscription
If you would like to create an Optimize Variable Subscription instead, you will see something like this after heading to the Variations section:
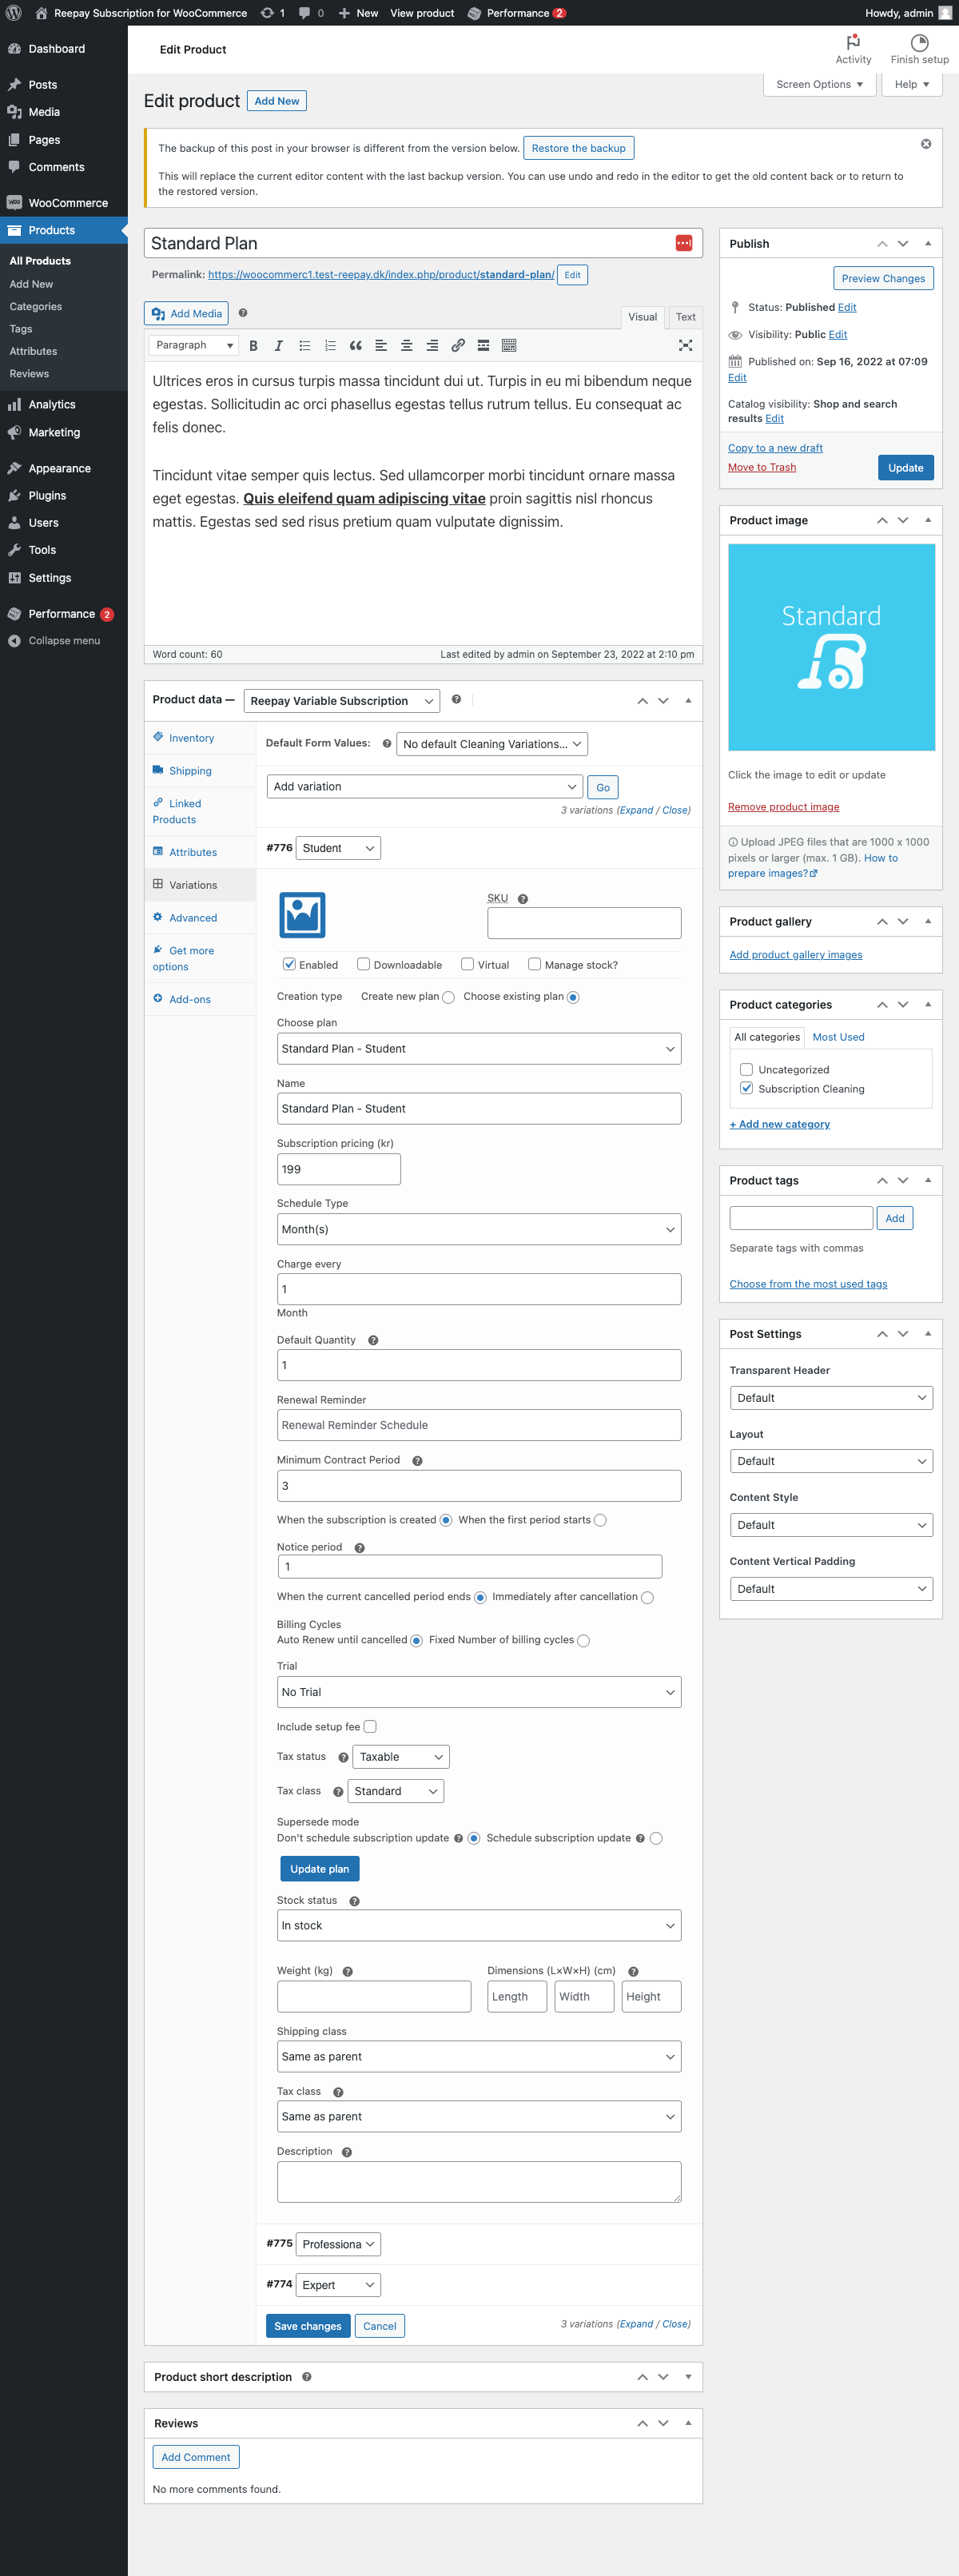
Same principle as before: Either Create new plan or Choose existing plan.
Subscription-based shipping
If you are selling box subscriptions and need to charge your customer for shipping at each renewal, you can configure add-on-based shipping.
Simply go to WooCommerce → Settings → Shipping .
Click one of your zones → Add flat rate shipping method.
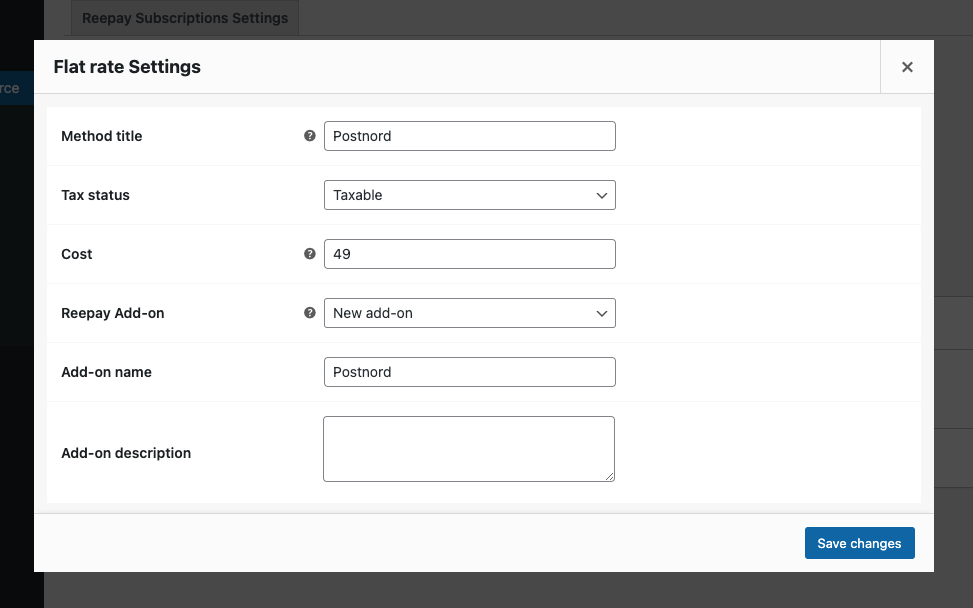
Then create a new add-on or choose the add-on you would like to use in the Optimize Add-on section.
Note
If you create a new add-on, the amount would be whatever you have typed into the cost field.
Coupons and Discounts
In WooCommerce go to Marketing → Coupons.
Add a coupon.
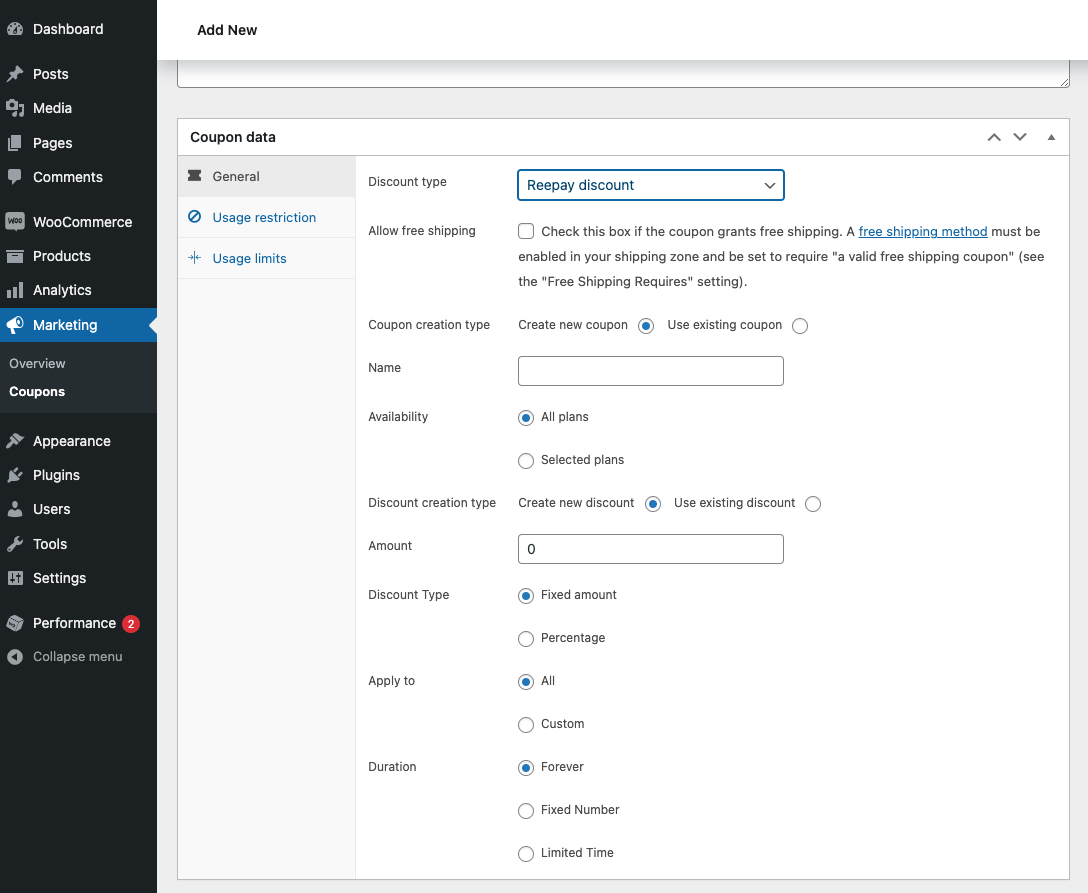
You will have the option to choose Optimize in Discount type.
Choose between Create new coupon or Use existing coupon.
You can give the coupon a name and choose which plan it should be valid for.
If you choose Create new discount you will have to , whether it should be a fixed amount or percentage, what the discount should apply to, and the duration
specify the amount,
decide, whether it should be a fixed amount or percentage,
select, on what the discount should be applied to,
and set the duration.
E.g. Fixed Number = 3 will give the customer a discount for the next 3 upcoming payments.
Purchase
Now navigate to the product you created.
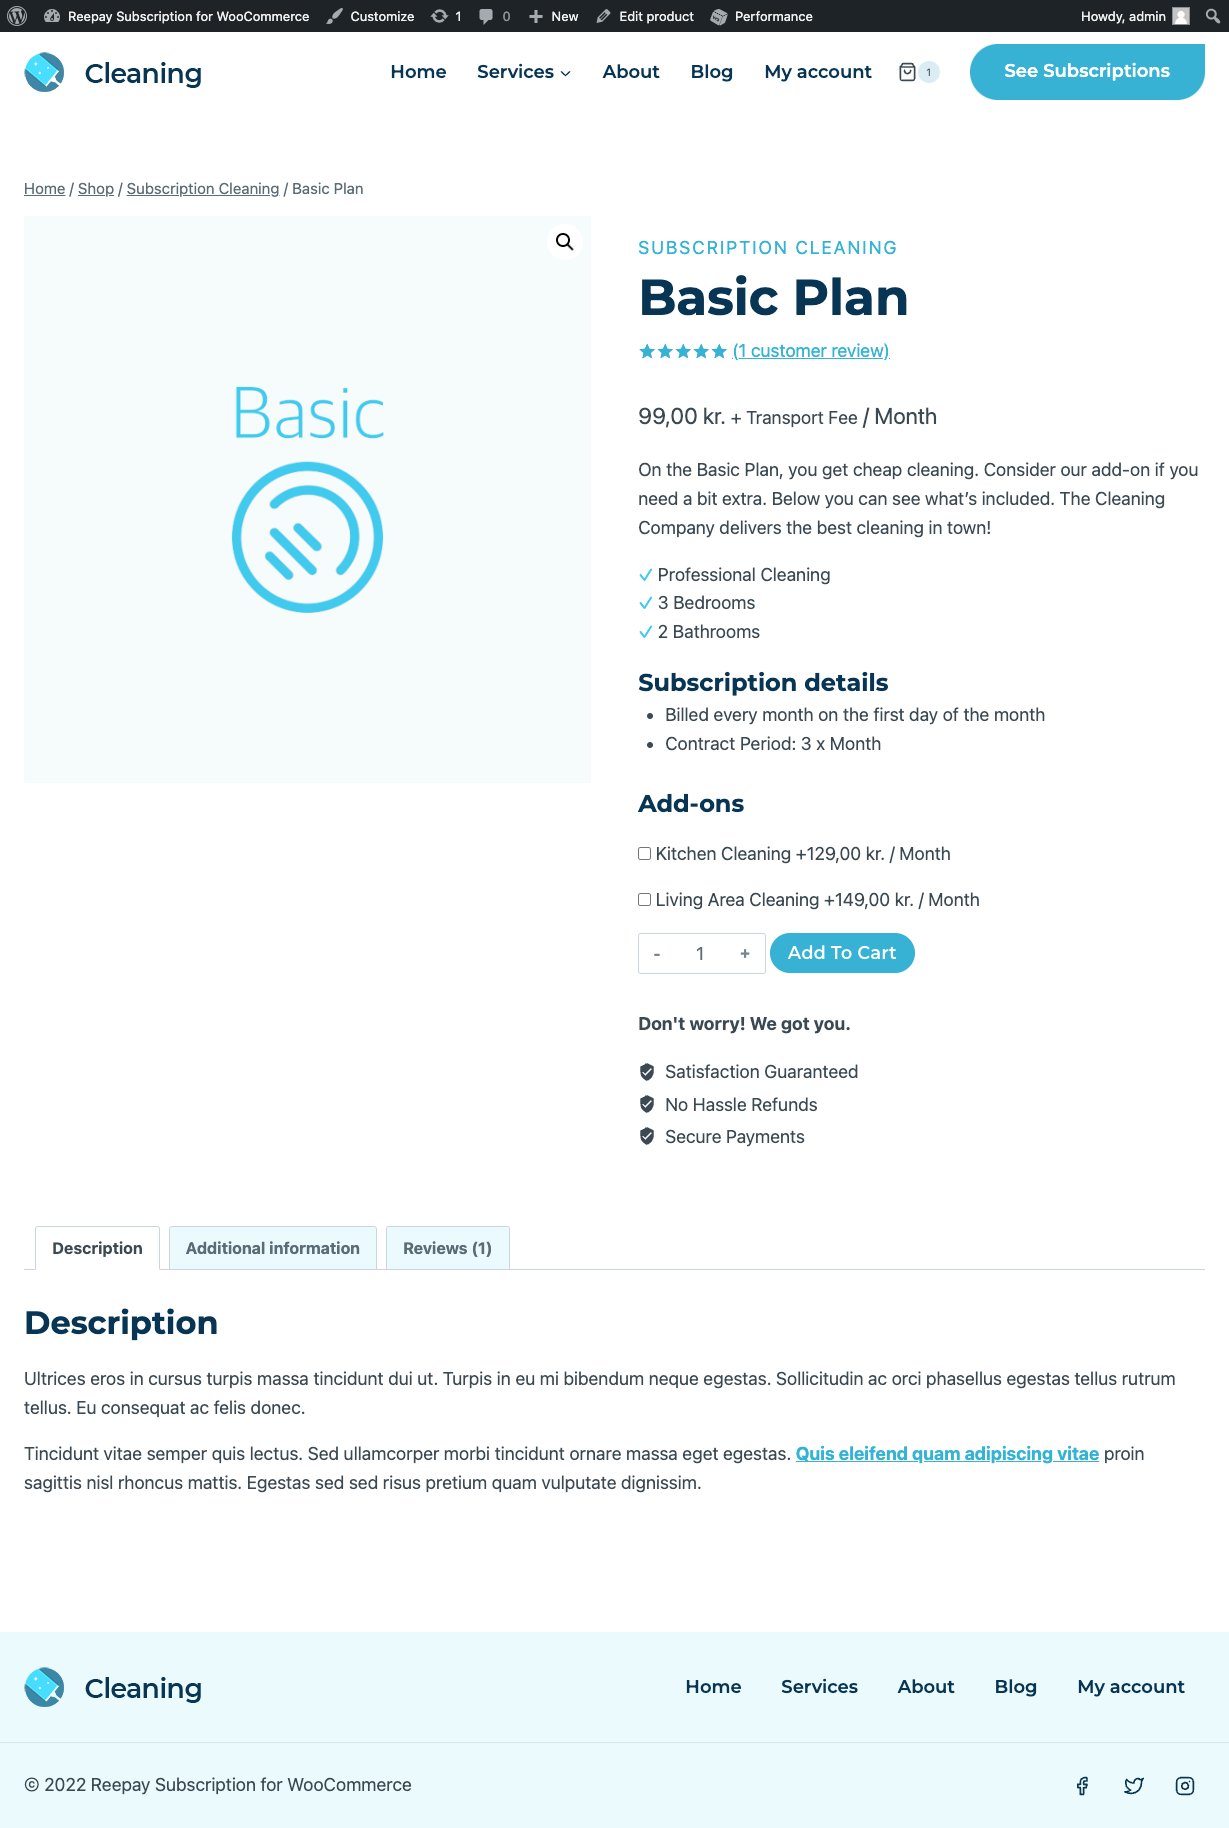
Here you can see the price and the duration. In this case 99,00 kr. / Month.
Also, you can see some additional plan information under Subscription details.
Lastly for this product, the customer has the option to select the add-ons you created.
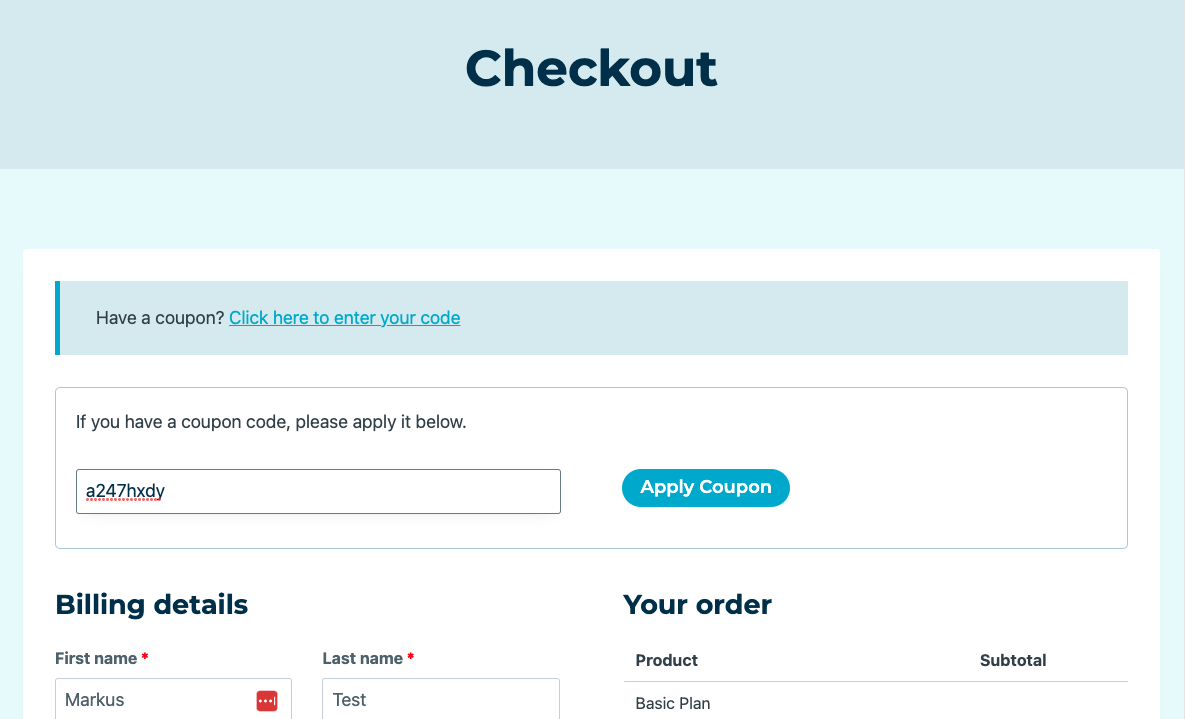
Once you have added the product to the basket, you can also try to apply a coupon if you have made a coupon that works for this plan.
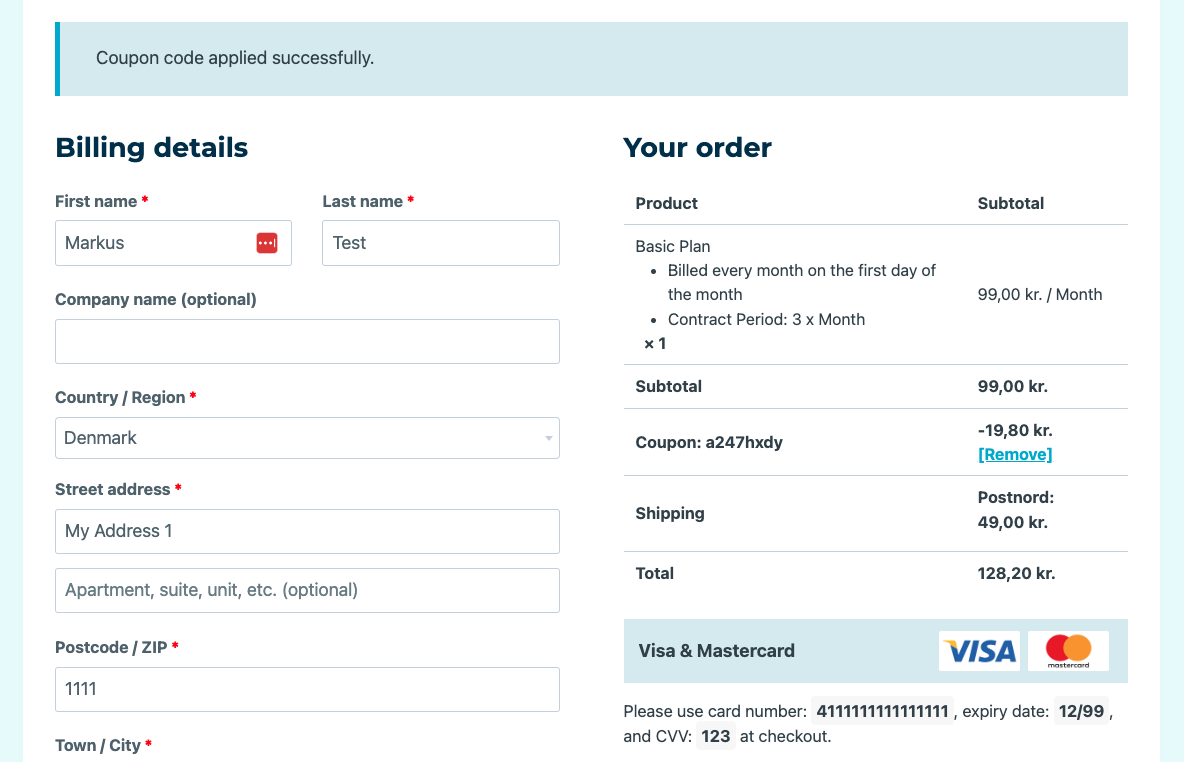
Once the discount has been applied it will be visible in the order summary.
Orders and subscriptions
When the order is paid, you will be able to find the order under WooCommerce → Orders.
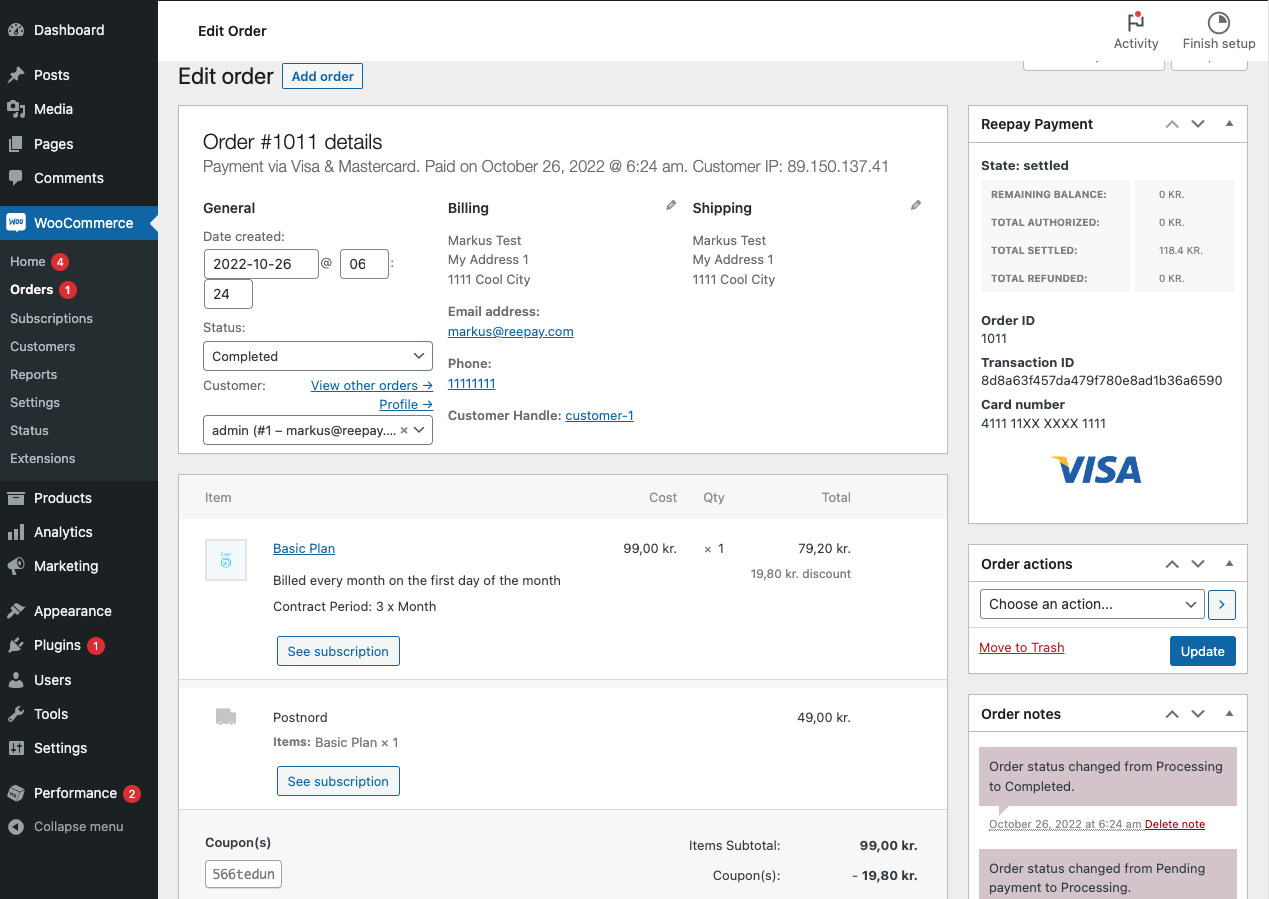
What you see below is the parent order, the subscription is based on.
The actual charges for the subscription will exist as sub orders. Click the Show history button to see sub orders.

If you click into the parent order, you will see the different products.
You can use the See subscription buttons to quickly jump to Billwerk+ Admin.
The same goes for the Customer Handle link under the Billing section.
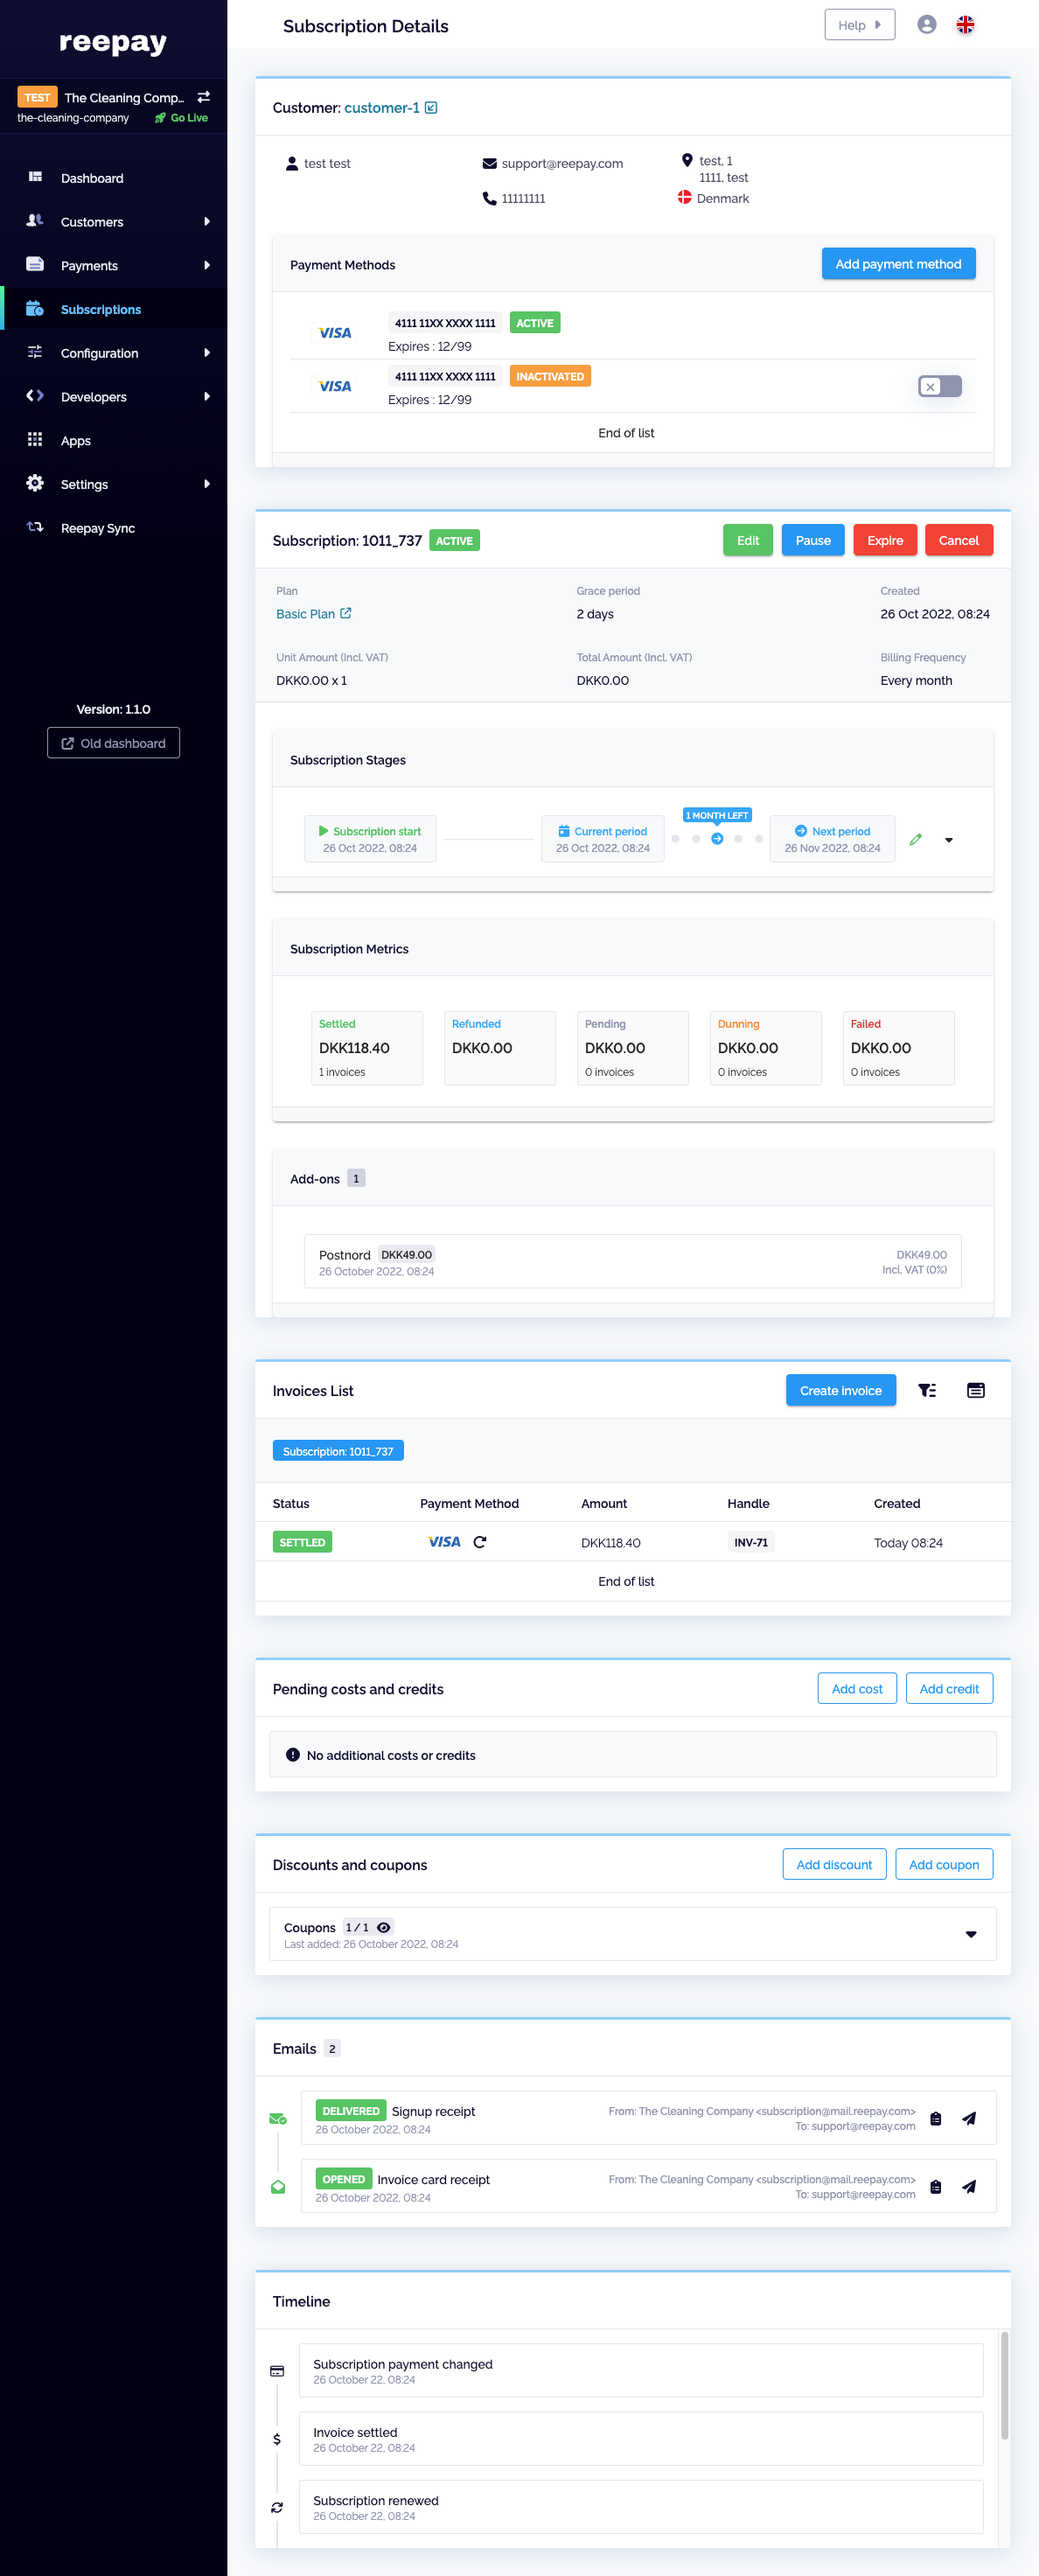
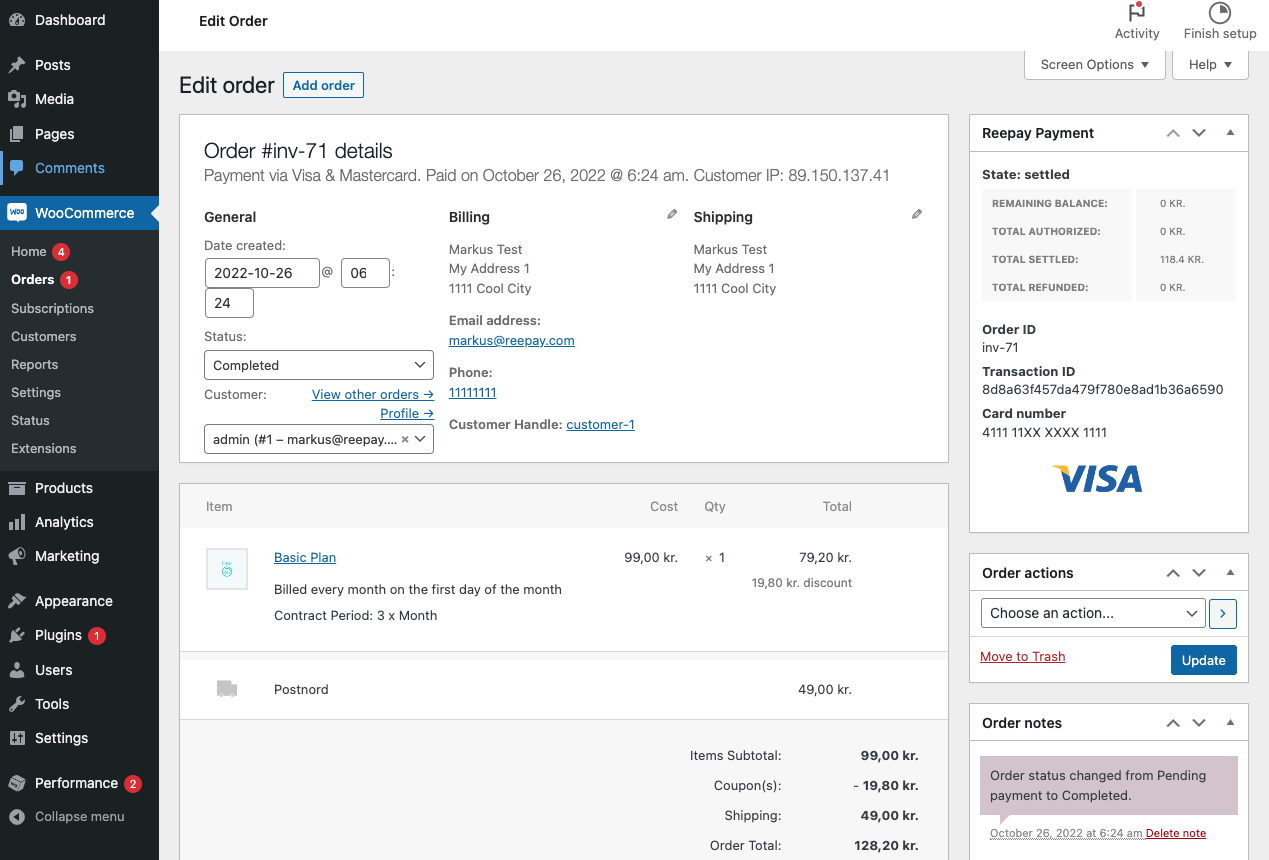
If you click on the See subscription button you will go directly to the subscription in Billwerk+, where you can manage it. In the Invoice List you can see INV-71 which also exist in WooCommerce as a sub order to the parent order.
Here can you see the sub order in WooCommerce:
Customers Self Service
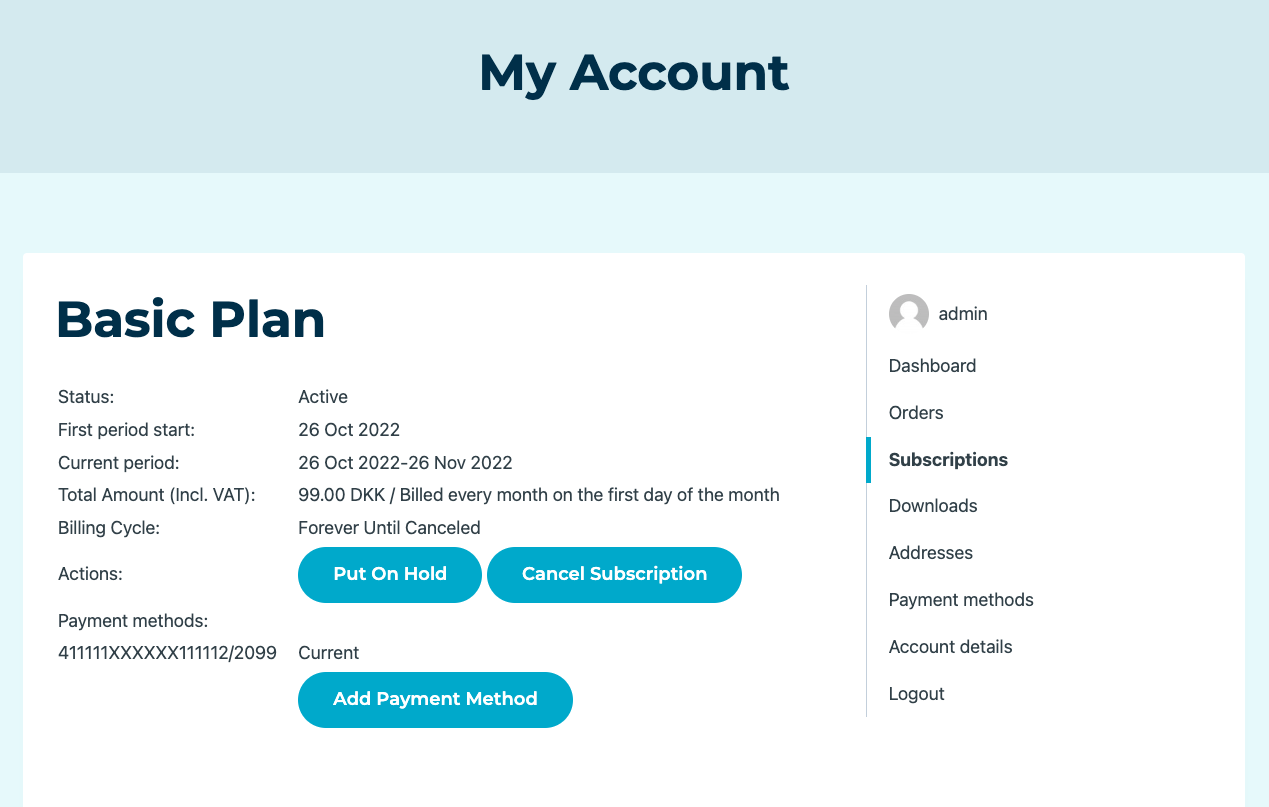
You customers are able to manage their subscription under My Account if you have enabled this in WooCommerce.
Under the Optimize Settings in WooCommerce, you can enable or disable the options to Put On Hold and Cancel Subscription.
The option to Add Payment Method is there by default.
