Accounting Export
With our DATEV accounting export, you can seamlessly transfer your financial data from Billwerk+ Optimize to DATEV, the leading accounting software in Germany. This means no more manual data entry or double-checking, saving you valuable time and effort.
You can find the option to enable the feature under Configurations > Financial processes > Accounting Export.
Tip
The DATEV Accounting Export is currently available in it's beta version. Please reach out to our Customer Care team under ree-support@billwerk.com if you would like to become a pilot user. Don't forget to provide us the following information:
Datev consultant number
Datev account number
SKR 03 or SKR 04
account length
intervall in which you want accounting exports to be created (daily, weekly or monthly)
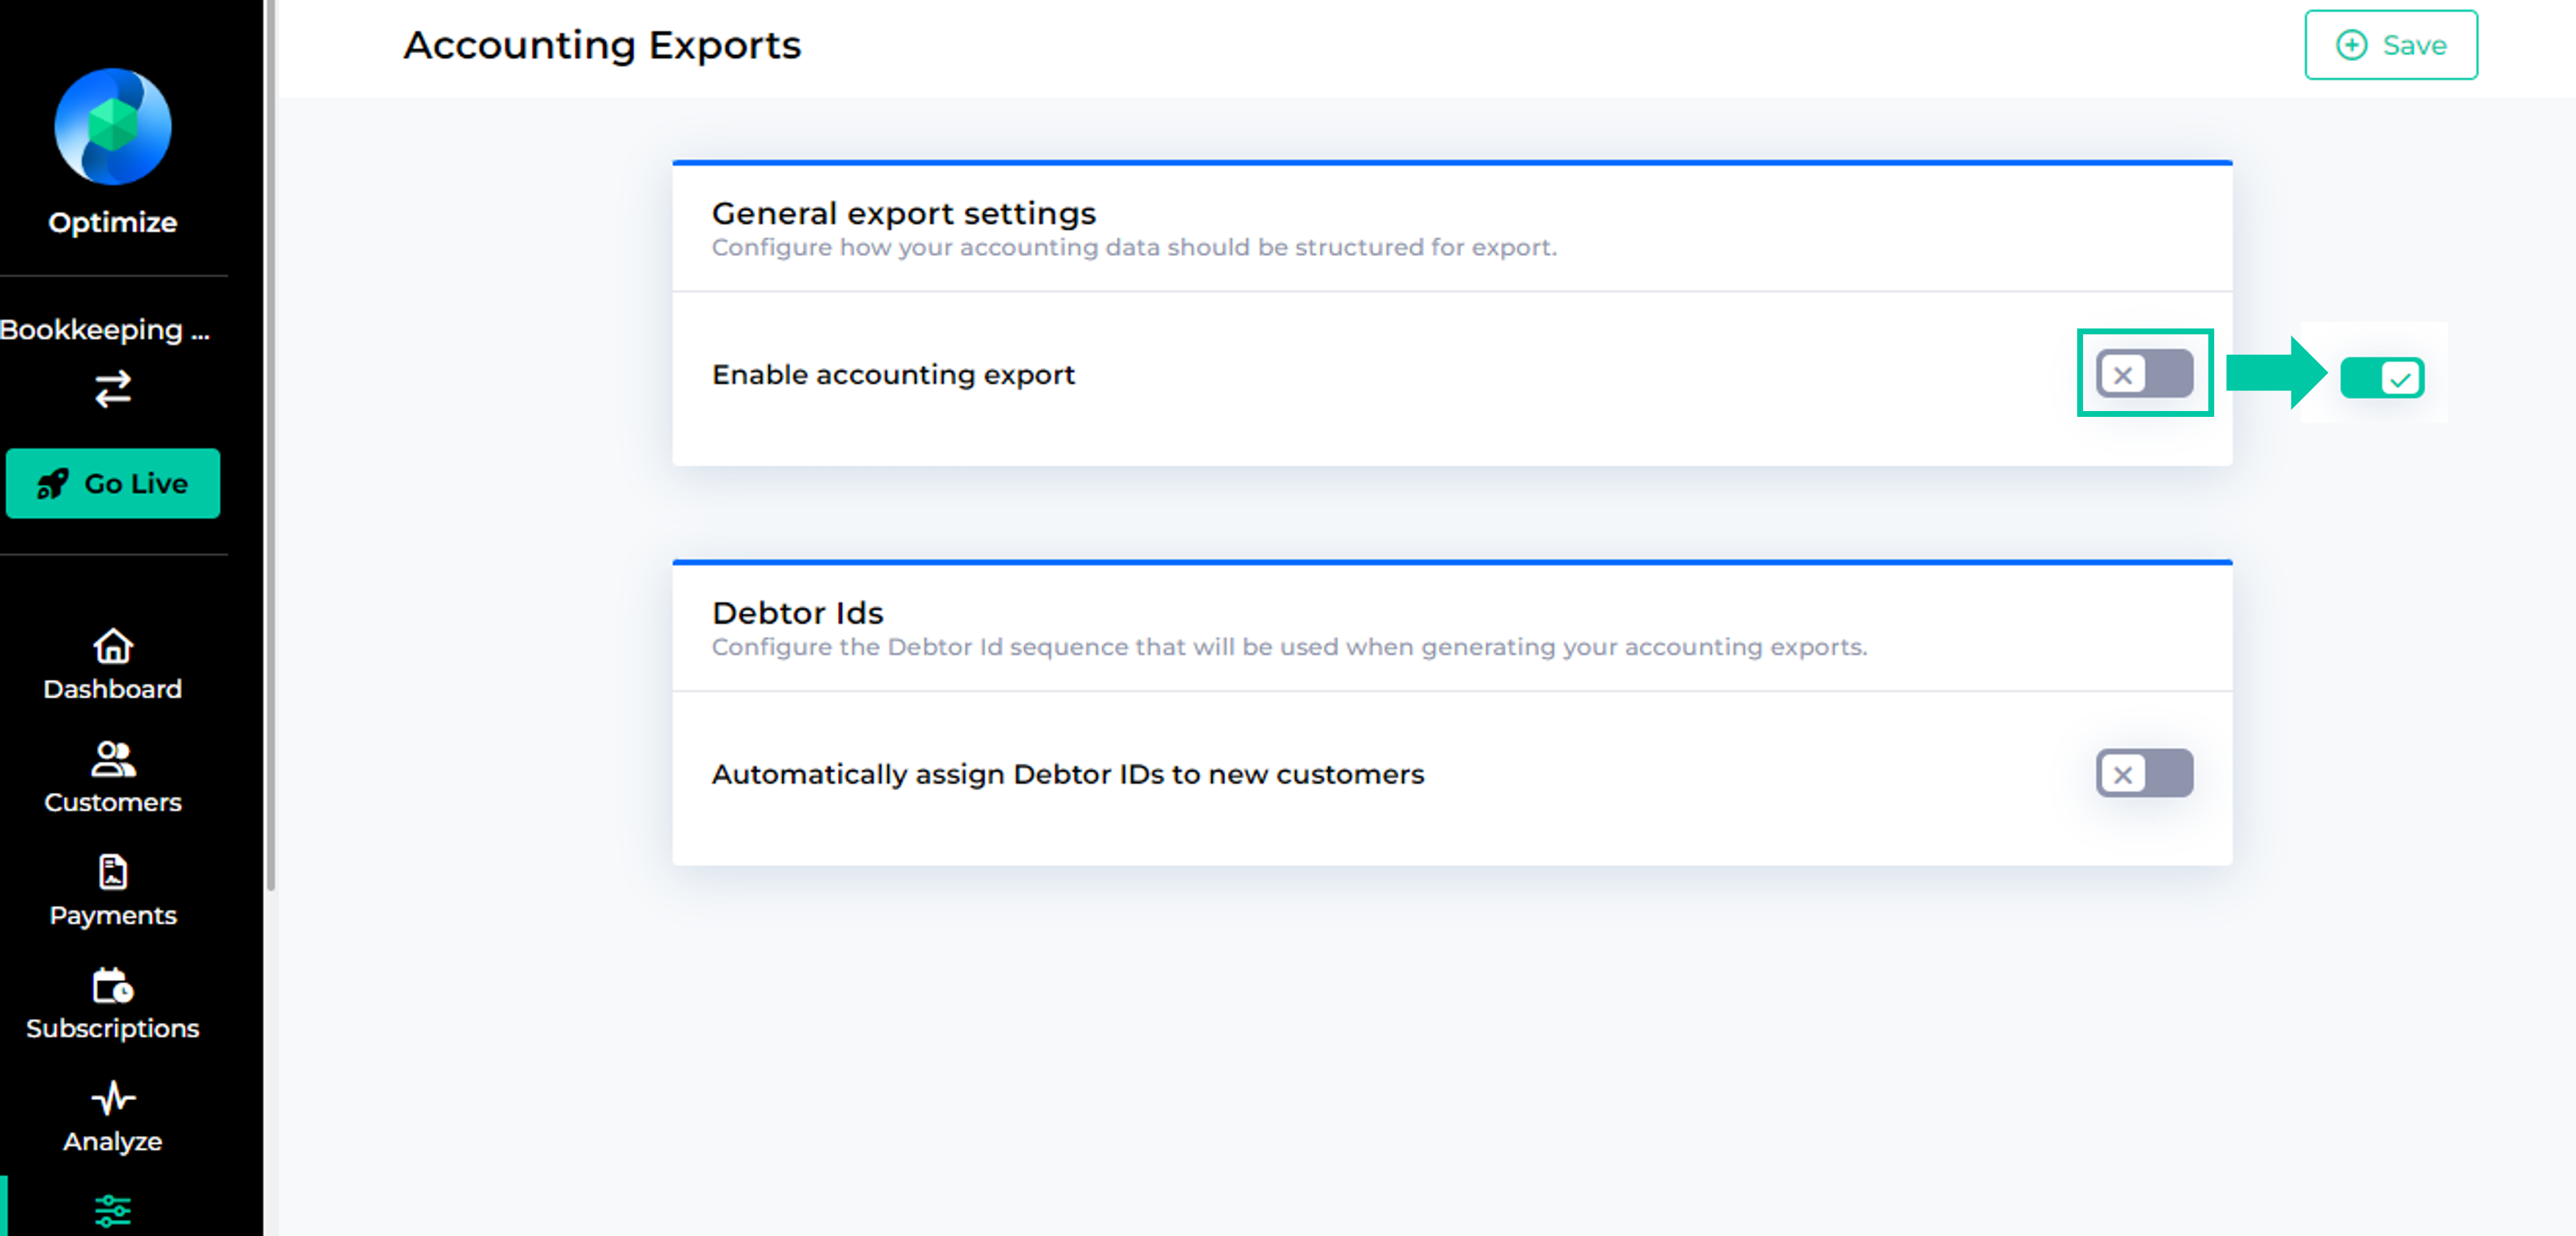
General export settings
Turn on the automated accounting export by enabling the toggle “Enable accounting export”.
Then choose your desired export format:
DATEV: You will receive a format that's compatible with the accounting program “DATEV” which can be customized using the settings below.
CSV: You will receive a neutral CSV-format containing your accounting data.
Next, choose your desired export interval: Choose how often you would like to get your accounting exports generated. You can choose between:
Monthly: Accounting exports will be generated on the first of the following month for the previous month.
Weekly: Accounting exports will be generated every Monday for the previous week.
Daily: Accounting exports will be generated every day for the previous day.
DATEV export settings
I you have chosen DATEV, in the General export settings, you can configure how your DATEV exports should look like:
Include header: You can decide whether you want your DATEV export to include a header. If you want a header to be part of your DATEV-export, make sure to also fill in the settings for “DATEV consultant” and “DATEV client”.
“On” means that the export file includes the header and thus complies with DATEV’s EXTF-format.
“Off” means that the export file does not include the header and hence complies with DATEV’s ASCII-format.
DATEV consultant: Enter here your DATEV consultant number. It will be included in the header of your DATEV-export files.
DATEV client: Enter here your DATEV client ID. It will be included in the header of your DATEV-export files.
Tip
If you don't use DATEV, but any system that is compatible with the DATEV-format, you can enter any dummy values here.
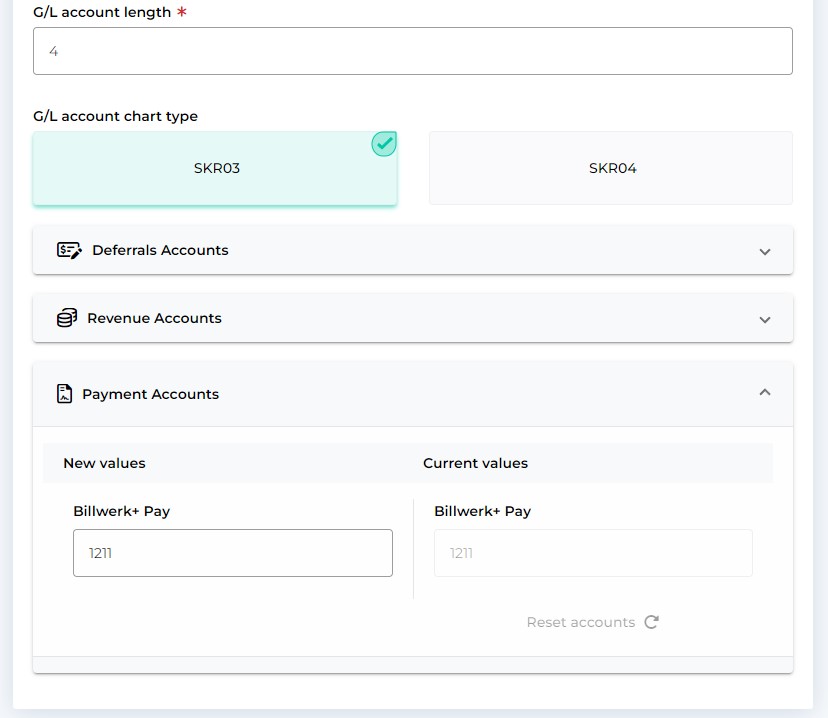
G/L account length: Select how many digits your account numbers have. Please note: In DATEV it is not possible to decrease the length of the field "G/L Account length" after it has been increased. Read more.
G/L account chart type: Postings will be generated using the standard account numbers of the selected G/L account chart type. Please select between SKR03 and SKR04. These are the standard accounts that are assigned by default:
Standard Chart of Accounts
SKR03 | Domestic (DE) | EU | Non-EU countries |
|---|---|---|---|
B2B | 8449 (19% VAT) 8334 (7% VAT) | 8337 | 8338 |
B2C | 8332 | ||
Payments | 1211 | ||
Deferrals | 0990 (Germany), 0991 (EU), 0992 (Third party countries) | ||
SKR04 | Domestic (DE) | EU | Non-EU countries |
|---|---|---|---|
B2B | 4449 (19% VAT) 4334 (7% VAT) | 4337 | 4338 |
B2C | 4332 | ||
Payments | 1811 | ||
Deferrals | 3900 (Germany), 3901 (EU), 3902 (Third party countries) | ||
Notice
For B2C-invoices to other EU-countries, Billwerk+Optimize always assumes local tax rates are applied and that you take part in the OSS procedure.
Overwrite Standard Chart of Accounts
For each account that will be used in your DATEV-export, you can overwrite the breforementioned standard accounts by writing your account number into the respective field on the left.
When recording bookings, the following tax codes (booking keys) apply, independent if you use our standard accounts or your own values:
Tax codes (Booking keys)
Tax rate / use case | Tax Key |
|---|---|
VAT 7 % | 2 |
VAT 19 % | 3 |
EU tax rates | 250 |
Blocks DATEV from automatically deducing tax when booking from a deferral amount on a revenue account, except for revenues that are subject to VAT in another EU country | 40 |
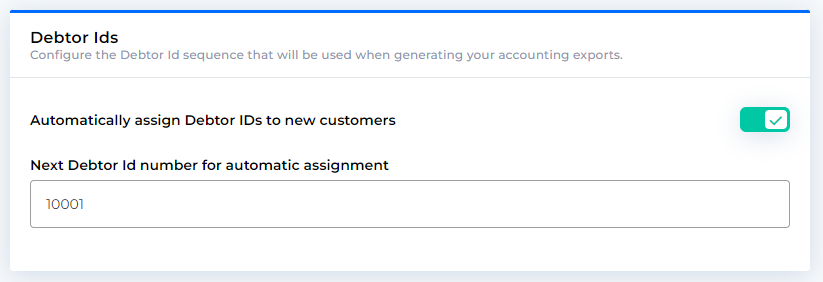
Debtor Id settings
You can choose to automatically assign debtor Ids to new customers in order to identify each customer customer in your accounting. The assigned debtor ID will be used as the customer's debtor account number in your accounting export.
In order to assign debtor Ids automatically, enable “Automatically assign Debtir IDs to new customers” and configure from what number the system should start counting, then save your settings.
Important
Debtor Ids can also be assigned manually / via API when creating a new customer. Please be aware that manually assigned debtor Ids should always be lower than the next debtor Id that should be assigned automatically.
Transfer Accounting Export to Google Drive, OneDrive, SFTP
GoogleDrive
You can send your accounting export files automatically to your own Google Drive by following these easy steps:
Steps for using the Google Drive API:
Set up a Google Cloud project:
Go to the Google Cloud Console.
Create a new project or use an existing one.
Activate the Google Drive API for your project.
Create OAuth 2.0 credentials:
Navigate to "APIs & Services" > "Login data".
Create OAuth 2.0 credentials and download the JSON file with the Client ID and Client Secret values.
Enable Google Drive and configure the client secret and the folder-Id in the Accounting export settings.
OneDrive
Steps for using the Microsoft Graph API:
Set up Azure AD application:
Go to the Azure Portal.
Register a new application under "Azure Active Directory" > "App registrations".
Make a note of the application ID (client ID) and the directory ID (tenant ID).
Create a new client secret under "Certificates & secrets" and make a note of the secret.
Enable OneDrive and configure the client-Id, client secret, tenant-Id, drive-Id and upload path in the Accounting export settings.
SFTP
You can also choose to transfer the accounting exports to your own SFTP.
In the Accounting export settings, simply enable the SFTP-export and fill the following settings: server URL, user, password, port, path.