Plugin for Dynamicweb
This guide shows you how to install and setup the Billwerk+ plugin for Dynamicweb.

DynamicWeb is a suite combining eCommerce, Marketing, product information management and CMS.
Summary:
Installation
To get started you need to install the NuGet package manager. NuGet is a package manager, primarily used for packaging and distributing software written using the .NET framework.
Please use one of the three following ways :
Visual Studio
NuGet.org
Manual
Visual Studio
Visual Studio is an integrated development environment from Microsoft. It is used to develop computer programs including websites, web apps, web services and mobile apps.
In Visual Studio > Open your Dynamicweb solution.
Then go to Tools > NuGet Package Manager.
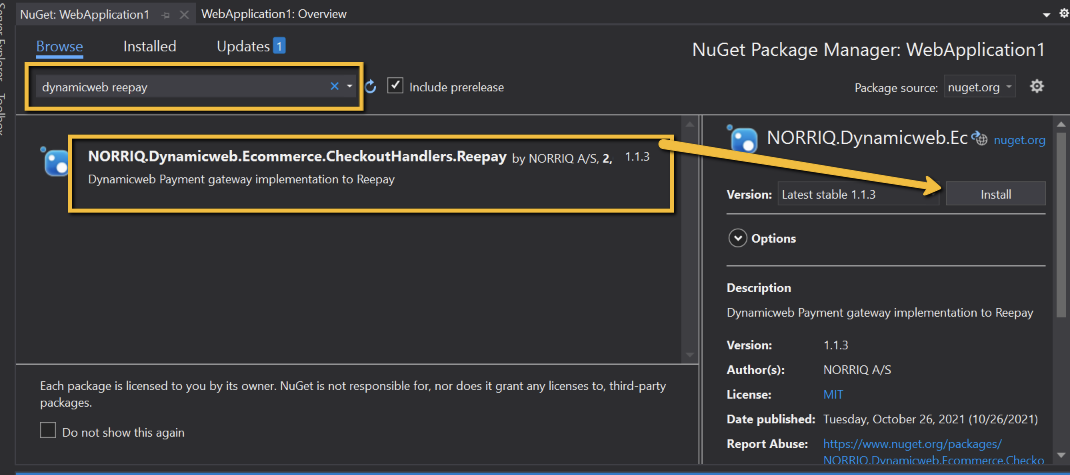
Click on Manage NuGet Packages for solution.
Search Dynamicweb Reepay.
Select NORRIQ.Dynamicweb.Ecommerce.CheckoutHandlers.Reepay
Press Install.

NuGet.org
NuGet.org is a public host of NuGet packages. In its role as a public host, NuGet.org itself maintains the central repository of over 100,000 unique packages at nuget.org.
Navigate to: NuGet Gallery | NORRIQ.Dynamicweb.Ecommerce.CheckoutHandlers.Reepay 1.1.3
Copy the Package manager command.
Open a NuGet command window on your PC.
Navigate to your Dynamicweb solution.
Paste the command taken from step 2.
Manual
Note
OBS be mindful of the required dependency to Dynamicweb. Ecommerce 1.2.10 / Dynamicweb 9.2.
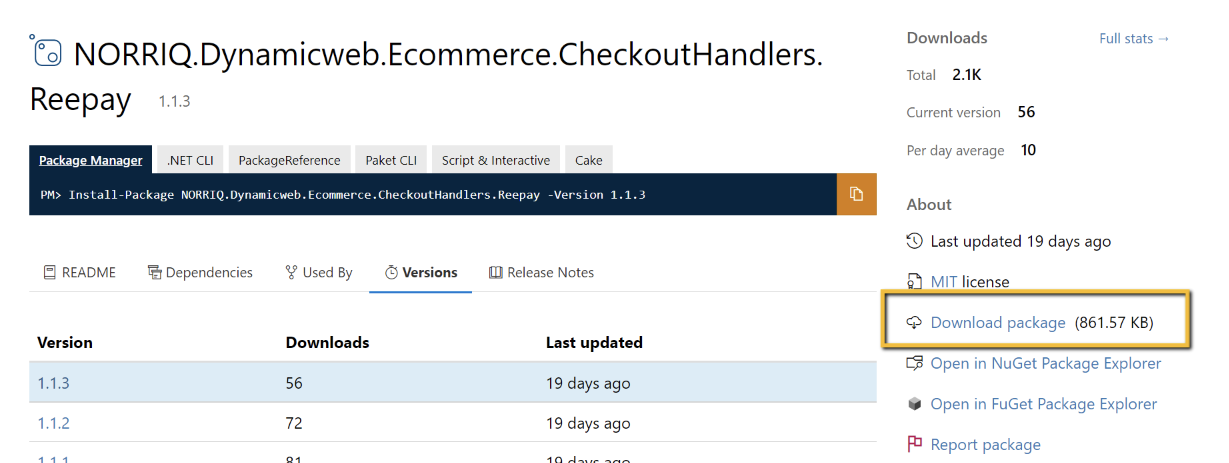
Download the NuGet package from NuGet Gallery | NORRIQ.Dynamicweb.Ecommerce.CheckoutHandlers.Reepay 1.1.3
Press download package.
Extract files via Winrar or 7Zip.
Go to the lib folder > net461 or net472.
Copy the files (NORRIQ.Reepay.Application.dll & NORRIQ.Reepay.dll) to your bin folder for the Dynamicweb solution.
Configuration
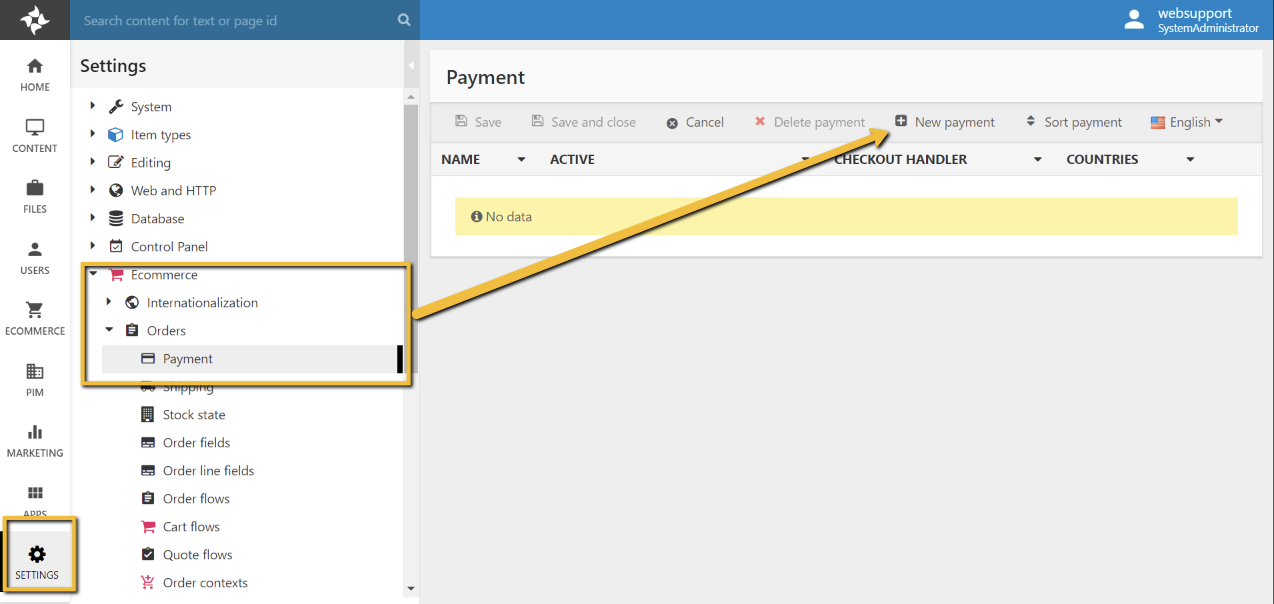
In Dynamicweb (/admin) go to Settings > Ecommerce > Orders > Payments.
Click on New payment to create a Billwerk + Checkout handler.
See the standard Dynamicweb documentation for general setup information for a Dynamicweb payment method - Payment Methods (dynamicweb.com)
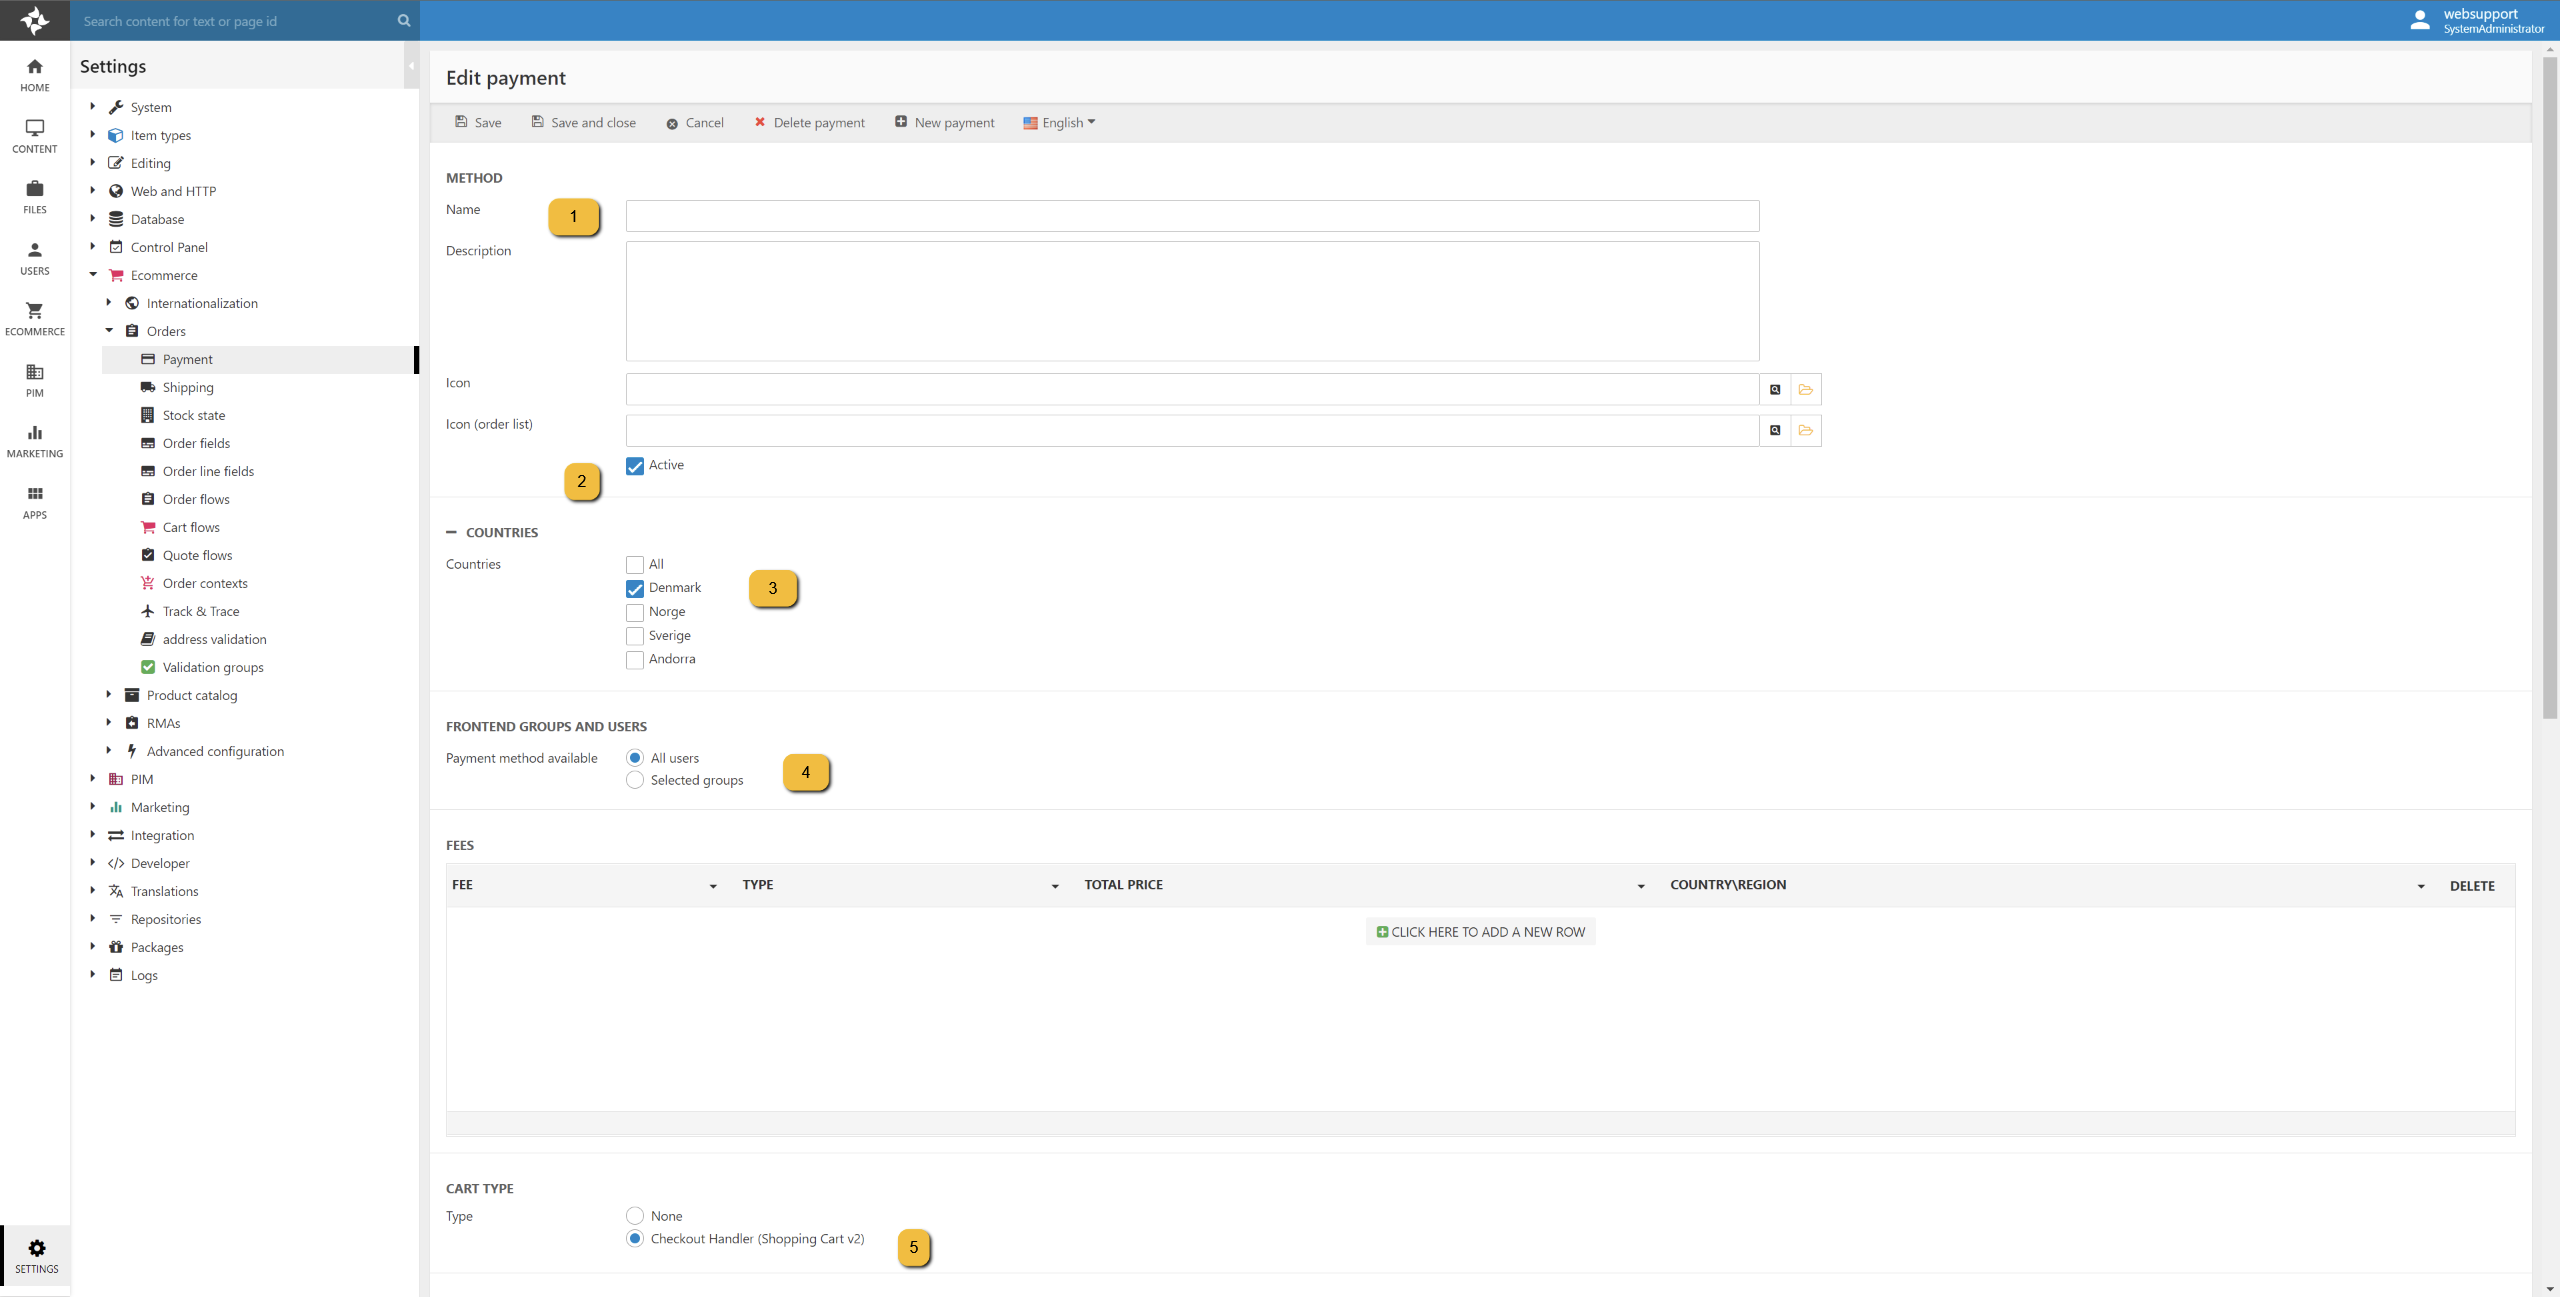
Give the payment checkout handler a name.
Note
Optional – Give the checkout handler a description, Icon, and Icon (order list). There’s no function associated with these.
Make sure that you have marked the gateway to active.
Select what countries should have this gateway available.
Select which users should have this gateway available.
Select Checkout Handler (Shopping Cart v2).
Select Reepay from the dropdown menu “Checkout handler” – “Type”.
Type your Private API key from Billwerk + Admin.
Optional: Type your webhook secret from Billwerk + Admin, if you intend to set up Billwerk + with webhooks, it currently supports the settle and authorized event.
Optional: Check Enable full transaction information - results in an additional call to Reepay if you wish to have the transaction information saved in Dynamicweb on the order.
This is done regardless of this check if you do not have set up a webhook for settled and authorized.
Optional: Check Generate a new customer object in Reepay for each session. If you would like to generate a new user in Billwerk + Admin for all transactions.
Optional: Select a locale if you want to override the default setting in Billwerk + Admin.
Optional: Set your own custom text on the Confirm Buy button in Billwerk + Admin.
Optional: Check it’s a test Billwerk+- Admin gateway.
Select what payment types you want to allow.
To select all, mark the field and press CTRL+A or select multiple by holding down CTRL and left mouse click the specific ones you want.
Optional: Select SCA mode for Billwerk+.
Optional: Check to send individual order lines to Billwerk+ (default is just sending order total).
Check Auto post mode, this will result in a Window checkout.
Optional: If Auto post mode was not checked, select a template for which checkout type you would like to use.
Included in this package:
Window checkout
Overlay checkout
Embedded checkout
Optional: Select a cancel template and/or an error template to be rendered in cases where Billwerk+ redirects to the cancel or error address.
Optional/Warning: Check Auto settle and capture order as soon as it is placed to settle the transaction immediately.