Hosted pages
Please find more information on Hosted Pages and Hosted Product Pages in this section.

Creation of hosted pages
This guide explores the options available for creating and customizing hosted pages.
Enhance the user experience of your customers, branding, payment methods and product management.
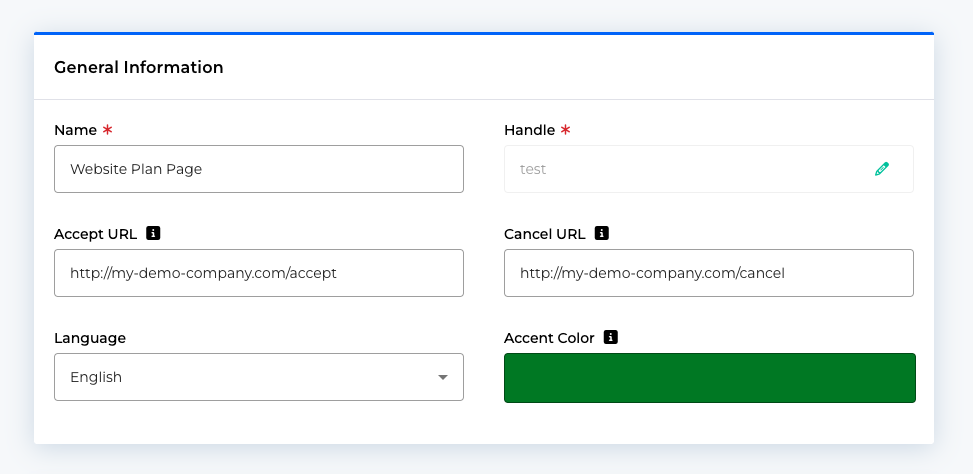
Choose a name for the hosted page,
Redirect customers after purchase,
Customize the accent color,
Specify accepted payment methods,
and manage the products displayed on the page.
By leveraging these features, users can create personalized and seamless hosted pages that align with their brand and optimize the checkout process. Let's dive in!
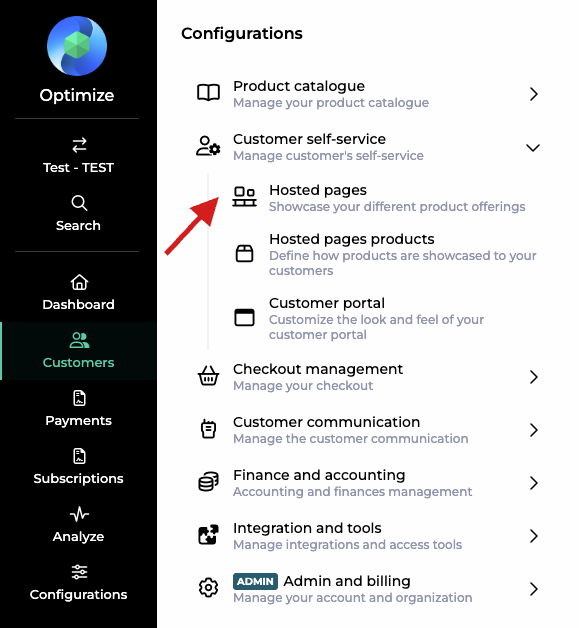
Click on Configurations > Customer Self-Service > Hosted Page
Choose a name for the hosted page:
This name is used to differentiate between all your hosted pages, but it is also part of the URL for the specific hosted page.
Redirect customers after purchase:
You can specify a redirect URL. This URL should point to the desired destination page, such as a confirmation page or a thank-you message.
Note
Ensure that the URL is accurate and functional to provide a seamless post-purchase experience.
Redirect customers if purchase is not completed:
In this case, redirect them to a designated URL.
This page could include helpful information:
a reminder to complete the purchase
or alternative products or services.
Provide a URL that aligns with your intended purpose and engages customers effectively.
Customize the hosted page's accent color to maintain a consistent brand experience:
Select a specific accent color that will be used on the hosted page.
Note
Choose a color that aligns with your brand's look and feel. This customization helps create a cohesive visual appearance, enhancing recognition and reinforcing your brand identity.
The logo you have configured under Account Settings will also be used.
Specify accepted payment methods:
If you prefer customers to only use specific payment methods, you can configure this setting.
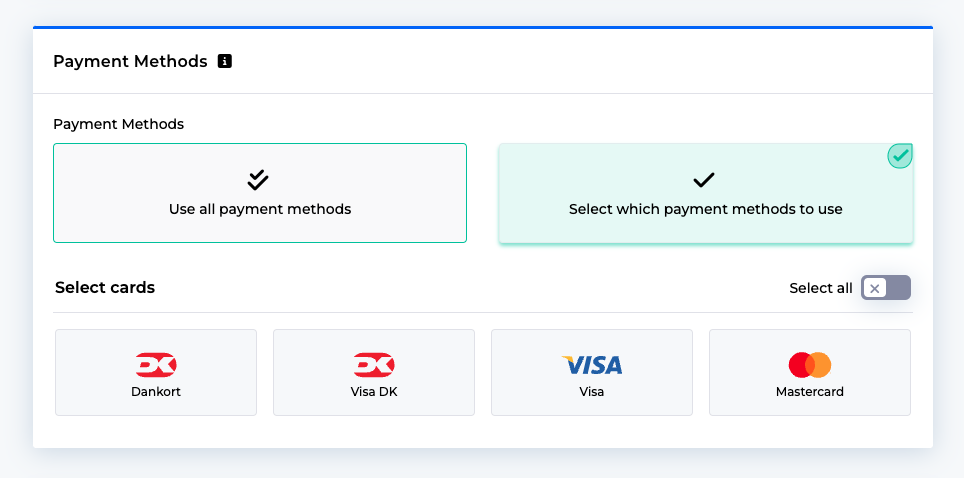
Specify the accepted payment methods on the hosted page, ensuring that they are in line with your business requirements and customer preferences.
This option allows you to streamline the checkout process and offer a seamless payment experience.
Caution
Only the payment methods that you have activated under Configuration > Payment Methods are displayed here.
Manage hosted page products:
The hosted page contains hosted page products.
The products section allows you to add products or services that will be displayed on the hosted page.
Here are a few considerations:
Adding Products: You can add multiple products or services to the hosted page. Ensure the products are relevant, well-presented, and appealing to your customers. See this guide for how you create products.

Single Product Checkout: If you only add one product, customers will skip the catalog page and proceed directly to the checkout page. This approach is ideal for streamlined purchases.
Multiple Products Checkout: If you add multiple products, customers will first be presented with a hosted catalog page. This page showcases the added products and provides customers with a chance to explore before proceeding to the checkout page.
Create hosted page products
This comprehensive guide explains how to create and tailor the hosted page products. The page allows users to configure and customize their hosted page products.
options to set a name
handle for internal identification
icons and descriptions for the product
visual badges and highlighting to make their product stand out on the hosted checkout page
select a plan and customize its settings
including pricing and additional configurations such as discounts and add-ons
personalize the fields customers see during checkout
default settings or customized
Click on Configurations > Customer Self-service > Hosted Pages Products to navigate
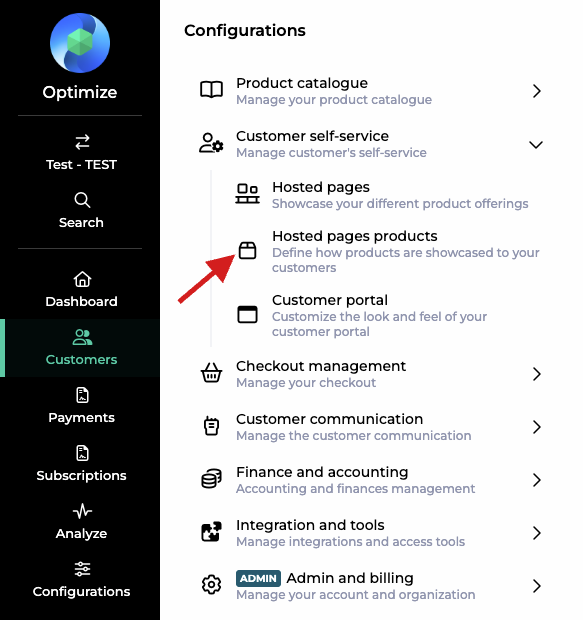
Click on either New on top right hand corner or “Create new Hosted Pages Product” button
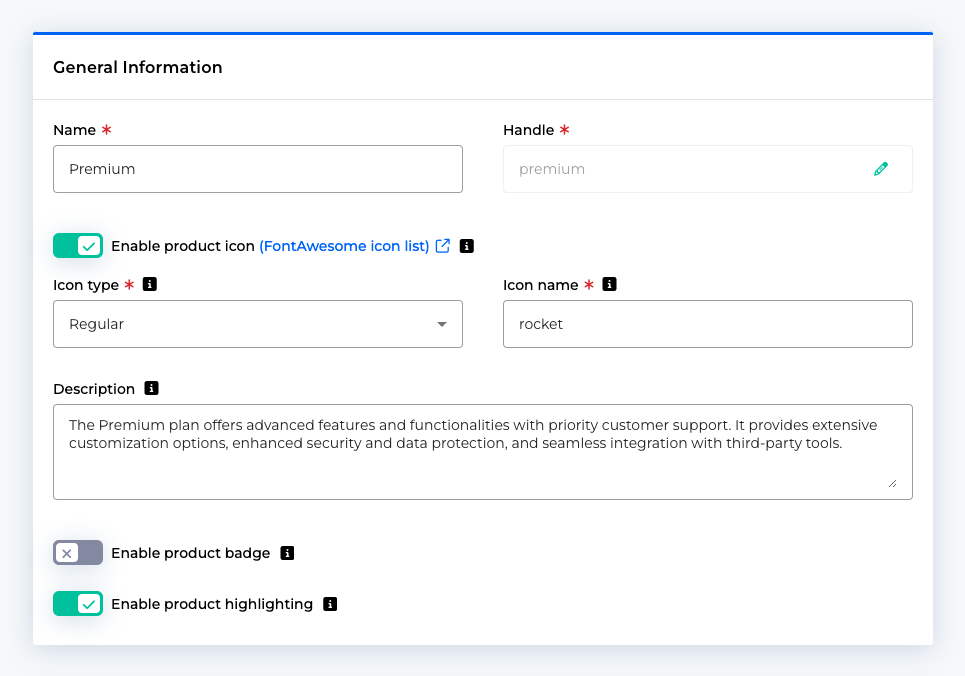
The create product page provides users with various functions and options to configure and customize their hosted page product. In this guide, we will walk you through each element on the page and explain its purpose and available choices.
Name: The "Name" field allows you to set a name for your product. Enter the desired name that best represents your product. E.g. Silver Membership.
Handle: The "Handle" field is used for internal identification purposes and is not visible to customers. Either let us choose a handle for you or enter a unique handle for your product, which can be a combination of letters, numbers, and hyphens.
Enable product icon: This option allows you to include an icon for your product which will be visible on both the hosted catalog page and hosted checkout page.. You can choose from a list of FontAwesome icons. If you enable this option you can select the appearance of the icon and enter the icon you would like to use. You will need to enter the icon name from FontAwesome to your desired icon. E.g. rocket.
Description: The "Description" field provides a space to describe your product. Enter a concise and informative description that highlights the key features or benefits of your product. This description will be visible on both the hosted catalog page and hosted checkout page.
Enable product badge: Enabling the product badge option allows you to display a visual badge or label on your product. This can be useful for indicating special offers, promotions, or other important information. This will only be visible on the hosted checkout page
Enable product highlighting: By enabling this option, you can apply visual highlighting to your product, making it stand out from others. This can help draw attention to your product on the website or platform where it is displayed. This will only be visible on the hosted checkout page.
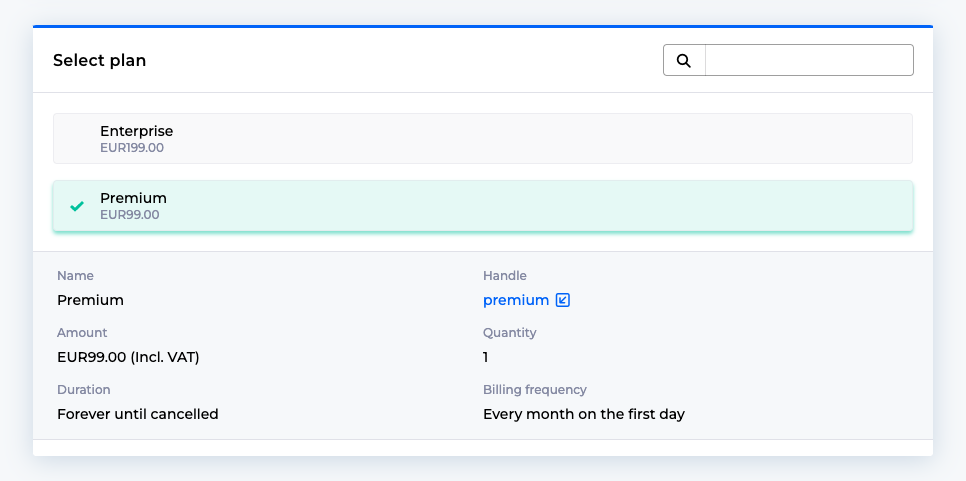
Select a plan: This section lets you pick the plan you would like to base your hosted page product on. Once selected you will be able to see a short summary of the plan.
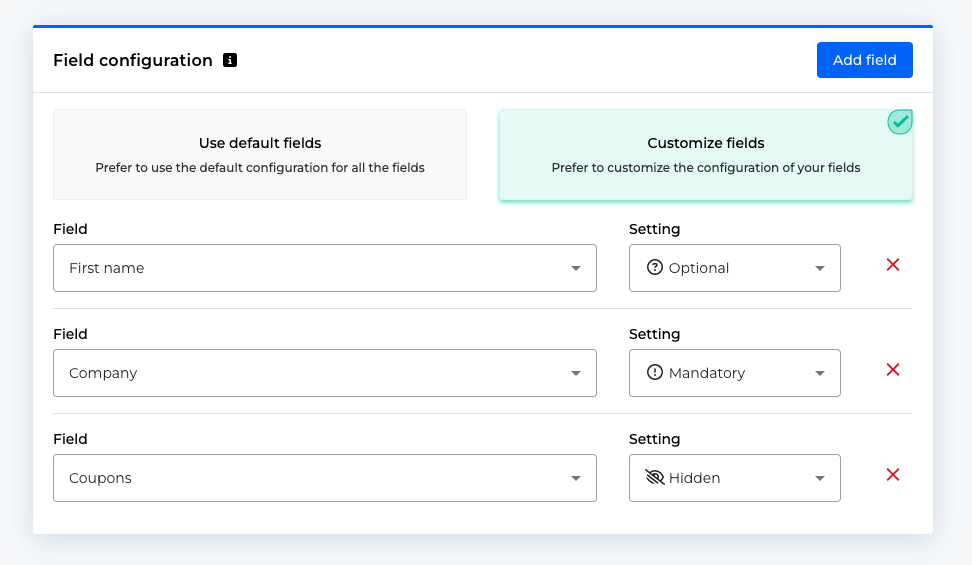
Choose field configuration: This option allows you configure which fields the customer should see for this product when they reach the hosted checkout. The first options is to use the default configuration for all the fields, which are first name, last name, email address, phone number, company name, VAT number, address, postal code, city, country, coupon field. Select this if you prefer to stick with the standard settings provided. Alternatively, if you want to personalize the configuration of your product's fields, enable this option. It allows you to modify and tailor the settings according to your specific requirements, selecting which fields the customer should see and whether they are mandatory or not.
Plan configuration: Choose between using the default plan settings or customizing them to suit your needs. The plan settings include pricing and other parameters related to your product.
Use the default plan settings: Select this option if you want to use the plan's pricing and default settings without any modifications.
Customize the plan settings: Enabling this option gives you the ability to customize the pricing and other settings associated with the selected plan. This allows for more flexibility in configuring your product.
Customize the plan settings: Enabling this option gives you the ability to customize the pricing and other settings associated with the selected plan. This allows for more flexibility in configuring your product.
Additional configuration: This section includes various additional configuration options for your product. You can e.g. add discounts, add-ons and additional costs that will become part of this product. When the customer buys this product, they automatically sign up for e.g. the add-ons you listed.
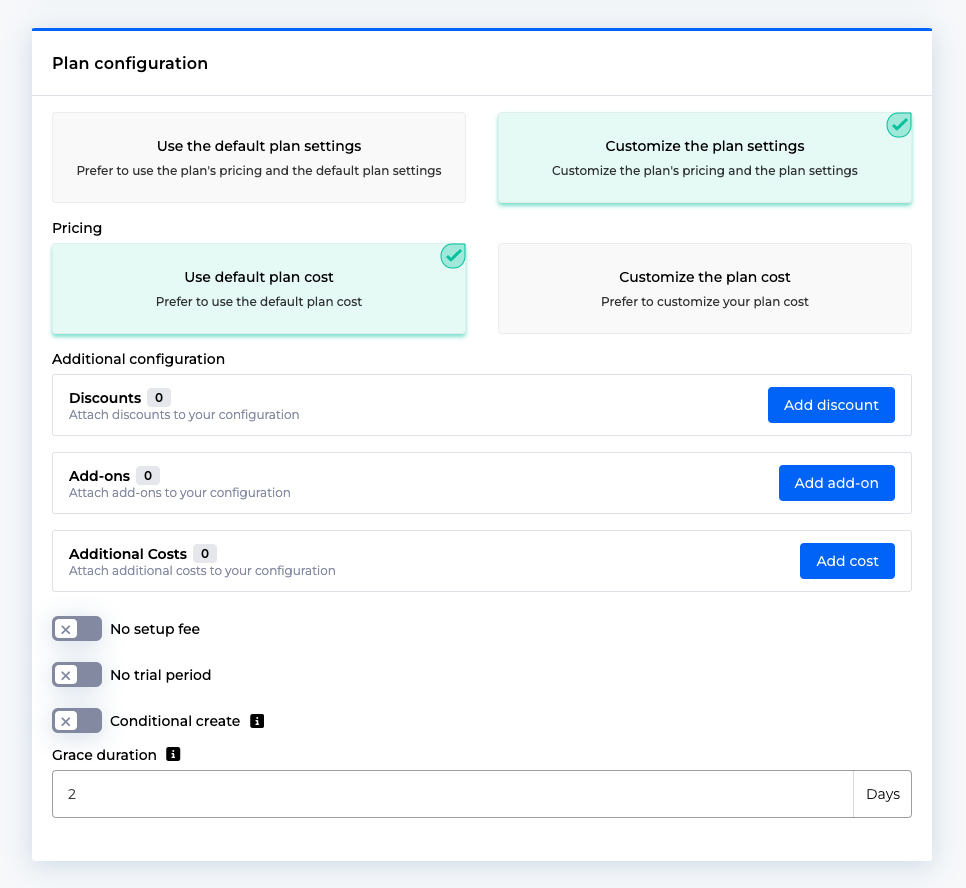
An example could be that this product contains your base subscription plan and some add-ons that reflect the services you offer.