User management
This guide shows you how to add, delete or manage users.
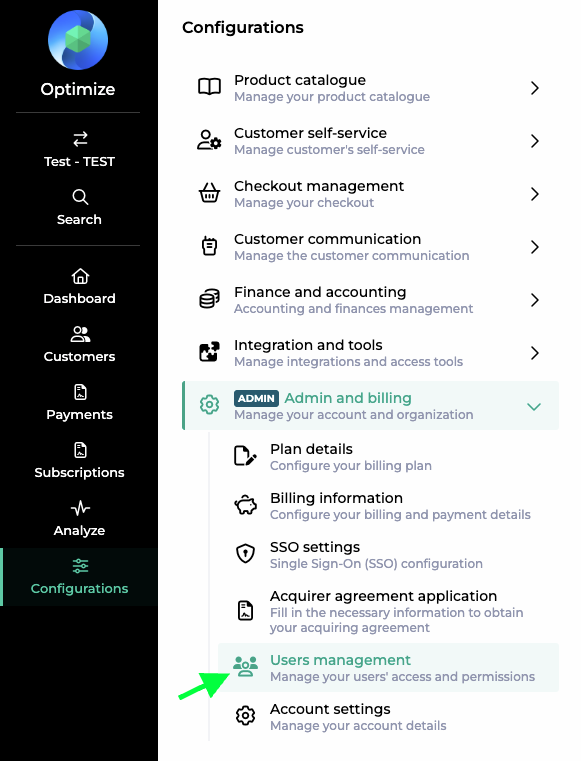
You can access the interface using the left hand navigation:
Click on Configurations > Admin and billing > User management

Create a new user
If you want to invite a user click Invite User in the top right corner.

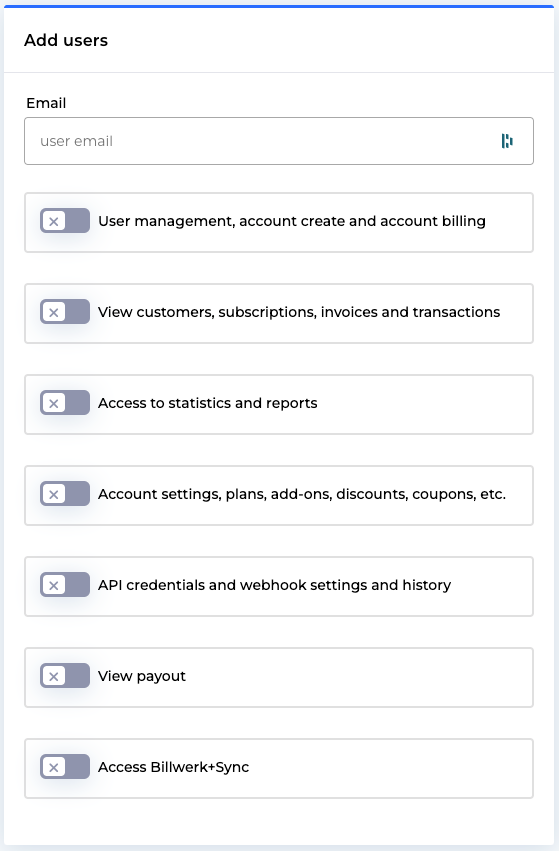
The following Add users page opens.

You can insert the Email address of the new user and set the authorizations.
Edit or delete a user
There are two icons at the end of each user entry:  .
.
The  icon allows you to edit a user.
The  icon allows you to delete the user.
User rights
In our application you can compose the rights per user individually according to your internal organization structure.
Below you can see the full list of rights:
User management, account create and account billing | Includes: |
View customers, subscriptions, invoices and transactions | You can add edit rights on top: |
Access to statics and reports | Allow access to these interfaces: |
Account settings, plans, add-ons,discounts, coupons, etc. | The user has : |
API credentials and webhook settings and history | Allows the user to: |
View payout | The user has access to the Payout interface and can perform payouts to customers. NoteA valid acquirer agreement supporting payouts is needed. |
Access Billwerk+ Sync | Billwerk+ Sync is only available once you are in production. |
Two-factor authentication
Two-factor authentication (2FA) serves as a security measure for identity and access management, necessitating the use of two distinct forms of identification for accessing resources and data.
To implement the two-factor authentication, go to Configurations > Admin and billing > User management

Then, next to the Invite User button in the upper right corner, you can find the possibility to Enforce 2FA.

When Enforce 2FA is activated, users have to identify themselves via their mobile phone, in order to login to Billwerk+. If the two-factor authentication is activated, it apples for the whole account.
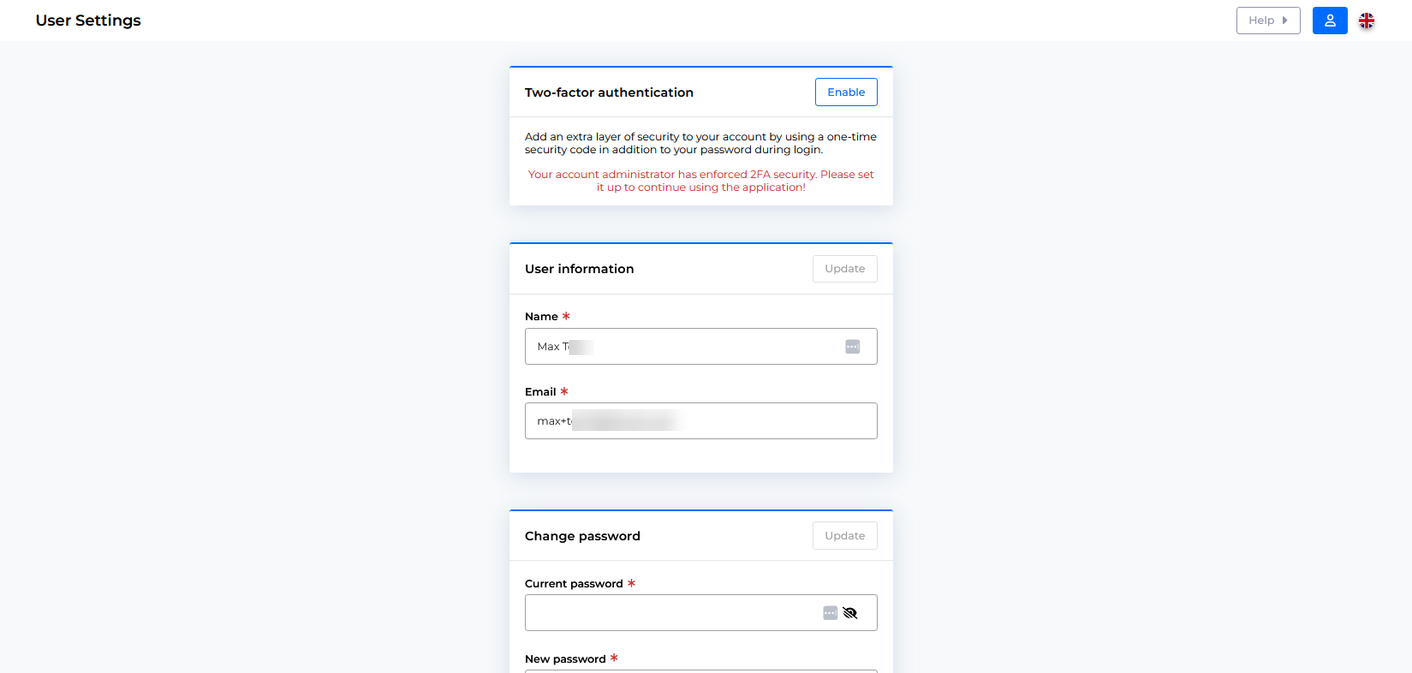
All existing and new users will have to use 2FA starting with their next login, like showed here.

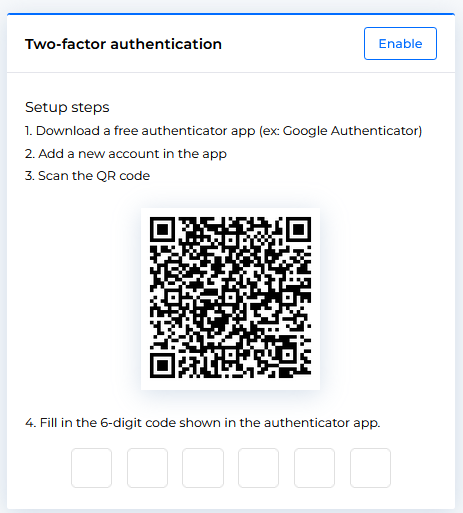
To activate this feature, users need to download and set up an authentication app such as Google Authenticator, Microsoft Authenticator, and others.
Following this they scan a QR code and fill the 6-digit one-time password provided by the authenticator app.

The 2FA will be mandatory for each subsequent login.
In the user settings, you have the ability to review who has currently implemented 2FA :

Password Guidelines
To maintain the security and integrity of customer data, users should adhere to the following password practices:
Password complexity:
Passwords should be at least 12 characters long.
Passwords should contain a combination of upper and lower case letters, numbers, and special characters (e.g., @, #, $, etc.).
Passwords should not contain easily guessable information, such as names, dictionary words, or repeated characters.
Passwords should be changed at least every 90 days.
Users should not share their passwords with anyone.
Users should handle any suspected password compromise by changing their password immediately and reporting to the account admin.